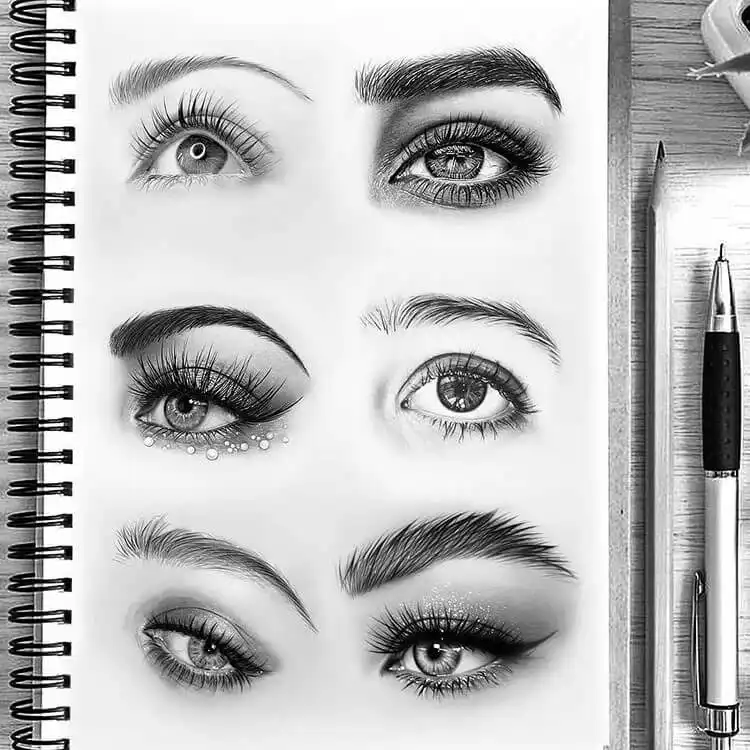
Mastering Art: How to Get Better at Drawing for Beginners – 30 Day Drawing Challenge
Are you eager to discover How to Get Better at Drawing for Beginners and perhaps even participate in a structured 30-Day Drawing Challenge? Many believe artistic talent is an innate gift, but the truth is, drawing is a skill like any other, honed through consistent practice and patience. While some may have a head start, anyone can dramatically improve their drawing abilities with the right approach and dedication. This comprehensive guide will equip you with the fundamental principles, practical techniques, and motivational insights to transform your artistic journey.
In this article, we’ll delve into eleven essential tips designed to accelerate your progress as a beginner artist, from understanding basic forms to experimenting with different mediums. We’ll also introduce a fun and engaging 30-Day Drawing Challenge, providing daily prompts to keep your creative momentum flowing. Prepare to unlock your artistic potential and embark on a rewarding path to becoming a more confident and skilled artist.
Essential Drawing Materials, Tools & Supplies for Beginners
Before you begin your artistic journey, gathering the right supplies can make a significant difference in your learning experience. You don’t need a massive collection of expensive items; a few key essentials will suffice for a beginner. The goal is to have tools that allow you to explore different techniques without being overwhelming.
- Graphite Pencils: Start with a basic set ranging from H (harder, lighter lines) to B (softer, darker lines). A common beginner set might include HB, 2B, 4B, and 6B. These allow for a versatile range of tones and line qualities.
- Sketchbook/Paper: Invest in a good quality, acid-free sketchbook or drawing pad. Look for paper with a medium tooth (texture) that can withstand erasing and layers of graphite. Consider different sizes – a small one for quick sketches on the go and a larger one for more detailed studies.
- Erasers: A kneaded eraser is invaluable for lifting graphite without damaging the paper and for subtle highlights. A vinyl or plastic eraser (like a Staedtler Mars Plastic) is excellent for clean, precise erasing.
- Pencil Sharpener: A simple handheld sharpener or a small desk sharpener will keep your pencil tips precise. Ensure it creates a sharp point for detail work.
- Blending Stumps/Tortillons: These paper tools are perfect for smoothly blending graphite and creating soft transitions in shading. You can also use cotton swabs or even your finger, but stumps offer more control.
- Reference Materials: While not a physical tool, access to good reference photos, still life objects, or even a mirror for self-portraits is crucial.
- Optional Additions: As you progress, you might explore charcoal sticks for rich darks, colored pencils for a touch of color, or fine-liner pens for ink work. Don’t feel pressured to buy everything at once; build your collection gradually based on your interests.
1. Start with the Basics
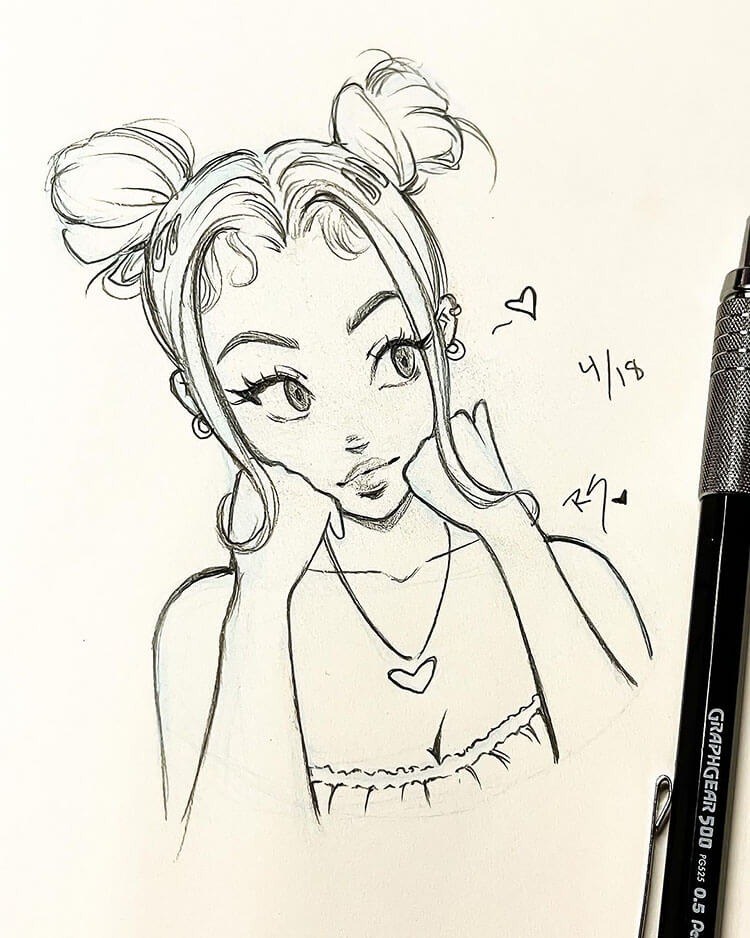
To truly get better at drawing, you must build a strong foundation, and that begins with mastering the basics. Think of shapes, lines, and proportions as the alphabet of drawing; once you understand them, you can construct any visual “sentence” or “story.” Begin by practicing fundamental geometric shapes like circles, squares, triangles, and cylinders. These forms are the underlying structure of virtually everything you’ll draw. Learning to draw them accurately in perspective, even simple ones like a cube, will give you an intuitive understanding of three-dimensional space on a two-dimensional surface. Focus on drawing straight lines, curved lines, and varying line weight – how much pressure you apply to create thicker or thinner lines – to add expression and depth. Many online resources and even drawing tutorials designed for children can provide accessible exercises to help you grasp these core concepts. The patience you invest in these foundational skills will pay dividends as you tackle more complex subjects later on.
2. Use Reference Materials
Incorporating reference materials is an indispensable step in improving your drawing accuracy and observation skills. Rather than relying solely on imagination, which can often lead to generic or anatomically incorrect results, using references provides concrete visual information. Whether it’s a photograph, a physical object arranged in a still life, or even observing people and animals in real life, references help you understand how light interacts with form, how textures appear, and the subtle nuances of proportion. They train your eye to see what’s actually there, not just what your brain expects to see. Don’t view using references as “cheating”; it’s a professional practice even among seasoned artists. The key is to interpret and learn from your references, not just copy them blindly. Pay attention to angles, negative space, and the overall composition. Over time, your visual library will expand, allowing you to draw more confidently from memory.

3. Experiment with Different Mediums
One of the most exciting aspects of art is the vast array of mediums available, each offering a unique expressive quality. As a beginner, don’t limit yourself to just one; instead, embrace the opportunity to experiment. Graphite pencils are a fantastic starting point for their versatility in shading and line work. However, venturing into charcoal can teach you about deep, rich blacks and expressive smudging. Ink, with its permanence and crisp lines, forces you to be more decisive. Pastels offer vibrant color and a painterly quality, while digital art opens up a world of layers, brushes, and undo functions. Trying different mediums helps you discover what you enjoy most, what feels natural in your hand, and what best communicates your artistic vision. It also broadens your understanding of texture, value, and color, which are transferable skills across all art forms. For instance, exploring the fluid nature of watercolor can greatly enhance your understanding of color blending and washes, an excellent skill to develop. For inspiration, consider 20 Easy Watercolor Flower Paintings to Inspire You – Lavender Flower, which can introduce you to a different facet of visual art.
4. Practice, Practice, Practice
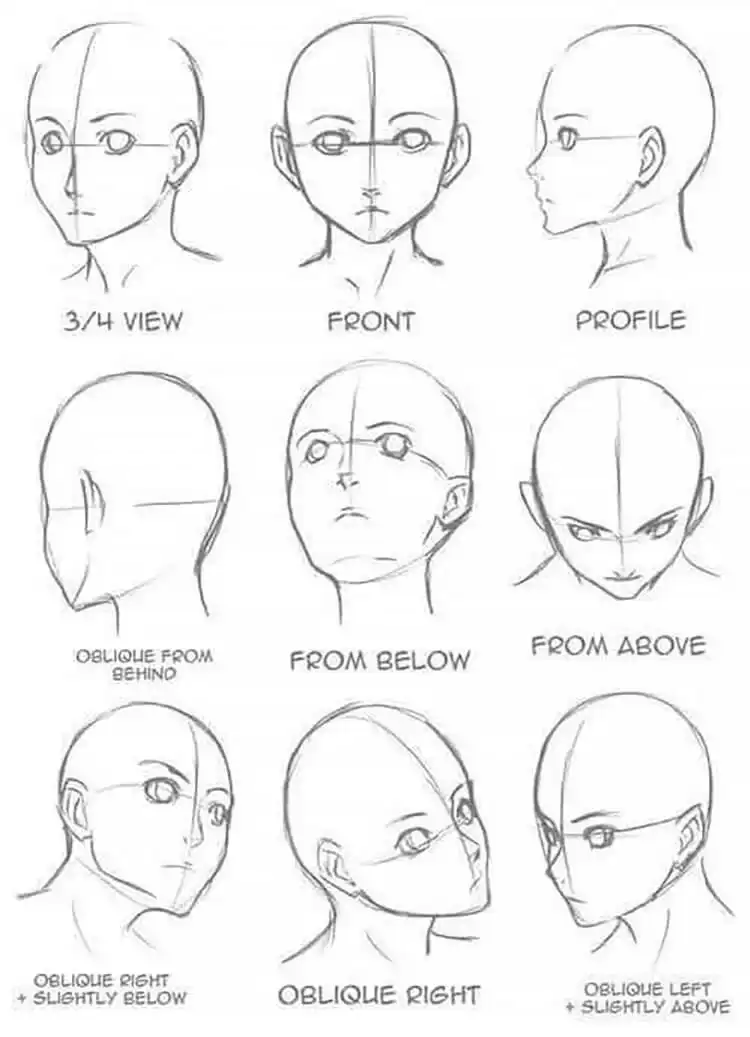
This tip might seem obvious, but its importance cannot be overstated: consistent practice is the single most effective way to improve your drawing skills. It’s not about being “born with talent”; it’s about building muscle memory, refining your eye-hand coordination, and developing a deeper understanding of visual principles through repetition. Even if it’s just 15-30 minutes each day, making drawing a regular habit will yield far better results than infrequent, marathon sessions. Think of it like learning a musical instrument or a sport; small, consistent efforts compound over time. Use your practice sessions to focus on specific weaknesses, whether it’s drawing hands, understanding perspective, or achieving smooth shading. Don’t aim for perfection in every sketch; instead, focus on learning and enjoying the process. Every line you draw, every shape you render, contributes to your growth as an artist. Embrace the journey, and watch your skills steadily blossom.
5. Join a Class or Workshop
While self-study is commendable, there’s immense value in structured learning environments like art classes or workshops. A good instructor can provide personalized feedback, demystify complex concepts, and guide you through exercises that are specifically designed to build your skills progressively. The camaraderie of a class also offers motivation and a sense of community. Look for beginner-friendly courses at local art centers, community colleges, or even private studios. If in-person classes aren’t feasible, the internet is a treasure trove of free resources. Platforms like YouTube host countless high-quality tutorials ranging from basic sketching to advanced techniques. Many professional artists also offer online courses, some free, some paid, covering a wide spectrum of topics. These guided lessons can help you overcome hurdles, learn proper techniques from the start, and gain insights that might take years to discover on your own. Engaging with an instructor can clarify common misconceptions and push you beyond your comfort zone effectively.
6. Take Reference Photos
Beyond simply using existing reference materials, actively taking your own reference photos is a powerful technique for developing your artistic eye and building a personal visual library. This practice encourages you to observe the world around you more closely, considering composition, lighting, and subject matter from an artist’s perspective. When you take photos specifically with the intent to draw them later, you’re looking for interesting forms, appealing light and shadow patterns, and unique details. Your environment is full of potential subjects, from the intricate patterns of a flower to the sprawling branches of a tree, the subtle expressions on a family member’s face, or the dynamic architecture of buildings. This personal connection to your references can also infuse your drawings with greater authenticity and emotional depth. Experiment with different angles, times of day for varied lighting, and close-ups versus wide shots. Over time, you’ll accumulate a rich collection of personalized inspiration that is uniquely yours to draw from.
7. Don’t Compare Yourself to Others
In the age of social media, it’s incredibly easy to fall into the trap of comparing your artistic journey to that of others, especially more experienced artists. This habit can be detrimental to your progress and enjoyment. Remember that every artist, no matter how accomplished, started somewhere. Their seemingly effortless masterpieces are the result of years of dedicated practice, countless failed attempts, and personal struggles. Focus on your own growth and celebrate your small victories. Your art is a reflection of your unique perspective and voice. Instead of seeing others’ work as a benchmark against which you fall short, view it as inspiration and a reminder of what’s possible with perseverance. Cultivate a mindset of self-compassion and understand that progress is rarely linear. Your journey is yours alone, and the only person you should compare yourself to is the artist you were yesterday.
8. Try Different Styles
Just as there are countless ways to tell a story, there are myriad artistic styles to explore. Limiting yourself to one approach too early can stifle creativity and prevent you from discovering your true artistic voice. Experimenting with different styles – from realistic and impressionistic to cartoon, abstract, or stylized – can be incredibly liberating. Each style presents unique challenges and offers distinct ways of interpreting the world. For instance, trying a highly detailed realism piece might push your observation skills, while a quick, expressive caricature can enhance your understanding of gesture and exaggeration. Don’t feel you need to master every style; the goal is to learn from them, borrow elements that resonate with you, and see how they influence your own evolving aesthetic. This exploration can also help you identify what kind of art you truly enjoy creating and viewing. If you’re particularly interested in character design, looking at different approaches can be very beneficial. For example, exploring character styles like Nezuko Drawing from the Demon Slayer Anime can broaden your understanding of stylized forms and expressions.
9. Try Still Life Drawings
Still life drawing is a classical art exercise for a reason: it’s an incredibly effective way to develop fundamental drawing skills. By arranging inanimate objects, you gain complete control over your subject, allowing you to study form, light, shadow, texture, and composition without the pressure of a moving subject or a fleeting moment. Start with simple objects – a single piece of fruit, a mug, or a basic geometric shape. Gradually increase the complexity by adding more items, varying their sizes and textures, and experimenting with different lighting setups (e.g., a single light source to create dramatic shadows). Still life drawing forces you to pay close attention to subtle details, understand how forms turn in space, and accurately render values (the lightness or darkness of tones). It’s an excellent way to practice perspective and spatial relationships. The deliberate nature of still life allows for careful observation and methodical execution, building a strong foundation for any other drawing subject.
10. Get Feedback
Sharing your work and receiving constructive feedback is a crucial, though sometimes intimidating, step in artistic growth. It provides an external perspective that can highlight areas for improvement you might not notice yourself. Seek feedback from trusted sources: art teachers, experienced artists, or even fellow beginners who are also learning. The online art community, through platforms like Reddit’s r/ArtCrit or Discord art servers, can also be a supportive place to share your work and ask for critiques. When soliciting feedback, be specific about what you’d like guidance on (e.g., “How can I improve the perspective here?” or “Does the shading make sense?”). Listen with an open mind, separating the critique from your personal worth. Not all feedback will be useful, but even a single insightful comment can unlock a new level of understanding and guide your future practice. Learning to both give and receive feedback is a valuable skill that fosters continuous improvement.
11. Have Fun Drawing
Ultimately, drawing should be an enjoyable and fulfilling activity. If you find yourself constantly stressed, frustrated, or pressured, you risk burning out and losing the passion that drew you to art in the first place. Remember that it’s a journey, not a race. Allow yourself to make mistakes; they are an integral part of the learning process. Don’t strive for perfection in every piece, especially as a beginner. Sometimes, the most valuable drawings are the messy, experimental ones where you learned something new. Draw subjects that genuinely excite you, whether it’s fantastical creatures, beloved pets, captivating landscapes, or abstract patterns. Take breaks when you feel overwhelmed, step away from your work, and return with fresh eyes. Nurturing your enjoyment and creativity will keep you motivated through challenges and ensure that drawing remains a source of joy and self-expression. Relax, explore, and let your artistic spirit soar!
Take My 30-Day Drawing Challenge
As emphasized throughout this guide, consistency is key to improving your drawing skills. That’s why I’m thrilled to introduce this 30-Day Drawing Challenge! These challenges are fantastic for building a regular practice habit, pushing you to explore new subjects, and overcoming creative blocks. Each day presents a new prompt, encouraging you to think creatively and apply the tips we’ve discussed. Remember, the goal isn’t to create a masterpiece every day, but simply to draw something. Even a quick 10-15 minute sketch counts! It’s about developing the discipline and the joy of putting pencil to paper daily. Don’t worry about perfection; focus on the process, on learning, and most importantly, on having fun. Let’s embark on this exciting artistic adventure together!
Day 1: Draw an Animal
Kick off your challenge by sketching an animal. You can choose your pet, a creature from a nature documentary, or even a fantastical beast. Focus on capturing its basic form and proportions first. Pay attention to how its limbs connect to its body and the general shape of its head. Try to convey some of its texture – fur, feathers, or scales – with simple lines or light shading. Don’t get caught up in intricate details; aim for a recognizable silhouette and a sense of movement or pose.
Day 2: Draw a Flower
Flowers offer an excellent opportunity to practice organic shapes and intricate details. Pick a flower you like – perhaps a rose, a sunflower, or a simple daisy. Observe its petals, how they overlap, and the arrangement of its leaves and stem. Try to capture the delicacy of the petals and the way light falls upon them. Experiment with varying line weights to give some parts more emphasis than others.
Day 3: Draw a Beach Scene
Transport yourself to the coast! A beach scene allows you to practice landscapes, water, and perhaps even some distant figures. Focus on the horizon line, the texture of sand, and the movement of waves. Consider adding elements like a lone seashell, a distant boat, or even a simple palm tree. Think about perspective and how objects appear smaller as they recede into the distance.
Day 4: Draw Your Favorite Food
What’s your go-to comfort food? Draw it! Whether it’s a slice of pizza, a towering burger, a bowl of ramen, or a beautifully arranged fruit plate, food is a fantastic subject for practicing textures, reflections, and composition. Think about how to make it look appetizing – the sheen on a berry, the steam from a hot dish, or the crumbly texture of a cookie.
Day 5: Draw a Tree
Trees are complex and beautiful subjects. Choose a specific type of tree, like an oak, a willow, or a pine. Observe its trunk, the branching patterns, and the shape of its canopy. Is it gnarled and old, or young and slender? Try to convey its character and the specific textures of its bark and leaves without drawing every single leaf.
Day 6: Draw Your Favorite Book Cover
Combine your love for reading with your drawing practice. Recreate the cover of your favorite book. This challenge is excellent for practicing typography, composition, and interpreting existing artwork. Pay attention to the layout of text and images, and how colors (even if you’re drawing in monochrome) create mood. Simplify complex elements if needed.
Day 7: Draw a Cartoon Character
Embrace your playful side and draw a beloved cartoon character. This is great for practicing stylized forms, exaggerated expressions, and dynamic poses. Focus on the character’s defining features and how they convey emotion. You can try to replicate an existing pose or invent a new one.
Day 8: Draw Whatever You Want
This is your free day! Let your imagination run wild. Draw anything that comes to mind, something you’ve been wanting to sketch, or a concept you’ve been playing with. This day encourages creative freedom and helps you identify subjects that truly inspire you. Don’t overthink it; just draw what feels right.
Day 9: Draw a Portrait of Yourself
A self-portrait is a classic exercise in observation and facial anatomy. Use a mirror to study your features. Pay attention to the relationships between your eyes, nose, mouth, and the overall shape of your face. Don’t strive for perfect likeness on your first try; focus on understanding proportions and light and shadow on your unique features. It’s an exercise in seeing yourself as an artist sees a subject.
Day 10: Draw Something Beginning with the Letter ‘S’
A fun prompt to get your creative gears turning. Think of objects, animals, or concepts that start with ‘S’. A shoe, a snake, the sun, a spaceship, a spoon, a skyscraper – the possibilities are endless. This helps you practice drawing various forms and materials from your surroundings or imagination.
Day 11: Draw Something with Wings
From delicate butterfly wings to powerful eagle wings or even mechanical wings, this prompt challenges you to draw dynamic forms. Focus on the structure of the wings, how they attach to the body, and their implied movement. Consider the different textures – feathers, membranes, or metal – and how they would look in flight or at rest.
Day 12: Draw Your Favorite Hobby
Illustrate something related to a hobby you love. If you enjoy gardening, draw a gardening tool or a plant. If you like playing music, draw an instrument. This personal connection to the subject will make the drawing more enjoyable and potentially more expressive. Think about the actions or objects associated with your passion.
Day 13: Draw Something You See Outside Your Window
Take a moment to observe your immediate surroundings. Draw a tree, a building, a car, or a small section of the landscape visible from your window. This exercise encourages direct observation and helps you capture the reality of your environment. Pay attention to perspective and depth as objects recede.
Day 14: Draw a Landscape
Expand on previous outdoor drawings with a full landscape. This could be a mountain range, a rolling field, a forest, or a city skyline. Focus on creating a sense of depth through atmospheric perspective (objects further away are lighter and less detailed) and linear perspective. Consider a strong focal point and a balanced composition.
Day 15: Draw Something You Ate Today
Similar to Day 4, but this time, sketch something from a meal you’ve already had. It could be a simple snack, your breakfast, or dinner. This is a quick observational drawing challenge that can be done at any time of day, reinforcing the habit of daily sketching. Focus on the immediate shapes and colors (even in monochrome).
Day 16: Draw Something Beginning with the Letter ‘E’
Another letter-based prompt to spark creativity. An elephant, an eagle, an egg, an engine, an earring, an eye – let your mind wander. This diversity of subjects will push you to tackle different forms and textures, enhancing your versatility as an artist.
Day 17: Draw Something You’re Afraid Of
Confront your fears artistically! This can be a monster, a spider, heights, or even an abstract representation of anxiety. This prompt encourages expressive drawing and allows you to tap into your emotions, translating abstract feelings into visual forms. It can be a surprisingly cathartic experience.
Day 18: Draw Something You Wore Today
Look down at your clothes or pick an item from your wardrobe. A shoe, a hat, a sweater, or even just a wrinkled shirt can be a great subject. Focus on the folds, creases, and the way the fabric drapes. These are excellent exercises for understanding volume and form beneath a surface, and how light interacts with textiles.
Day 19: Draw a Mushroom
Mushrooms offer unique, organic forms, interesting textures, and often charming details. Draw a single mushroom or a cluster. Pay attention to the cap, stem, and gills. Think about its environment – is it growing on a log, in grass, or on the forest floor? This helps you consider the context of your subject.
Day 20: Draw a Place You Would Like to Visit
Dream big! Imagine a place you’ve always wanted to visit – a historical landmark, a natural wonder, a futuristic city, or a quiet village. Use reference photos if needed, or draw from pure imagination. This helps you practice drawing architecture, landscapes, or cultural elements while fueling your wanderlust.
Day 21: Draw Something That Makes You Happy
This prompt is designed to connect your art with positive emotions. It could be a person, a pet, an object, a symbol, or an abstract representation of joy. Let the feeling guide your hand and infuse your drawing with positive energy. This is a great way to ensure your art practice remains a source of pleasure.
Day 22: Draw a Character from a Book or Movie
Bring a beloved character from your favorite story to life on paper. This could be a hero, a villain, or a quirky sidekick. Focus on their key features, costume, and expression that make them instantly recognizable. This is a fun way to practice character design and fan art.
Day 23: Draw Something That Represents Your Personality
This is a more abstract and personal challenge. Think about symbols, objects, colors, or concepts that you feel represent who you are. This could be an animal, a particular landscape element, an abstract pattern, or even a combination of elements. It’s an opportunity for self-reflection through art.
Day 24: Draw a Dessert
Indulge your sweet tooth with this drawing prompt. A slice of cake, an ice cream cone, a donut, or a plate of cookies – desserts are great for practicing soft textures, delicate details, and appealing presentations. Think about how to make it look delicious and inviting on paper.
Day 25: Draw Something Blue
Focus on a specific color, even if you’re drawing in monochrome. Choose an object that is predominantly blue in real life. This forces you to think about how that color translates into values (shades of grey) and how it informs the form and texture of the object. A bluebird, a blueberry, or a blue vase could be good choices.
Day 26: Drawing Anything for 20 Minutes Only
This day is all about quantity and quick sketching. Set a timer for 20 minutes and just draw. Don’t worry about finishing a piece; focus on capturing the essence of your subject quickly. This exercise improves your speed, decisiveness, and ability to prioritize information in a short timeframe.
Day 27: Draw a Drink
Whether it’s a steaming cup of coffee, a frosty glass of water, a colorful cocktail, or a bottled soda, drinks offer interesting challenges with reflections, transparency, and liquid forms. Pay attention to the glass or cup, the liquid level, and any condensation or bubbles.
Day 28: Draw a Plant
Similar to flowers and trees, drawing a plant (like a houseplant, a bush, or a leafy branch) helps you with organic forms and intricate patterns. Focus on the growth habit, the vein patterns on leaves, and how the light interacts with its foliage. This encourages detailed observation of nature.
Day 29: Draw Yourself or Someone Else as a Caricature
Have fun exaggerating! A caricature involves highlighting and distorting prominent features for humorous or expressive effect. This is a fantastic exercise for understanding facial anatomy and learning how to capture a likeness while injecting personality. Don’t be afraid to be silly.
Day 30: Redraw One of Your Drawings from Earlier in the Month, Making It Better
For your final challenge, revisit an earlier drawing from this month. Look at it critically and identify areas where you’ve improved or where you can apply new knowledge. Redraw it, focusing on refining lines, improving proportions, adding more confident shading, or enhancing the composition. This side-by-side comparison will vividly demonstrate your progress!
Expert Pro Tips for Flawless Results in Your Drawing Journey
To truly elevate your drawing skills and achieve more satisfying results, incorporate these expert pro tips into your daily practice. They go beyond the basics and help refine your approach to art creation.
- Master the Art of Observation, Not Just Looking: There’s a profound difference between passively looking at something and actively observing it. Train your eye to break down subjects into fundamental shapes, identify negative space, and analyze how light falls on forms. Ask yourself: “Where is the light source?” “What shapes do the shadows create?” “How do proportions relate to each other?” This analytical approach to seeing will drastically improve the accuracy and depth of your drawings.
- Break Down Complex Forms into Simple Shapes: Don’t try to draw a detailed human figure or a complex machine all at once. Instead, learn to see the underlying geometric forms. A head might be an oval or a sphere, an arm a cylinder, a torso a box. By constructing your subjects from these basic building blocks, you establish correct proportions and three-dimensional volume before adding intricate details. This method provides a solid framework that prevents common drawing errors.
- Don’t Fear the Eraser – It’s a Drawing Tool: Many beginners see the eraser as a symbol of failure. In reality, it’s a vital drawing tool. Use kneaded erasers to lighten areas, create highlights, or even “draw” with negative space. A sharp-edged eraser can refine lines or clean up edges. Embracing the eraser allows for greater experimentation, reduces pressure, and encourages you to make bold marks, knowing you can always adjust.
- Keep a Sketchbook Handy for Constant Practice: Make drawing an integrated part of your daily life by carrying a small sketchbook wherever you go. Use pockets of free time – on a commute, waiting in line, or during a coffee break – to do quick gesture drawings, capture interesting objects, or jot down visual ideas. These spontaneous sketches, even if incomplete, build your observation skills and hand-eye coordination over time.
- Study Light and Shadow (Value): Understanding value is paramount to creating drawings with depth, form, and realism. Practice drawing value scales, from pure white to pure black, and then apply this understanding to your subjects. Observe how light creates highlights, mid-tones, core shadows, reflected light, and cast shadows. The interplay of light and shadow is what defines three-dimensional form on a two-dimensional surface, giving your drawings a lifelike quality.
Frequently Asked Questions About Getting Better at Drawing
Frequently Asked Questions
How long does it take to get good at drawing as a beginner?
The time it takes varies for everyone, but consistent practice is key. With 15-30 minutes of daily practice over a few months, you’ll see noticeable improvement. Focusing on fundamentals and embracing a growth mindset accelerates the process significantly.
What are the most essential supplies a beginner needs for drawing?
For beginners, essential supplies include a set of graphite pencils (HB, 2B, 4B, 6B), a good quality sketchbook or drawing paper, a kneaded eraser, and a pencil sharpener. These items provide a versatile foundation without overwhelming you.
Is the 30-Day Drawing Challenge suitable for complete beginners?
Absolutely! The 30-Day Drawing Challenge is designed to encourage consistent practice and exploration. The prompts are varied, and the focus is on daily effort and learning, not perfection. It’s an excellent way to build a drawing habit from scratch.
How important is using reference materials when learning to draw?
Using reference materials is extremely important. It trains your eye to observe accurately, understand proportion, light, and shadow, and learn how forms appear in reality. It’s a professional practice that helps artists of all levels achieve greater realism and accuracy in their work.
How can I stay motivated during a long drawing challenge?
To stay motivated, focus on progress over perfection, celebrate small achievements, and remind yourself that drawing should be fun. Don’t compare your work to others, and allow yourself to draw subjects you genuinely enjoy. Taking short breaks and returning with fresh eyes can also help maintain enthusiasm.
Ready to Unleash Your Inner Artist? Pin This Guide!
Congratulations on taking the first step towards a more skilled and confident drawing journey! Whether you’re just starting or looking to refine your techniques, the principles and challenges outlined in this guide are designed to support your artistic growth. Remember that every stroke, every sketch, and every moment of practice brings you closer to your artistic goals. The 30-Day Drawing Challenge is a fantastic way to build consistency and explore new creative horizons.
We’d love to see your progress and hear about your experiences. Don’t hesitate to share your thoughts, questions, or even your daily challenge sketches in the comments below! And if you found this guide helpful, please consider saving it to your favorite Pinterest boards. Your support helps us continue to create valuable content for aspiring artists like you. Happy drawing!


