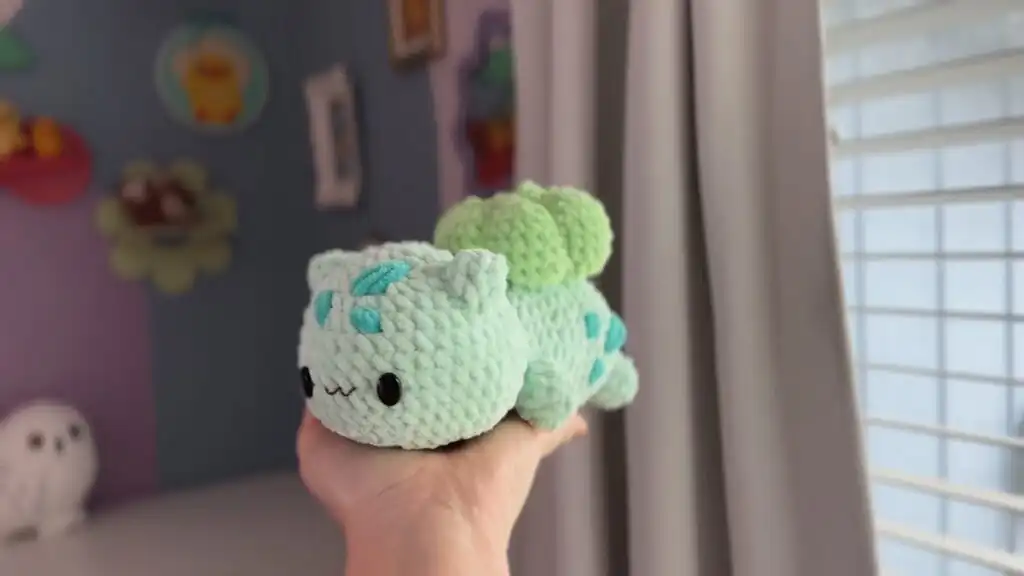
Crochet Your Own Iconic Bulbasaur: The Ultimate DIY Amigurumi Pattern
If you grew up loving Pokémon, there’s a special kind of nostalgia that comes with seeing your favorite pocket monsters come to life, especially when they’re handmade with yarn and love! Among all the Pokémon that captured our hearts, Bulbasaur stands out as one of the most adorable and iconic. With his leafy bulb, cheerful eyes, and sweet smile, Bulbasaur makes the perfect crochet companion for any fan of the franchise looking to expand their Pokémon crochet collection.
In today’s tutorial, we’ll explore how to create your very own DIY Crochet Bulbasaur Amigurumi Pattern, a soft, huggable plush inspired by the beloved grass-type Pokémon. Whether you’re crafting it for yourself, as a thoughtful gift for a Pokémon-loving friend, or to proudly display as part of your handmade collection, this detailed pattern will certainly bring out your inner Pokémon trainer while sharpening your crochet skills.
This pattern draws inspiration from the YouTube tutorial by Awo-LsT, which provides detailed steps, helpful tips, and creative customization ideas. You’ll learn everything from the specific materials needed and key stitches to expertly shaping the head, body, and bulb to give your Bulbasaur that signature look and charming personality.
Before we dive into the step-by-step guide, let’s highlight why this amigurumi project is such a hit among crochet lovers and Pokémon fans alike:
Beginner-Friendly: Designed with simple stitches and easy assembly steps. This pattern is perfect for those new to amigurumi or looking for a relaxing project. The instructions are broken down into manageable steps, making the process straightforward and enjoyable for crocheters of all skill levels. You’ll build confidence with fundamental techniques. For additional guidance, consider a Crochet Stitch Dictionary.
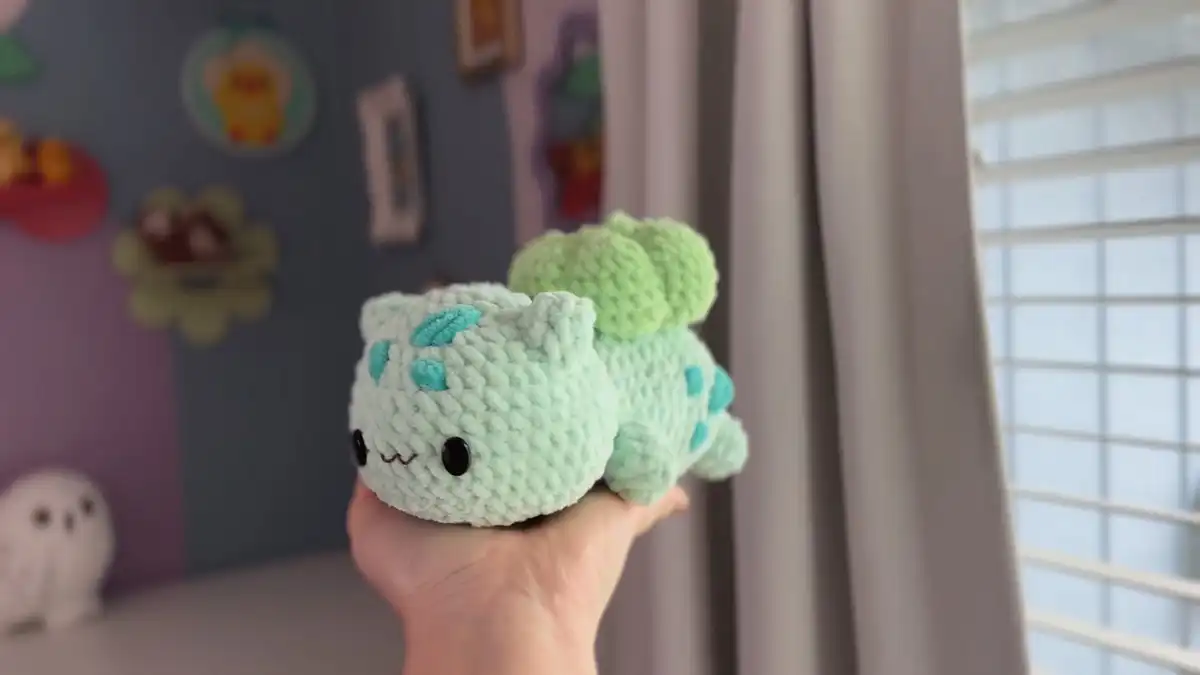
Customizable: You can adjust colors, expressions, and details for a unique look. Express your creativity by personalizing your Bulbasaur! Experiment with different shades of green, alter its facial expression to be happy or sleepy, or add unique embroidered details to truly make it one-of-a-kind. Each Bulbasaur can reflect your personal touch.
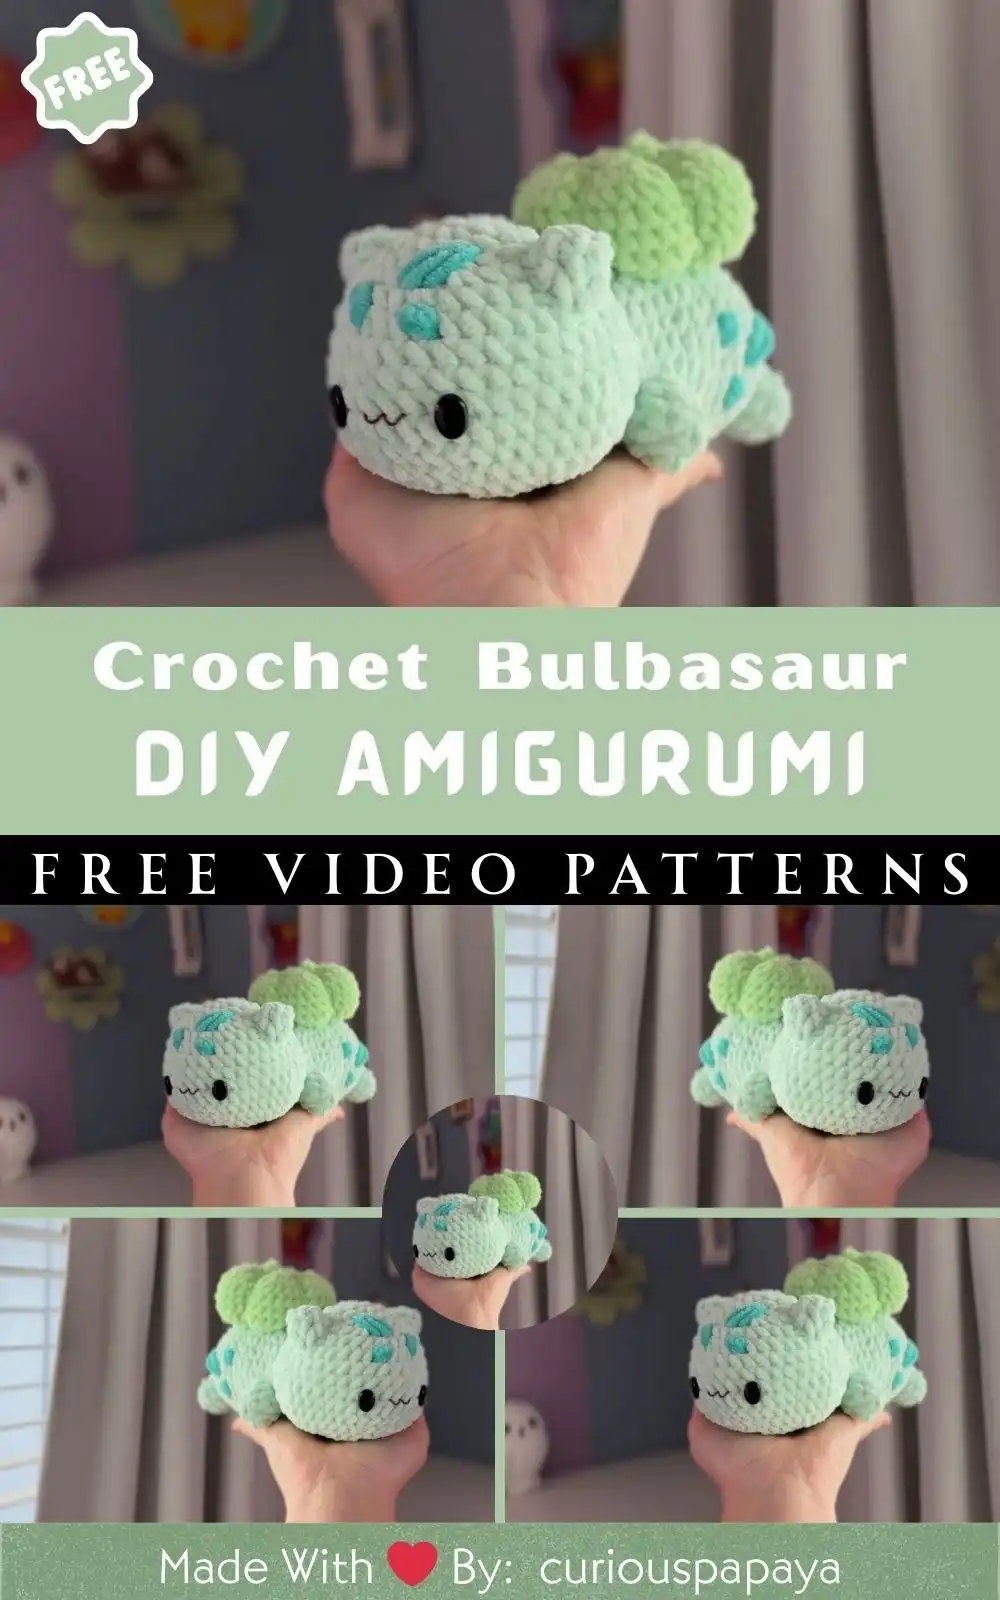
Perfect Gift Idea: Great for birthdays, anniversaries, or fandom collections. A handmade Bulbasaur is a heartfelt gift that will be cherished by any Pokémon enthusiast. It’s ideal for celebrating special occasions or simply showing appreciation to friends and family who adore the franchise. This thoughtful gesture showcases both your crafting skill and care.
Compact and Adorable: The perfect size for display or as a keychain attachment. This amigurumi Bulbasaur is designed to be perfectly portable and display-worthy. Its charming size makes it an excellent desk companion, a cute addition to a shelf, or even a delightful keychain accessory, bringing a touch of Pokémon magic wherever it goes.
Instagram-Worthy: Its charming face and round body make it perfect for crochet photography. Prepare to impress your followers with your finished Bulbasaur! Its iconic design and soft, rounded features are inherently photogenic, making it a fantastic subject for sharing your crochet journey and finished projects on social media. Capture its cuteness from every angle.
Family Fun: A fun bonding project for parents and kids who love Pokémon. This crafting project offers a wonderful opportunity for families to connect and create together. Parents can guide younger Pokémon fans through the stitches, fostering creativity and teamwork. It’s an engaging activity that culminates in a shared, tangible memory.
Collectible Craft: Start a mini Pokémon amigurumi series—make Pikachu, Charmander, and Squirtle next! Once you’ve mastered Bulbasaur, you’ll be inspired to crochet the rest of the gang. This project is a fantastic starting point for building a charming collection of amigurumi Pokémon, expanding your crafting repertoire and fandom display. For even more creative inspiration, explore a Kawaii Crochet pattern book. Consider exploring easy cube crochet animals for more collectible plush ideas.
Material You’ll Need
Before starting, gather all the essential materials to ensure a smooth and enjoyable crocheting experience. A complete crochet kit for beginners can provide a great start. The recommended items are based on the reference tutorial and have been adapted for clarity and accessibility, ensuring you have everything at your fingertips to bring your Bulbasaur to life.
Yarn
Main Body (Bulbasaur): Mint green or light teal yarn. Choose a soft, worsted-weight yarn in a shade that captures Bulbasaur’s signature body color. Mint green gives a fresh, vibrant look, while a light teal can add a unique, slightly deeper tone. Ensure your chosen yarn is smooth for neat stitches and easy handling.
Spots: Dark turquoise or darker green. For Bulbasaur’s distinctive spots, select a contrasting multicolored yarn set that stands out beautifully against the main body. Dark turquoise provides a lovely pop, while a darker green offers a more subtle, natural blend. These small details add significant character.
Bulb (Back Plant): Leaf green and forest green for shading. To create a realistic and textured bulb, use at least two shades of green. Leaf green forms the primary color, while forest green can be used for shading or crocheting individual leaves. For high-quality options, consider acrylic yarn skeins that offer a wide range of colors. This adds depth and visual interest to Bulbasaur’s most iconic feature.
Eyes and Mouth: Black and white yarn or embroidery thread. For Bulbasaur’s expressive face, black and white yarn or embroidery thread is perfect for outlining the eyes and crafting a gentle smile. White thread can add tiny highlights to the eyes, giving them a sparkle. Alternatively, safety eyes offer a quick and neat solution.
Optional: Red yarn for a happy mouth expression. If you wish to give your Bulbasaur a particularly cheerful demeanor, a small amount of red cotton yarn can be used to embroider a bright, happy smile. This detail adds an extra layer of cuteness and personality, making your amigurumi truly unique. You can find many lovely yarn options for various projects, including adorable baby sets, that would work well here.
Hook
Size: 2.5 mm to 3 mm crochet hook (depending on your yarn thickness). The correct hook size is crucial for achieving the tight stitches characteristic of amigurumi, preventing stuffing from showing through. A 2.5 mm crochet hook is ideal for finer yarns, while a 3 mm hook works well with slightly thicker options. Always check your gauge to ensure a consistent fabric.
Stuffing
Polyester fiberfill or soft cotton filling for shaping the head, body, and bulb. High-quality polyester fiberfill is recommended for its resilience and ability to retain shape, providing a firm yet huggable finish. Soft cotton filling can also be used for a slightly denser plush. Ensure even stuffing to avoid lumps and maintain Bulbasaur’s smooth contours.
Other Tools
Yarn needle for sewing parts together. A sturdy yarn needle with a blunt tip is indispensable for neatly attaching Bulbasaur’s head, body, legs, ears, and bulb. Its large eye accommodates thicker yarn, making assembly seamless and secure. This tool ensures all components are firmly joined for a durable finish.
Stitch marker for keeping track of rounds. In amigurumi, working in continuous rounds can make it easy to lose your place. A stitch marker helps you identify the beginning of each round, ensuring accurate stitch counts and consistent shaping. This simple tool is a lifesaver for maintaining pattern integrity.
Scissors. Sharp, small scissors are essential for neatly cutting yarn ends and trimming any excess fibers. A clean cut prevents fraying and ensures a professional finish to your crochet work. Keep them handy for quick snips throughout your project.
Safety eyes (6mm–8mm) or black felt circles. For Bulbasaur’s eyes, safety eyes offer a secure and professional look, available in various sizes to suit your preference (6mm-8mm is ideal). Alternatively, cut black felt circles and glue them on for a softer, child-friendly option. This choice greatly impacts your Bulbasaur’s overall expression.
Glue (optional, for securing felt features). If you opt for felt circles or other small embellishments, a strong fabric glue or craft adhesive can be used to secure them permanently. Ensure the glue dries clear and is safe for fabric to maintain a pristine finish. Always apply sparingly for best results.
Basic Crochet Stitches & Abbreviations
Before starting, here’s a quick glossary of the stitches you’ll use in this Bulbasaur pattern, ensuring you’re familiar with the fundamental techniques required for amigurumi. Mastering these will set you up for success in creating your Pokémon plush:
- MR: Magic Ring (also known as Magic Circle or Adjustable Ring) – a technique to start crocheting in the round without a hole in the center.
- CH: Chain – a series of interconnected loops forming the foundation of many crochet projects.
- SC: Single Crochet – a basic stitch that creates a dense, compact fabric, perfect for amigurumi.
- INC: Increase (working two SC into one stitch) – a method to add stitches, expanding the circumference of your work.
- DEC: Decrease (single crochet two stitches together) – a method to reduce stitches, tapering your work or creating curves.
- SL ST: Slip Stitch – a very flat stitch used to join rounds, move yarn across stitches, or finish off work.
- FO: Fasten Off – securing your yarn end after cutting to prevent unraveling.
Part 1: Crocheting Bulbasaur’s Head
The head is the main and most adorable feature of Bulbasaur, where his big eyes and cute smile truly come to life. Pay close attention to shaping and stuffing to capture his iconic expression. This section guides you through creating the perfect rounded foundation for his face.
Round Instructions
- Round 1: Start with a Magic Ring and make 6 SC (6).
- Round 2: INC in each stitch (12).
- Round 3: (1 SC, 1 INC) repeat 6 times (18).
- Round 4: (2 SC, 1 INC) repeat 6 times (24).
- Round 5: (3 SC, 1 INC) repeat 6 times (30).
- Round 6–10: SC around (30 each round). These rounds form the head’s rounded shape.
- Round 11: (3 SC, 1 DEC) repeat 6 times (24).
- Round 12: (2 SC, 1 DEC) repeat 6 times (18).
- Round 13: (1 SC, 1 DEC) repeat 6 times (12).
- Round 14: DEC around (6).
Round 1: Start with a Magic Ring and make 6 SC (6). Begin your Bulbasaur’s head with a magic ring, forming a tight, adjustable loop. Work six single crochet stitches into this ring, then pull the tail to close tightly. This creates the foundational center for a neatly crocheted piece, essential for amigurumi without a central gap.
Round 2: INC in each stitch (12). In this round, you’ll increase your stitch count by working two single crochet stitches into every stitch from the previous round. This simple increase doubles your stitch count to twelve, beginning the expansion and shaping of Bulbasaur’s rounded head and broadening its circumference evenly.
Round 3: (1 SC, 1 INC) repeat 6 times (18). Alternate between a single crochet and an increase stitch throughout this round, repeating the sequence six times. This methodical increase evenly expands the head to eighteen stitches, maintaining a circular shape. Consistent tension here is key for smooth growth.
Round 4: (2 SC, 1 INC) repeat 6 times (24). Continue increasing by working two single crochet stitches, followed by an increase, repeating this pattern six times. This round expands the head to twenty-four stitches, further developing its rounded form. Keep your stitches tight to ensure a dense fabric suitable for stuffing.
Round 5: (3 SC, 1 INC) repeat 6 times (30). For this round, you will crochet three single crochet stitches, then perform an increase, repeating the sequence six times in total. This brings your stitch count to thirty, creating a wider, more pronounced curve for the top of Bulbasaur’s head, preparing for the straight sides.
Round 6–10: SC around (30 each round). These rounds form the head’s rounded shape. For these five rounds, simply single crochet in each stitch without any increases or decreases. This creates the cylindrical mid-section of Bulbasaur’s head, giving it height and establishing its overall shape before tapering. Maintaining a consistent stitch count is vital here.
Round 11: (3 SC, 1 DEC) repeat 6 times (24). Now, begin to decrease the head’s circumference. Work three single crochet stitches, followed by a decrease (SC2tog), repeating this sequence six times. This reduces the stitch count to twenty-four, gently shaping the lower part of the head and starting its inward curve.
Round 12: (2 SC, 1 DEC) repeat 6 times (18). Continue the decreasing pattern with two single crochet stitches, then one decrease, repeated six times. This further narrows the opening to eighteen stitches, creating a more pronounced curve as the head closes in. Ensure your decreases are as invisible as possible for a smooth finish.
Round 13: (1 SC, 1 DEC) repeat 6 times (12). In this round, alternate between one single crochet and one decrease stitch, repeating the sequence six times. This step significantly reduces the circumference to twelve stitches, shaping the very base of the head. Now is an excellent time to begin firmly stuffing your piece.
Round 14: DEC around (6). For the final round, decrease in each stitch around, leaving six stitches remaining. This completely closes the opening of the head, creating a neat, finished bottom. Ensure the head is stuffed firmly but not overly tight to keep its soft plush texture. Leave a long tail for sewing later to attach it to the body.
Part 2: Crocheting Bulbasaur’s Body
The body should be slightly oval and chubby to give Bulbasaur that wonderfully huggable look. This section guides you through building the main torso, ensuring it’s robust enough to support the head and bulb while maintaining a cute, rounded form.
Round Instructions
- Round 1: MR with 6 SC (6).
- Round 2: INC around (12).
- Round 3: (1 SC, 1 INC) × 6 (18).
- Round 4: (2 SC, 1 INC) × 6 (24).
- Round 5–8: SC around (24).
- Round 9: (2 SC, 1 DEC) × 6 (18).
- Round 10: (1 SC, 1 DEC) × 6 (12).
- Round 11: DEC around (6).
Round 1: MR with 6 SC (6). Start the body with a magic ring, working six single crochet stitches into it. Pull the ring tight to eliminate any central gap. This foundational step is crucial for creating a clean, seamless base for Bulbasaur’s body, ensuring a professional amigurumi finish.
Round 2: INC around (12). Increase in every single crochet stitch from the previous round, resulting in a total of twelve stitches. This expansion initiates the shaping of the body, creating a flat disc that will gradually curve. Ensure consistent tension for even growth and a smooth fabric.
Round 3: (1 SC, 1 INC) × 6 (18). Alternate one single crochet with one increase stitch, repeating this sequence six times around the round. This increases your stitch count to eighteen, further expanding the body’s circumference. This round helps establish the initial rounded shape of Bulbasaur’s robust torso.
Round 4: (2 SC, 1 INC) × 6 (24). Work two single crochet stitches, followed by one increase, repeating this pattern six times. This brings the total stitch count to twenty-four, creating a broader base for the body. The increases are strategically placed to ensure the shaping remains circular and proportionate.
Round 5–8: SC around (24). For these four rounds, simply single crochet in each of the twenty-four stitches. This creates the main cylindrical section of Bulbasaur’s body, adding height and dimension without further increases or decreases. Maintaining uniform tension here is vital for a smooth and even texture.
Round 9: (2 SC, 1 DEC) × 6 (18). Begin decreasing the body by working two single crochet stitches, then a decrease (SC2tog), repeating this six times. This reduces the stitch count to eighteen, starting the gentle taper of the body. Ensure your decreases are neat to maintain the body’s integrity and shape.
Round 10: (1 SC, 1 DEC) × 6 (12). Continue the decreasing sequence by alternating one single crochet with one decrease, repeating this six times. This further narrows the opening to twelve stitches, creating a more pronounced curve for the lower body. Start stuffing the body firmly during this round.
Round 11: DEC around (6). For the final round, decrease in each stitch around until only six stitches remain. This completely closes the body opening. Stuff the body firmly, ensuring it’s chubby and symmetrical. Close the hole with an SL ST, and leave a long tail for sewing the body to the head later.
Part Bulbasaur’s Legs (x4)
Each leg is short and rounded, designed to give your Bulbasaur that sturdy, adorable stance. You’ll crochet four identical legs, ensuring they are firm enough to provide stable support for your plush. Consistency in tension is key for matching results.
- Round 1: MR with 6 SC (6).
- Round 2: INC around (12).
- Round 3–4: SC around (12).
- Round 5: (1 SC, 1 DEC) × 4 (8).
- Round 6: SC around, then FO, leaving a tail for sewing.
Round 1: MR with 6 SC (6). Begin each leg with a magic ring, working six single crochet stitches into the loop. Pull the ring tightly closed to form a neat, secure center, which is fundamental for creating compact, stable amigurumi limbs. Repeat this process for all four legs.
Round 2: INC around (12). Increase in every stitch from the magic ring, creating twelve stitches in total for this round. This step expands the base of the leg, giving it a slightly wider and more stable foundation. Ensure even increases for a well-rounded and proportionate foot.
Round 3–4: SC around (12). For these two rounds, simply single crochet in each of the twelve stitches. This creates the main body of the leg, adding height and form without further increases or decreases. Consistent stitch tension during these rounds is crucial for achieving uniform leg size and shape across all four pieces.
Round 5: (1 SC, 1 DEC) × 4 (8). In this round, begin tapering the leg by alternating one single crochet with one decrease (SC2tog), repeating this sequence four times. This reduces the stitch count to eight, shaping the top of the leg. Lightly stuff the leg as you work, or before closing this round, to give it form.
Round 6: SC around, then FO, leaving a tail for sewing. Single crochet in each of the remaining eight stitches for this final round. This firms up the top edge of the leg before you fasten off. Cut your yarn, leaving a long tail, which will be essential for neatly sewing the finished leg onto Bulbasaur’s body, ensuring a secure attachment.
Stuff lightly and sew all four legs evenly spaced under the body.
Part Bulbasaur’s Ears (x2)
The ears are small, slightly pointed, and sit atop the head, giving Bulbasaur his alert and curious expression. You’ll crochet two identical ears, paying attention to their small size and subtle shaping to integrate seamlessly with the head.
- Round 1: CH 2, then SC 3 in 2nd CH from hook.
- Round 2: Turn, INC in each stitch (6).
- Round 3: Turn, (1 SC, 1 INC) × 3 (9).
- Round 4: SC evenly around edges to give a clean shape.
Round 1: CH 2, then SC 3 in 2nd CH from hook. Start each ear by chaining two stitches. Then, work three single crochet stitches into the second chain from your hook. This creates a tiny foundation row, forming the very tip of the ear. This small beginning is key for a delicate, pointed shape.
Round 2: Turn, INC in each stitch (6). Turn your work, then single crochet increase (two SC) into each of the three stitches from the previous row. This will result in six stitches, beginning the widening of the ear. Turning your work ensures you’re building up rows rather than working in the round, creating a flatter piece.
Round 3: Turn, (1 SC, 1 INC) × 3 (9). Turn your work again. For this round, alternate one single crochet with one increase stitch, repeating the sequence three times. This expands the ear to nine stitches, giving it a broader, more rounded base while maintaining its subtle point. Consistent turning keeps the edges neat.
Round 4: SC evenly around edges to give a clean shape. After completing the last row, single crochet evenly around the entire perimeter of the ear, including the sides and base. This step provides a polished, clean edge, making the ear look more defined and easier to attach neatly to Bulbasaur’s head. Fasten off, leaving a tail for sewing.
Attach both ears slightly to the sides near the top of the head for that cute alert expression.
Part 5: The Bulb (Back Plant)
This is Bulbasaur’s most defining feature! The bulb should look leafy and layered, resembling a budding plant. Crafting this requires careful shaping to achieve its signature rounded yet slightly pointed top, making it truly recognizable.
- Round 1: MR with 6 SC (6).
- Round 2: INC around (12).
- Round 3: (1 SC, 1 INC) × 6 (18).
- Round 4: (2 SC, 1 INC) × 6 (24).
- Round 5–7: SC around (24).
- Round 8: (2 SC, 1 DEC) × 6 (18).
- Round 9: (1 SC, 1 DEC) × 6 (12).
- Round 10: DEC around (6).
Round 1: MR with 6 SC (6). Begin the bulb with a magic ring, working six single crochet stitches into it. Pull the ring tightly closed to form a seamless center, which is crucial for the bulb’s neat appearance. This creates a solid foundation for its growth and distinctive shape.
Round 2: INC around (12). Increase in every stitch from the previous round, resulting in twelve stitches. This initial expansion helps to create the flat base of the bulb, which will gradually curve upwards. Ensure even increases to maintain a symmetrical and well-formed shape.
Round 3: (1 SC, 1 INC) × 6 (18). Alternate one single crochet with one increase stitch, repeating this sequence six times around the round. This increases your stitch count to eighteen, further expanding the bulb’s circumference. This round contributes to the wider, lower section of the bulb’s iconic form.
Round 4: (2 SC, 1 INC) × 6 (24). Work two single crochet stitches, followed by one increase, repeating this pattern six times. This brings the total stitch count to twenty-four, creating the widest part of the bulb. The consistent increases ensure a smooth, rounded expansion, characteristic of Bulbasaur’s plant.
Round 5–7: SC around (24). For these three rounds, simply single crochet in each of the twenty-four stitches. This creates the cylindrical main body of the bulb, adding height and forming the central portion before it begins to taper. Maintaining even tension throughout these rounds is important for a consistent and firm texture.
Round 8: (2 SC, 1 DEC) × 6 (18). Begin decreasing the bulb by working two single crochet stitches, then a decrease (SC2tog), repeating this six times. This reduces the stitch count to eighteen, starting the gentle taper towards the top of the bulb. Ensure your decreases are neat to maintain the plant’s natural, budding appearance.
Round 9: (1 SC, 1 DEC) × 6 (12). Continue the decreasing sequence by alternating one single crochet with one decrease, repeating this six times. This further narrows the opening to twelve stitches, shaping the upper dome of the bulb. Begin stuffing lightly during this round to ensure an even fill.
Round 10: DEC around (6). For the final round, decrease in each stitch around until only six stitches remain. This completely closes the bulb opening, forming a neat, slightly pointed top. Stuff lightly before closing, ensuring the bulb maintains its shape without being overly rigid. To create texture, embroider leaf veins or add layered green yarn on top. You can even crochet small pointed leaves separately and sew them around the top for added realism and flair.
Part 6: Crochet Spots and Details
Bulbasaur’s darker green spots make him instantly recognizable, adding visual depth and character to his mint green body. These small, flat circles are easy to crochet and strategically placed to replicate his unique markings, enhancing the overall authenticity of your amigurumi.
Crochet small flat circles: To create Bulbasaur’s spots, you’ll be crocheting simple flat circles. These will be worked in continuous rounds using the darker green or turquoise yarn you selected earlier. The technique is fundamental and allows for quick production of multiple spots in varying sizes to achieve a natural look.
Small Spots: MR, 6 SC, FO. For the smaller spots, start with a magic ring and work six single crochet stitches into it. Pull the ring tightly closed, then fasten off, leaving a short tail for sewing. These smaller circles will provide subtle details and can be strategically placed on the head or body.
Large Spots: MR, 6 SC, then INC in each (12). To create larger spots, begin with a magic ring and six single crochet stitches. Then, in the next round, increase in each of those six stitches, resulting in twelve stitches. Fasten off, leaving a tail. These larger circles will create more prominent markings, adding visual interest.
Sew these spots randomly over the head and back for realism. Once your spots are crocheted, use a yarn needle to carefully sew them onto Bulbasaur’s head and back. Vary their placement and size to achieve a natural, organic look, mimicking his iconic Pokémon design. This step truly brings out his unique character.
Part 7: Assembling Your Bulbasaur
Now that all your crochet pieces are ready, it’s time for assembly – this is where Bulbasaur truly comes to life! Taking your time with each attachment ensures a sturdy, well-proportioned, and endearing final plush that will be cherished.
Attach Head and Body: Use a yarn needle to sew the head onto the body evenly. Carefully align the head onto the body, ensuring it sits squarely and centrally. Use the long yarn tails left from both pieces and a yarn needle to securely stitch them together, working around the seam for a clean, strong join. This forms the main structure of your Bulbasaur.
Add Legs: Stitch all four legs underneath the body, two at the front and two at the back. Position the four crocheted legs evenly under Bulbasaur’s body. Ensure two are slightly forward for the front legs and two are slightly back for the rear legs. Use a yarn needle and their respective tails to firmly sew each leg in place, providing stable support.
Position Bulb: Sew the bulb securely onto the middle of Bulbasaur’s back. Take the completed bulb and center it on Bulbasaur’s back. Use the long yarn tail from the bulb to stitch it securely onto the body. Make sure it is firmly attached and stands upright, as this is one of Bulbasaur’s most recognizable features.
Attach Ears: Sew both ears symmetrically on top of the head. Carefully position the two small ears slightly to the sides near the top of Bulbasaur’s head. Ensure they are symmetrical and angled slightly forward for an alert expression. Use the yarn tails to stitch them firmly in place, blending the edges smoothly.
Sew Spots: Place and stitch the spots naturally across the body. Arrange the crocheted spots (both small and large) artistically over Bulbasaur’s head and back. Experiment with placement before sewing them down. Use matching yarn to secure each spot, ensuring they lay flat and contribute to a realistic, textured appearance.
Add Facial Features: This critical step gives your Bulbasaur its unique personality and expression.
- Safety eyes or felt circles for the eyes.
- Embroidered or yarn-stitched smile.
- Optional small nostrils for detail.
Safety eyes or felt circles for the eyes. For the eyes, you have two great options: secure safety eyes (inserting them firmly between stitches before the head is fully closed) for a classic look, or use black felt circles glued or sewn on for a softer, more child-friendly finish. The eye placement greatly influences Bulbasaur’s personality.
Embroidered or yarn-stitched smile. Using black or red embroidery thread, carefully stitch a gentle U-shaped smile just below the eyes. Practice on a scrap piece first if you’re new to embroidery. This small detail brings Bulbasaur’s friendly demeanor to life, adding charm to his face.
Optional small nostrils for detail. For an added touch of realism, you can embroider two tiny dots or short lines just above the mouth with black embroidery thread to represent Bulbasaur’s nostrils. This subtle detail enhances the facial features, bringing more depth and character to your finished amigurumi.
Take your time during this stage—it’s where Bulbasaur’s personality really comes to life!
Part 8: Embroidery & Expression Details
You can personalize your Bulbasaur’s face in fun ways, adding unique embroidery and expression details that truly make your amigurumi one-of-a-kind. These small touches allow you to infuse character and charm, reflecting your creative vision.
Classic Cute Smile: Use red yarn to create a soft U-shaped mouth. For a sweet and traditional Bulbasaur, embroider a gentle, U-shaped smile with red yarn. This simple detail instantly conveys happiness and approachability, making your plush even more endearing. Ensure the stitches are neat and even for the best effect.
Playful Expression: Add a small wink or raised eyebrow stitch. Inject some mischief into your Bulbasaur’s face by adding a playful wink or a slightly raised eyebrow with black embroidery thread. These small, asymmetric details create a dynamic and charming expression, suggesting a mischievous or curious personality.
Shiny Eyes: Add a tiny white thread dot to the black eyes for a glossy look. To give Bulbasaur’s eyes a sparkling, lifelike quality, use a tiny amount of white embroidery thread to stitch a small dot or dash on the upper corner of each black eye. This subtle highlight adds depth and makes the eyes truly pop.
Chibi Look: Make the eyes larger and the mouth tiny for kawaii-style cuteness. For an exaggerated, super-cute “Chibi” or “kawaii” aesthetic, opt for slightly larger safety eyes or felt circles. Pair these with an exceptionally small, subtly stitched mouth. This style emphasizes cuteness, perfect for a whimsical Bulbasaur.
Finishing Touches
Once you’ve completed assembly, double-check for any loose ends and ensure everything is secure. These final finishing touches are essential for a professional and durable amigurumi that will withstand cuddles and display.
Loose yarn ends — weave them neatly inside. After sewing all parts, carefully inspect your Bulbasaur for any stray yarn tails. Use a yarn needle to weave these ends securely into the inside of the plush, preventing them from unraveling and ensuring a clean, polished appearance. This step enhances durability.
Secure stitching on smaller parts (especially ears and legs). Double-check the attachment of smaller, more delicate parts like the ears and legs. Gently tug on them to ensure they are firmly stitched and won’t detach with handling. Reinforce any areas that feel less secure for long-lasting enjoyment of your amigurumi.
Balanced stuffing so your Bulbasaur stands evenly. Feel your Bulbasaur all over to ensure the stuffing is evenly distributed, without any lumps or soft spots. Proper stuffing is vital for maintaining its shape and allowing it to sit or stand stably. Adjust as needed to achieve a perfectly symmetrical and firm plush.
For added durability, lightly brush the finished plush to fluff up the yarn fibers and give it a soft, professional finish.
Optional Variations
Want to get even more creative with your DIY Crochet Bulbasaur Pokemon Amigurumi Pattern? Try these fun variations to make your Bulbasaur truly stand out or adapt it for different purposes. These ideas allow for boundless creativity and personalization beyond the standard pattern.
- Shiny Bulbasaur: Use mint blue or pastel green yarn instead of teal.
- Mini Keychain Version: Use fine cotton thread and a 1.5mm hook.
- Mini Keychain Version: Use fine cotton thread and a tiny mini ergonomic crochet hook set. This will result in a miniature plush perfect for attaching to keys, backpacks, or as a charm, a charmingly detailed keepsake.
- Giant Plush Bulbasaur: Use thick blanket yarn and a 6mm crochet hook for a cuddly version.
- Battle-Ready Bulbasaur: Add a little vine from the bulb using green chains and coils.
- Sleepy Bulbasaur: Crochet closed eyes and a small yawn expression—perfect for display!
Shiny Bulbasaur: Use mint blue or pastel green yarn instead of teal. To create a “Shiny” variant, swap the standard mint green or light teal yarn for a striking mint blue or a soft pastel green. This vibrant color change instantly transforms your Bulbasaur into its rare in-game counterpart, a delightful surprise for fans.
Mini Keychain Version: Use fine cotton thread and a 1.5mm hook. For a tiny, portable Bulbasaur, downsize your materials! Opt for fine cotton thread and a tiny mini ergonomic crochet hook set. This will result in a miniature plush perfect for attaching to keys, backpacks, or as a charm, a charmingly detailed keepsake.
Giant Plush Bulbasaur: Use thick blanket yarn and a 6mm hook for a cuddly version. If you desire a super huggable companion, supersize your Bulbasaur! Utilize thick blanket yarn and a large 6mm crochet hook. This creates an oversized, plushy version that’s perfect for cuddling on the couch or as a prominent decorative piece.
Battle-Ready Bulbasaur: Add a little vine from the bulb using green chains and coils. Give your Bulbasaur a dynamic, action-packed look by adding a “Vine Whip” detail. Crochet a short length of green chains, then coil it into a vine-like shape and attach it emerging from the bulb. This brings a touch of its combat abilities to life.
Sleepy Bulbasaur: Crochet closed eyes and a small yawn expression—perfect for display! For a uniquely serene Bulbasaur, crochet or embroider closed, slightly arced eyes and a small, relaxed yawn shape for its mouth. This peaceful expression makes for a charming display piece, conveying tranquility and cuteness.
We hope you’ve enjoyed this comprehensive guide to crocheting your very own Bulbasaur! Don’t forget to save this pin to your favorite Pinterest board for future reference, share it with fellow Pokémon and crochet enthusiasts, and leave a comment below to show off your finished creation!


