This post contains affiliate links. As an Amazon Associate, we earn from qualifying purchases.
How To Crochet a Cardigan: 6 Different Styles To Try
Discover the joy of creating your own cozy and stylish outerwear with our guide on how to crochet a cardigan: 6 different styles to try. Crocheting a cardigan is an incredibly rewarding experience, allowing you to craft a perfectly sized garment that reflects your unique taste. Imagine wrapping yourself in a piece made by your own hands, showcasing your creativity and craftsmanship with every stitch. Just like creating a Crochet Heirloom Blanket: A Timeless Keepsake, a cardigan becomes a cherished item.
Making a crocheted cardigan is often simpler than you might expect. Many patterns utilize basic, repeatable stitches that even beginners can master, such as the double crochet. While you can certainly incorporate intricate designs, the fundamental construction is quite straightforward. Typically, you’ll create three main pieces: a back panel and two front panels, which are then joined before adding the sleeves. Some innovative designs are even simpler, requiring just a single large rectangle to form the core of your garment.
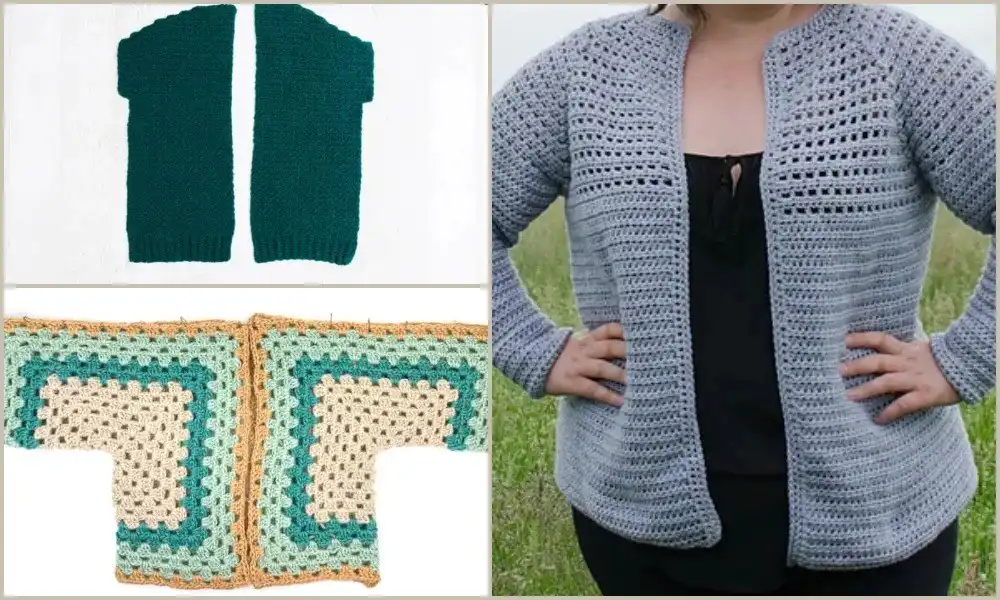
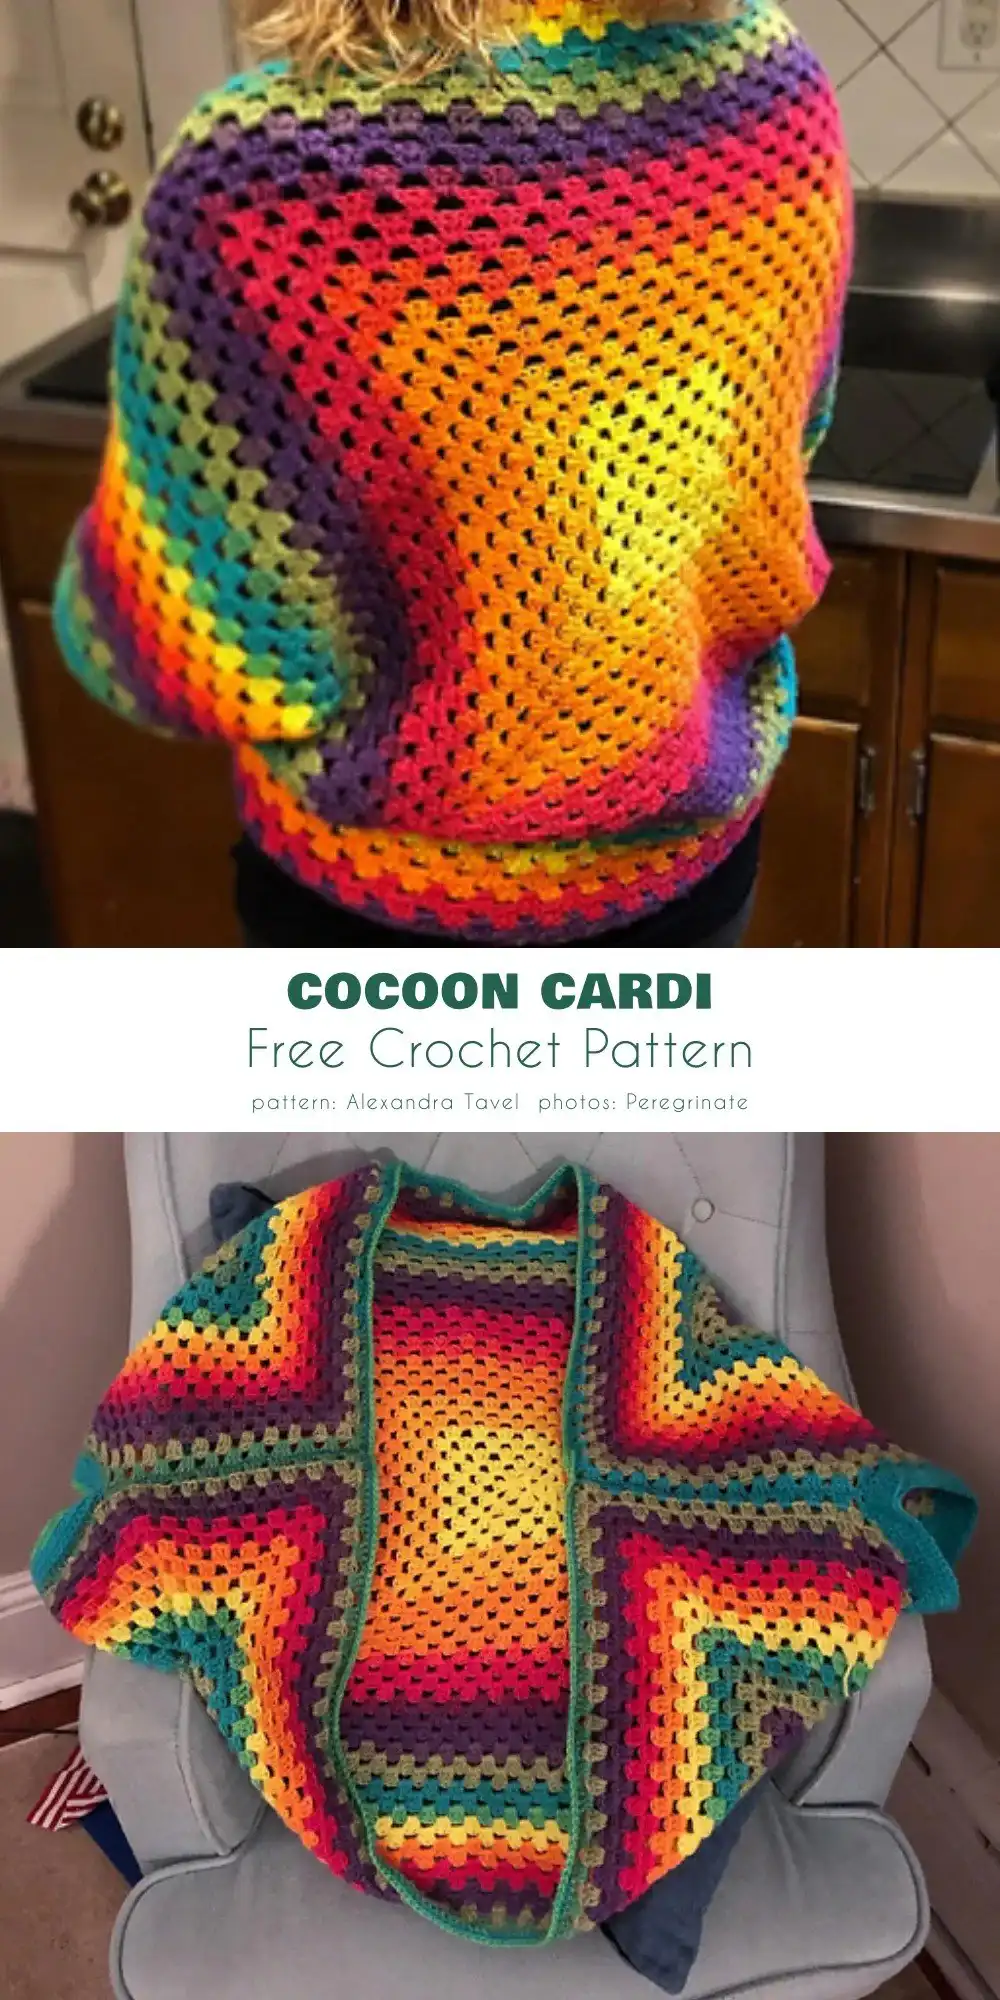
How to make a cardigan crocheted?
Creating your own crocheted cardigan is a delightful process that builds piece by piece. Start by understanding the basic construction which usually involves crocheting a back piece and two front panels. Once these main sections are complete, they are seamed together to form the body of the cardigan. The final step typically involves crocheting the sleeves and attaching them, or in some designs, creating the sleeves as part of the initial panels. This modular approach makes the project manageable and enjoyable for various skill levels.
Before starting to crochet, gather the following:
- Yarn: The soul of your project, choose wisely for comfort and durability.
- Crochet Hook: The essential tool that brings your yarn to life.
- Scissors: Necessary for neatly trimming yarn ends and finishing.
- Measuring Tape: Crucial for accurate body measurements and tracking project progress.
- Stitch Markers: Invaluable for marking key stitches, rows, or pattern repeats.
- Yarn Needle: Used for weaving in loose ends and seaming your finished pieces together seamlessly.
Now, let’s explain each point more detail.
Yarn:
Selecting the right yarn is pivotal for your cardigan’s success and comfort. Always consult your chosen pattern for suggested yarn types and quantities, but feel free to experiment with acrylic, cotton, wool, or blends based on your preference and desired drape. Consider your budget, as good quality yarn can be an investment, ensuring your finished garment will be cherished for years to come.
Worsted weight yarn is a popular and versatile choice for cardigans, typically weighing around 3.5 ounces (100g) per skein. Skein lengths can vary, generally offering 180 to 210 yards (160-190 meters) of yarn. For an adult-sized cardigan, you’ll likely need 5 to 8 skeins, with about 7 skeins being a good estimate for a size L. As you gain experience, you can confidently explore different yarn weights to customize the look and feel of your crocheted cardigan, perhaps even trying a Crochet Textured Stitch: A Versatile Classic Design for added flair.
Crochet Hook:
Your crochet hook is an extension of your hand, directly impacting your stitch definition and fabric drape. Always choose the hook size recommended by your pattern for the specific yarn you’re using. However, don’t hesitate to adjust your hook size if your gauge swatch indicates you need to achieve the pattern’s intended fabric density. This allows for personalized tension control and fine-tuning your finished garment.
Accurate body Measurements:
A well-fitting cardigan begins with precise measurements. Before you start, carefully measure your bust, waist, hips, arm length, and desired overall sweater length. Compare these dimensions with the pattern’s size chart or select a pattern specifically designed for your measurements. When measuring, pull the tape taut enough to be accurate without constricting your body, ensuring a comfortable and flattering fit for your finished garment. This attention to detail prevents common sizing issues and guarantees a beautiful, custom-made cardigan.
Once you have your measurements, the next exciting step is choosing a simple stitch pattern you want to follow. With countless free and paid patterns available, it’s easy to feel overwhelmed. To simplify the decision, first decide on the overall style you envision. This will narrow down your options and make the pattern selection process much more enjoyable, guiding you towards the perfect project.
6 different styles of a crochet cardigan:
While the world of crochet cardigan construction offers endless possibilities, certain approaches are more common and beginner-friendly. This list highlights six popular and accessible methods for crocheting a cardigan, providing a solid foundation for your crafting journey. Each style offers a unique construction method, leading to distinct silhouettes and finishing touches. To further inspire you, we’ve included examples of patterns that utilize each technique, helping you visualize your next project.
Style 1 Cocoon cardigan made from a single rectangle
- Designed by Alexandra Tavel for the Movie Night Cocoon Cardi
The cocoon cardigan is a fantastic starting point for beginners due to its simple construction. It typically involves crocheting one large rectangle, often using a basic stitch like the granny stitch. Once the rectangle reaches the desired dimensions, it’s folded, and the sides are joined to create armholes and sleeves. This method results in a relaxed, comfortable fit that drapes beautifully.
The Movie Night Cocoon Cardi, a free pattern by Alexandra Tavel, perfectly exemplifies this style. Its straightforward design and use of simple stitches make it an ideal project for those new to garment making, offering a quick and satisfying result. You can easily adjust the size by adding more rounds to the rectangle. Finish with optional cuffs and a neckline for a polished look.
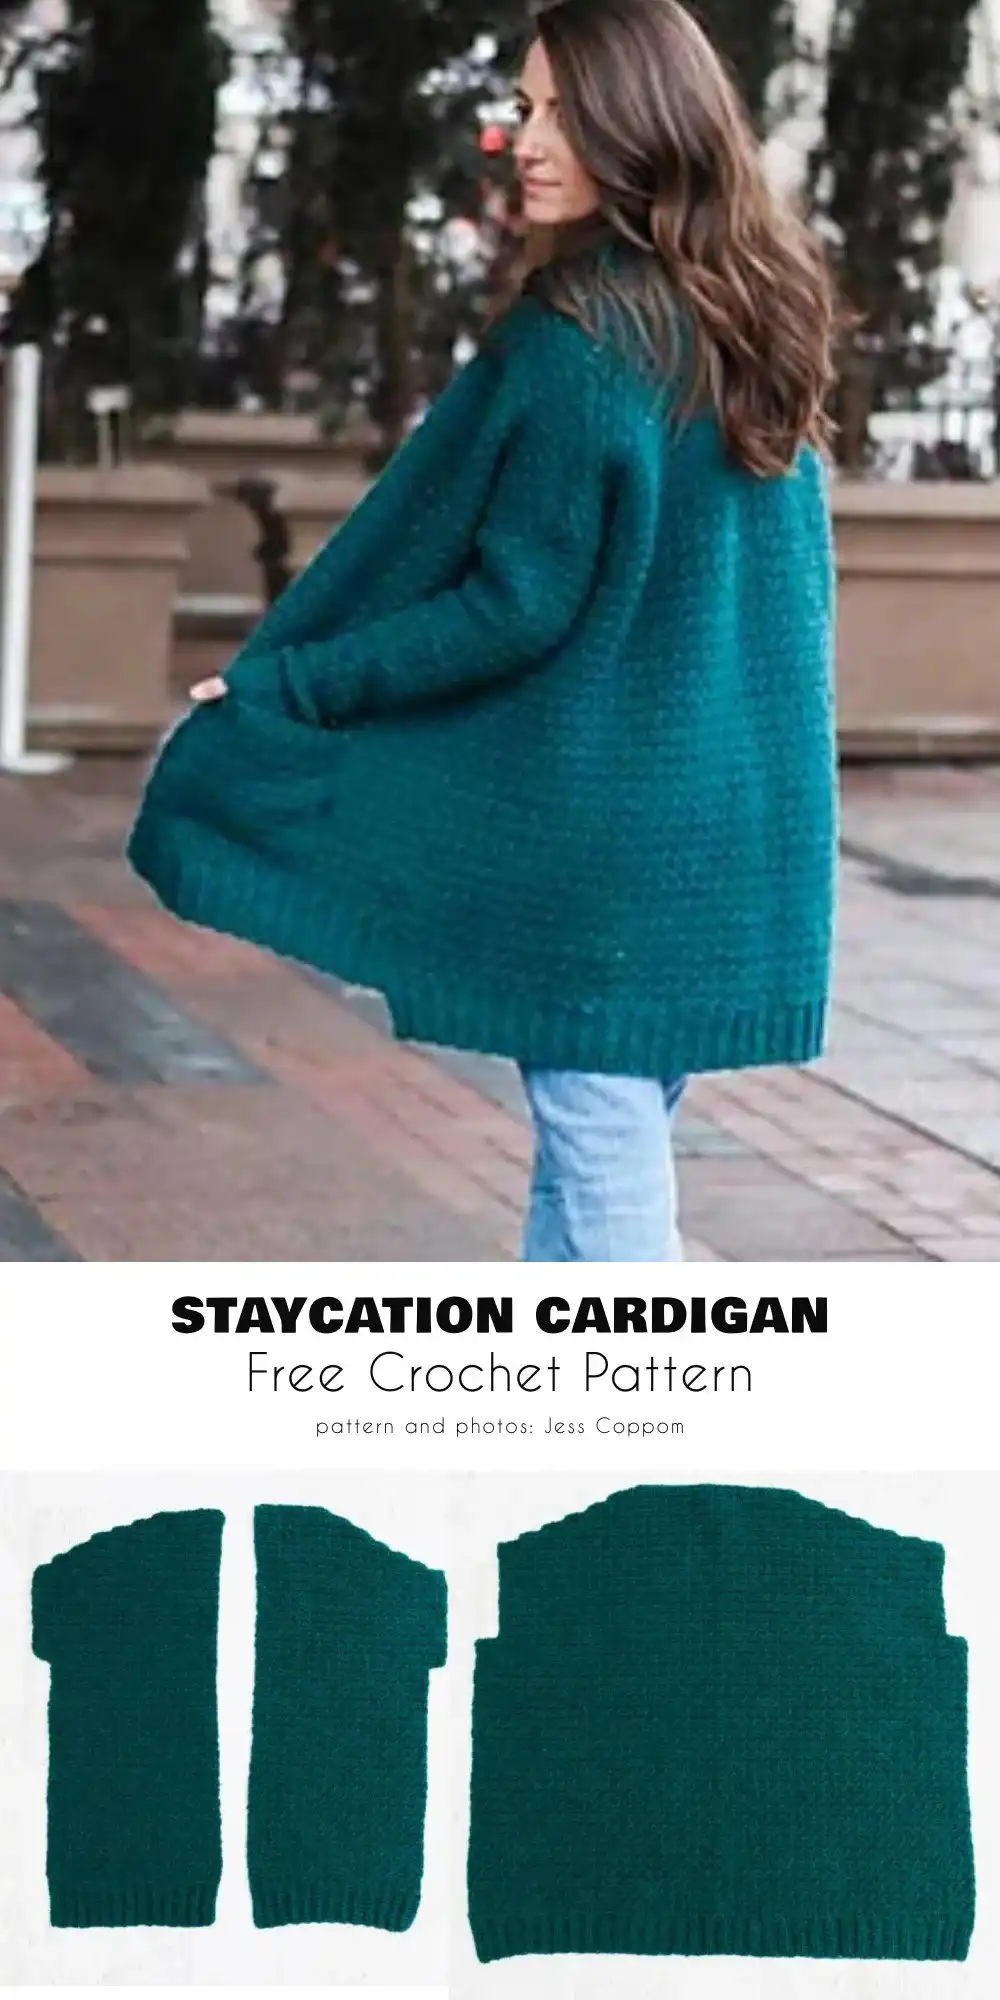
PHOTOS by Alexandra Tavel / Two of Wands
For more patterns of this type, please visit
Airy Cocoon Cardigan Free Crochet Patterns
Style 2 Crochet cardigans made from panels
- Designed by Make and Do Crew for the Staycation Cardigan
Cardigans constructed from panels involve crocheting separate pieces for the back, two front panels, and two sleeves. Each piece is worked individually to the desired size and shape. Once all panels are complete, they are meticulously seamed together. This traditional method allows for precise shaping and fitting, creating a structured garment with clear lines.
A beautiful illustration of this technique is the Staycation Cardigan by Make and Do Crew. This pattern demonstrates how individual panels can come together to form a cohesive and stylish garment. This method offers great flexibility for incorporating different stitch patterns or color blocks on each panel, allowing for a truly customized design and professional finish.
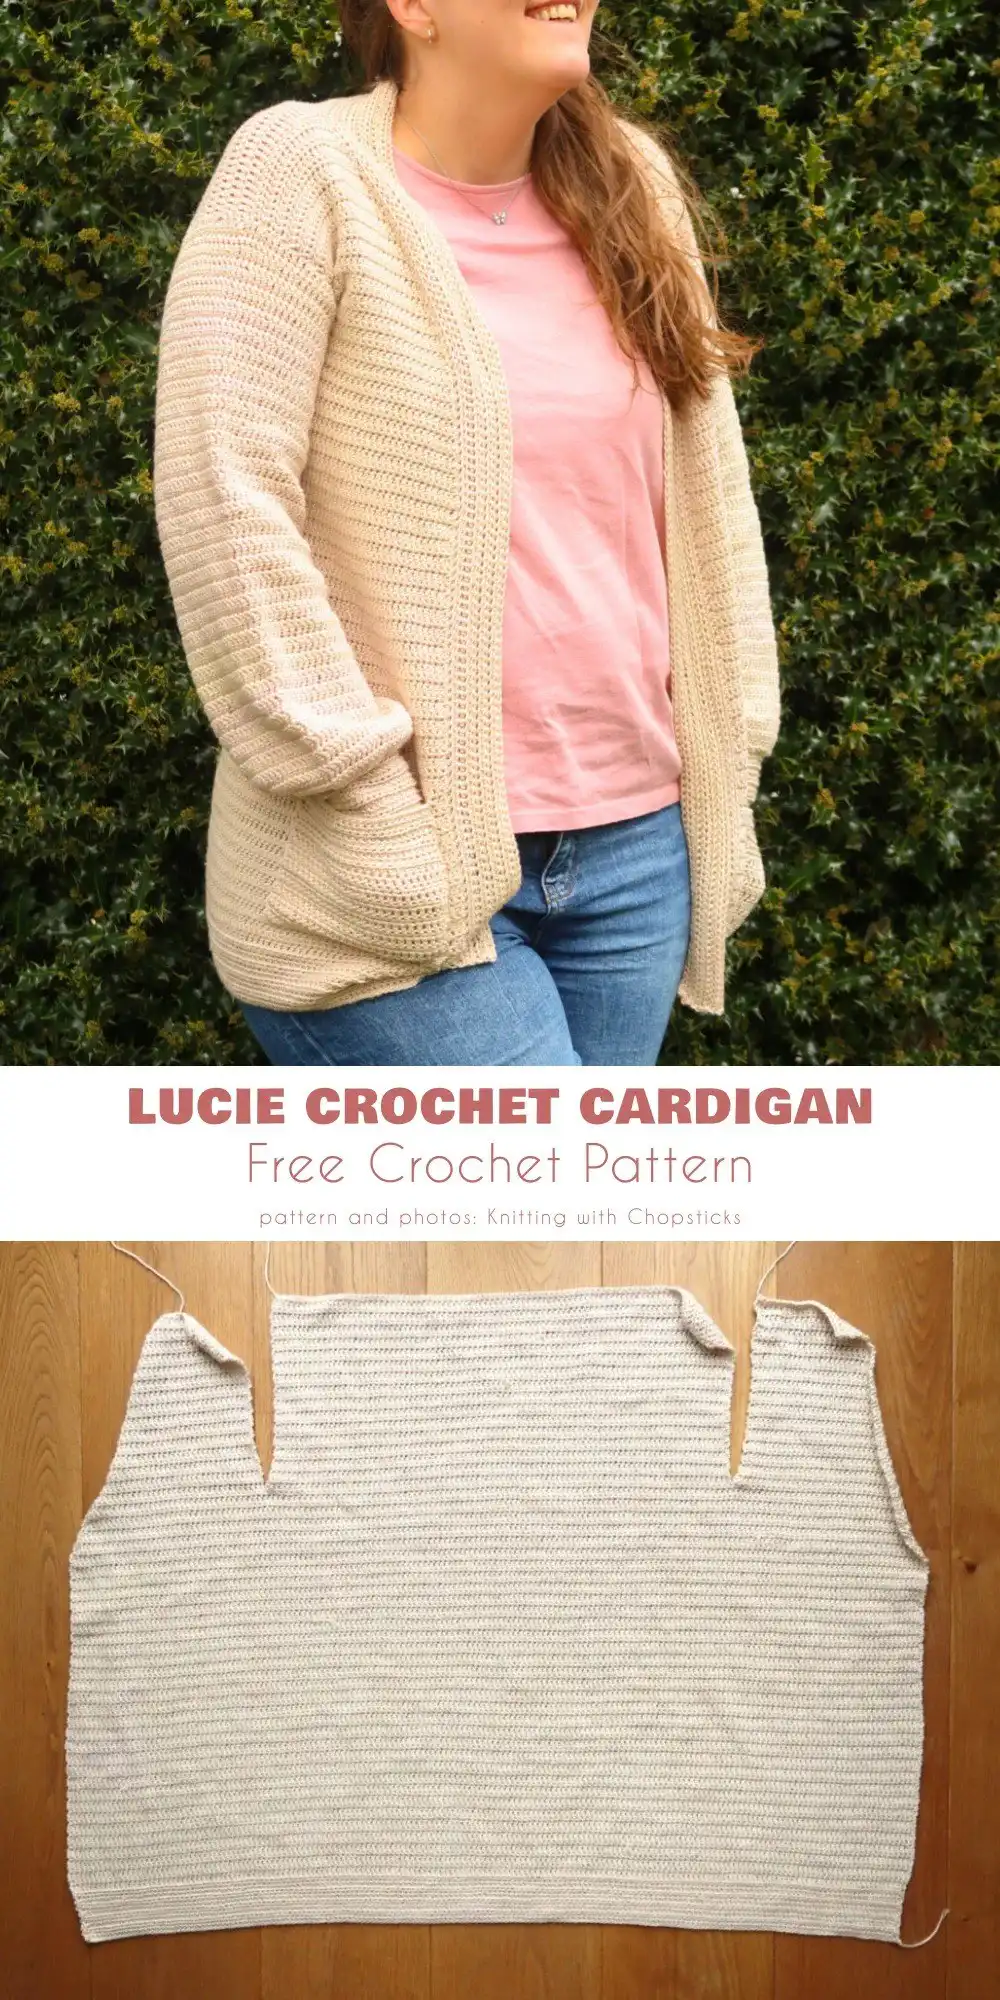
PHOTOS by Make and Do Crew
Style 3 Single piece main body panel with separate sleeves
- Designed by Knitting with Chopsticks for the Lucie Crochet Cardigan
This construction method streamlines the panel approach by creating the back and front panels as one continuous piece. You crochet across the entire width of the cardigan, leaving strategic openings for the armholes. Once the main body is complete, the sleeves are crocheted separately and then attached into these designated spaces. This reduces seaming and can often feel faster to construct than fully separate panels.
The Lucie Crochet Cardigan by Knitting with Chopsticks is an excellent example of this technique. Its simple shapes make it an accessible project, perfect for crocheters looking for a slightly less intricate garment construction. This style offers a clean look with minimal seams, resulting in a comfortable and attractive finish that drapes well and is easy to wear.
PHOTOS by Knitting with Chopsticks
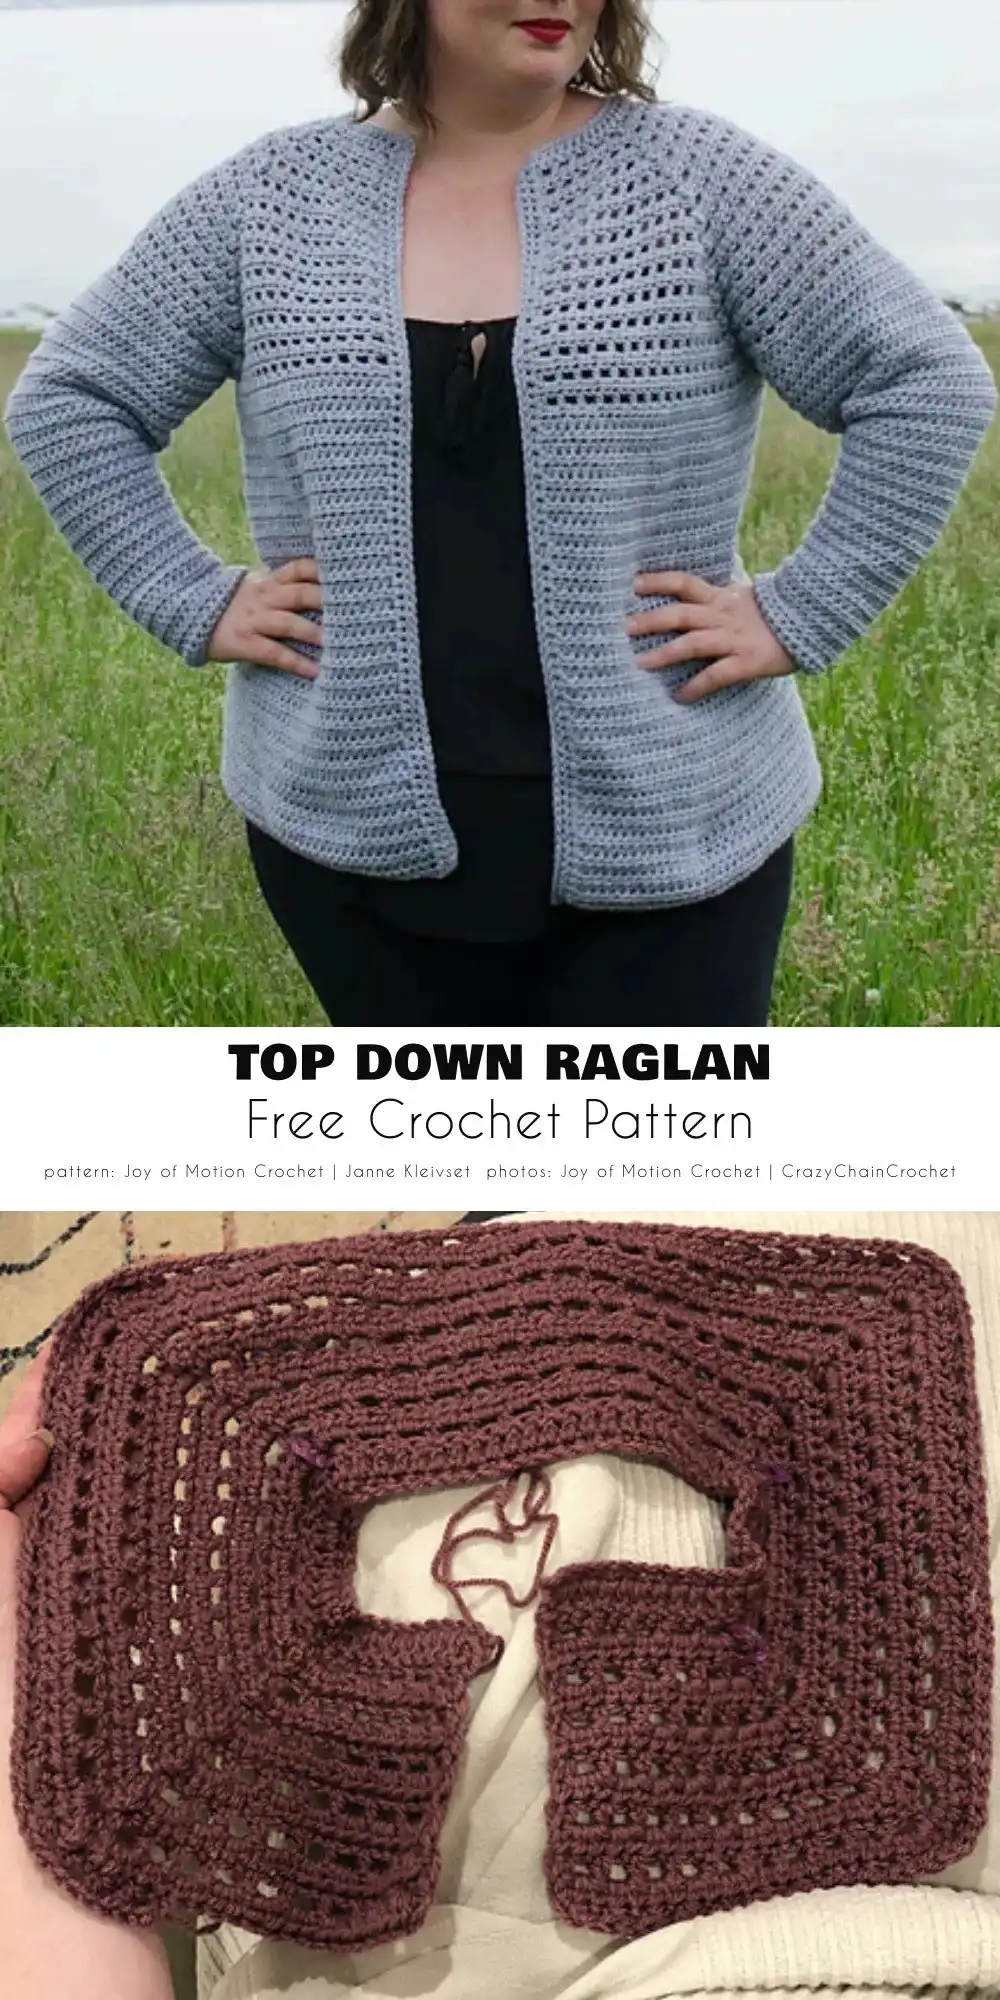
Style 4: Top-down raglan
The top-down raglan cardigan begins at the neckline and is crocheted downwards in one continuous piece. The yoke is typically worked flat, increasing stitches evenly at four specific points (the raglan lines) to shape the shoulders and armholes. Once the yoke reaches the underarms, the work is split to create separate sections for the body and sleeves. Underarm chains are often added for comfort and ease of movement.
This method eliminates most seaming, as the body and sleeves are worked directly from the armholes. You can easily customize the length of both the body and sleeves as you go, making it highly adaptable. Raglan designs are known for their comfortable fit across the shoulders and are a popular choice for their seamless construction and modern aesthetic. They are perfect if you love long, adjustable sleeves.
PHOTOS by various designers / Ravelry
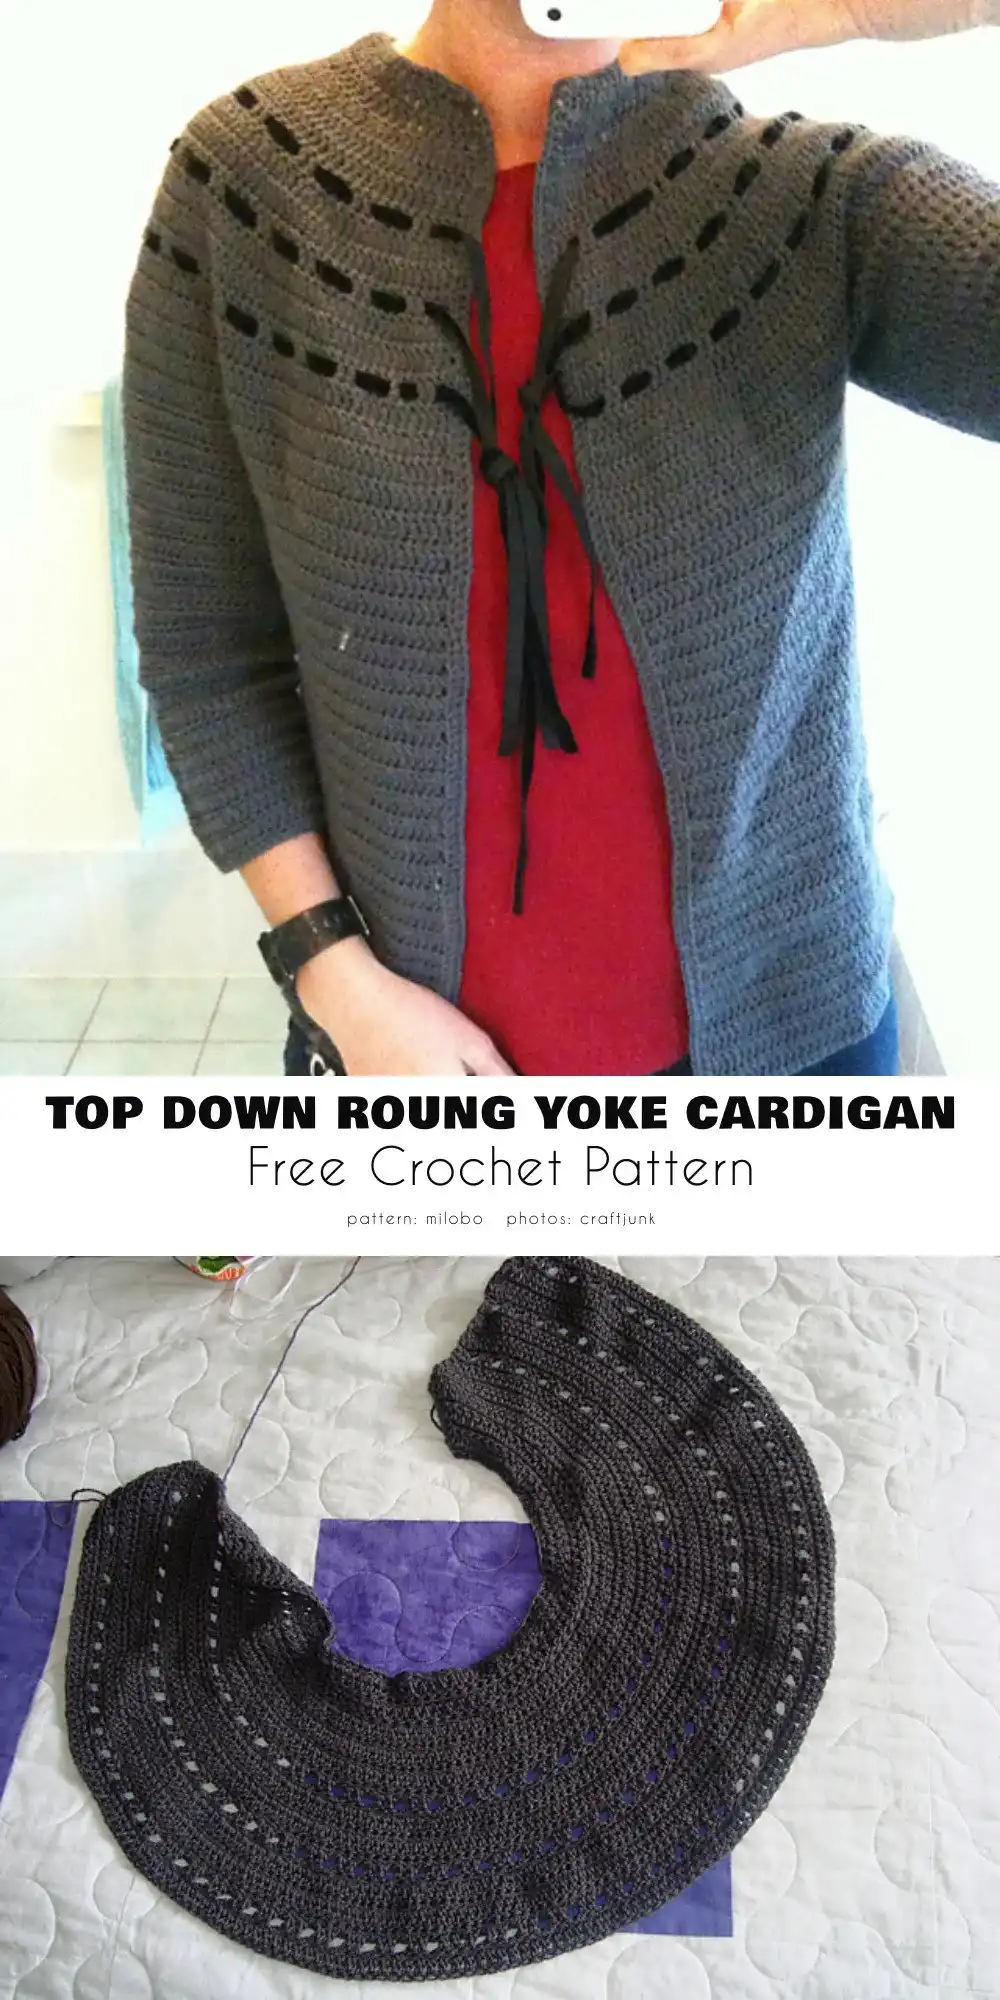
Style 5: Top down round yoke cardigan
Similar to the raglan, the top-down round yoke cardigan also starts from the neckline and works downwards. However, instead of sharp raglan lines, increases are distributed more evenly around a circular or oval yoke. This creates a smooth, rounded shoulder line that is very flattering. The yoke is worked flat until it reaches the underarm section, where it is then split for the body and sleeves, often with underarm chains for a better fit.
After the yoke is formed and split, you continue crocheting the body of the cardigan downwards. The sleeves are then worked directly from the armholes, much like the raglan style. This seamless construction results in a beautifully flowing garment with a classic silhouette. Round yoke cardigans are cherished for their elegant drape and comfortable, unrestrictive fit, making them a joy to wear.
PHOTOS by various designers / Ravelry
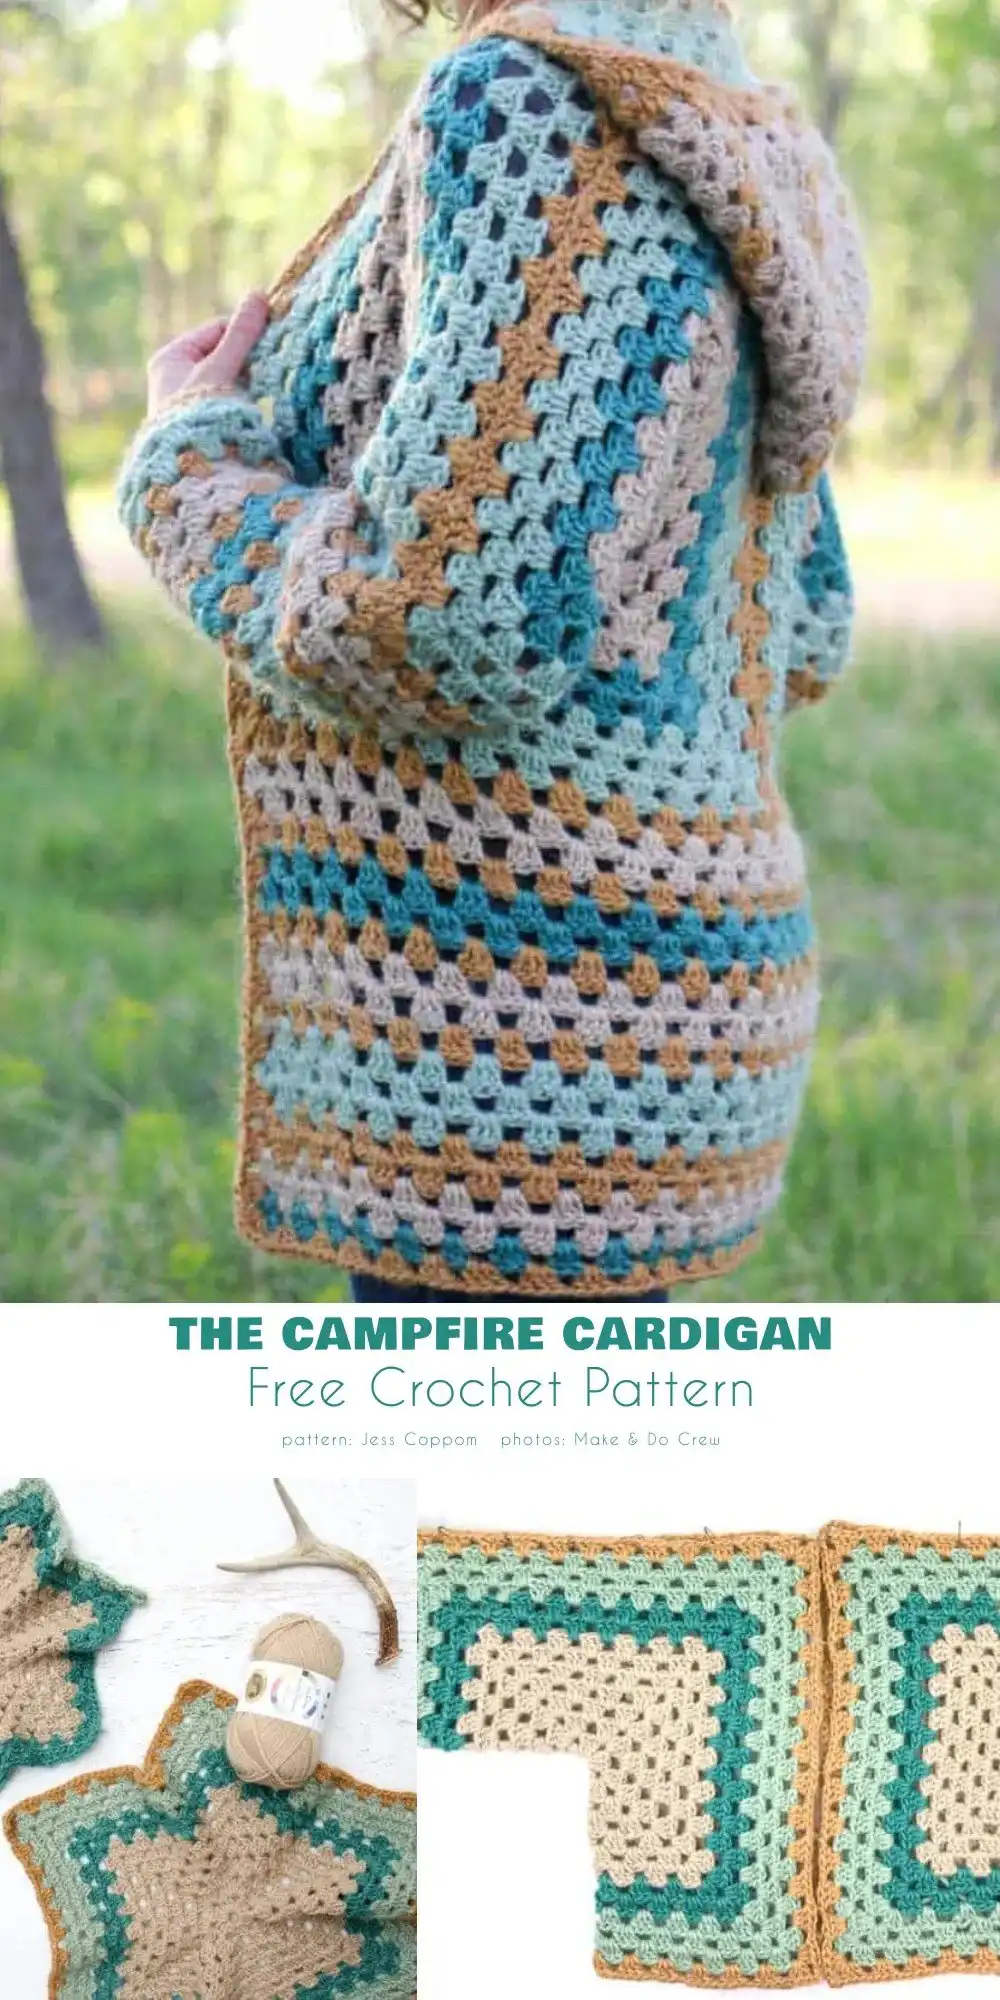
Style 6: Crochet cardigan made from 2 granny hexagons
- Pattern available on Make and Do Crew blog
This innovative construction method uses two large granny hexagons as the foundation for your cardigan. These hexagons are crocheted until they reach a significant size, then strategically folded and joined. The unique shape of the hexagon naturally forms the chest, shoulders, and upper arm areas of the sweater when sewn together. This creates a surprisingly simple yet effective base for a garment.
Once the two hexagons are joined, you typically extend the length of the sweater by adding rows to the bottom edges. Sleeves are also extended from the hexagon’s edges, and an optional rectangular hood can be added for extra coziness. This technique is surprisingly beginner-friendly and results in a wonderfully comfy, often oversized cardigan. It’s a great way to explore unique garment construction while using a familiar stitch, similar to how you might approach other projects like 50+ Free Crochet Crop Top Patterns, Crochet Top Patterns and Easy Crochet Tutorials or even a Crochet Four-Season Star Stitch Bucket Hat.
PHOTOS by Make and Do Crew
We hope this guide has inspired you to pick up your hook and start crocheting your next favorite cardigan! Each style offers a unique journey and a beautiful, wearable outcome. Don’t forget to save your favorite styles to Pinterest, share this guide with a fellow crochet enthusiast, and leave a comment below with which cardigan style you’re excited to try first!