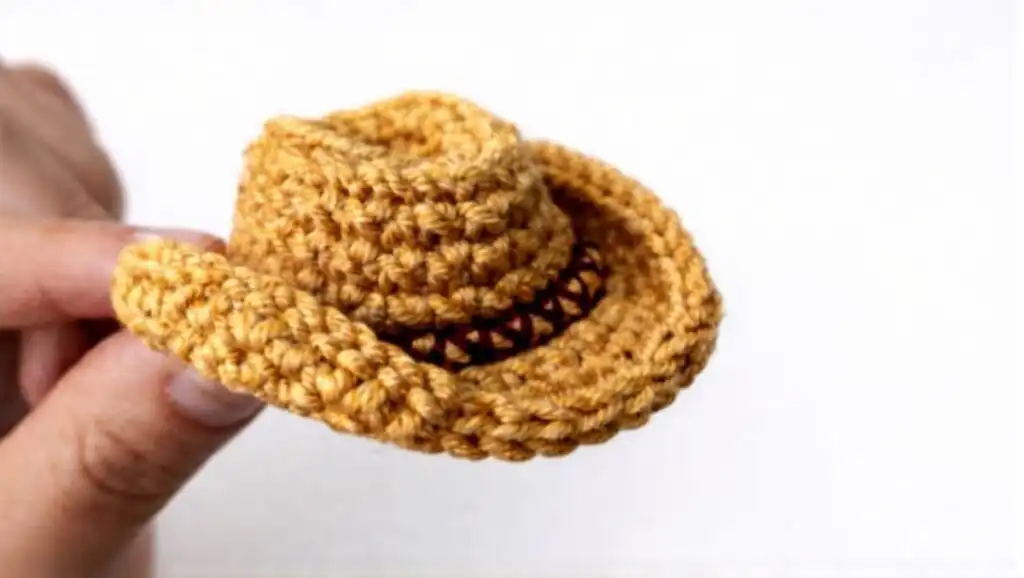
How to Crochet a Mini Cowboy Hat: Beginner-Friendly Step-by-Step Pattern
Embark on a delightful crochet journey as you learn how to crochet a mini cowboy hat with this easy, beginner-friendly step-by-step pattern. This adorable miniature accessory is perfect for a variety of uses, from charming keychains and doll accessories to unique party décor and gift toppers. Get ready to create something small, cute, and instantly recognizable!
This pattern is specifically designed for beginners, utilizing fundamental stitches that work up quickly. You’ll also master valuable techniques like working in front loops only (FLO) and back loops only (BLO) to achieve crisp, defined shaping. Enhance your creation further by adding an optional tiny hat band for that extra touch of Western charm.
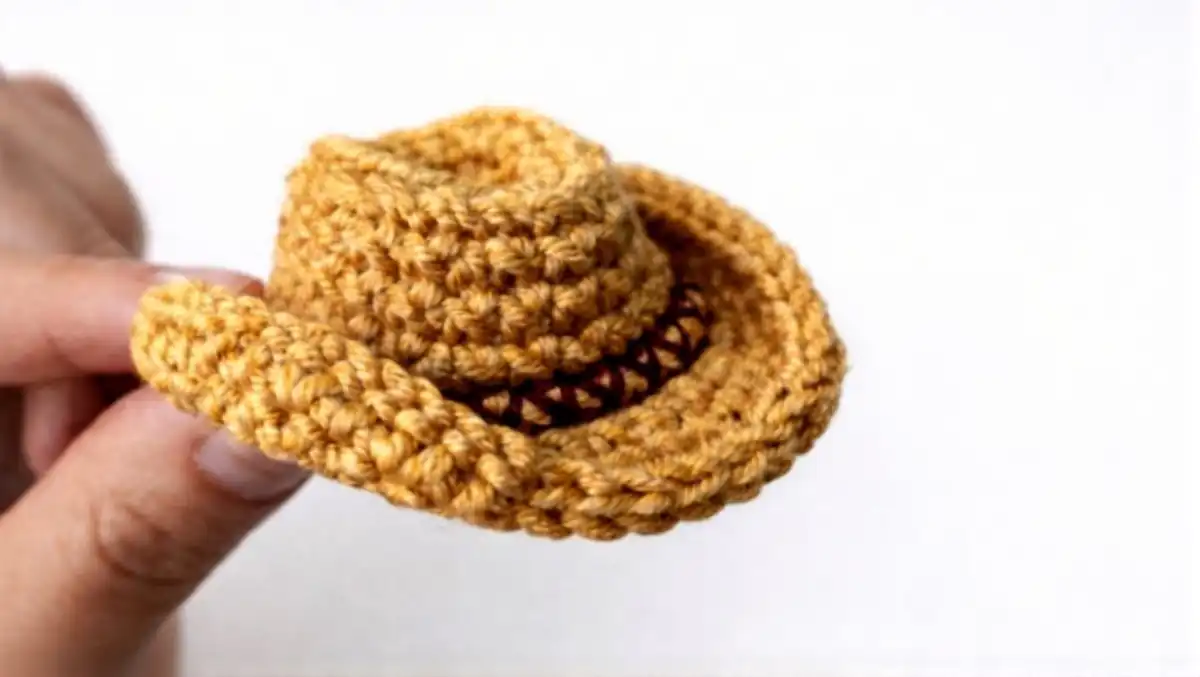
Materials Needed
To successfully crochet one mini cowboy hat, gathering the right materials is your first step. The choice of yarn and hook significantly impacts the final look and feel of your tiny hat. Here’s a detailed breakdown of what you’ll need to get started on this fun project.
- Yarn: Any small to medium weight yarn will work wonderfully for this project. For a truly classic cowboy aesthetic, opt for colors like tan, various shades of brown, cream, or even a soft gray. Both acrylic and cotton yarns are excellent choices, offering durability and good stitch definition for miniature projects.
- Crochet hook: Selecting the correct hook size is crucial for achieving the desired fabric density. Match your hook size to your chosen yarn, typically within the 2.5 mm to 4.0 mm range for small items. For that tight, amigurumi-style finish that helps the hat hold its shape, consider going one size smaller than your yarn label suggests.
- Scissors: Essential for cutting yarn tails and finishing your project neatly.
- Yarn/tapestry needle: This tool is indispensable for weaving in any loose ends, creating a polished look. It’s also used if you decide to add a decorative hat band.
- Stitch marker: A stitch marker, or even a scrap piece of contrasting yarn, is vital for marking the beginning or end of your rounds. Since this hat is worked in continuous spirals, it prevents you from losing your place and ensures accurate stitch counts.
- Optional: Keychain ring, jump ring, or lobster clasp: If you plan to transform your mini cowboy hat into a keychain or bag charm, these hardware pieces will be necessary for attachment.
- Optional: Contrasting yarn: A small amount of yarn in a different color can be used to create a tiny, eye-catching hat band, adding a personalized detail to your finished piece.
Crochet Abbreviations (With Simple Meanings)
Understanding crochet abbreviations is key to following any pattern accurately, especially when working with amigurumi-style designs. This mini cowboy hat pattern uses several common abbreviations that even beginners can quickly master. Familiarize yourself with these terms before you begin.
- MR = Magic Ring (also called Magic Circle): A technique to start crocheting in the round without a hole in the center.
- SC = Single Crochet: The most basic crochet stitch, creating a dense fabric.
- INC = Increase (2 SC in the same stitch): Working two single crochet stitches into one stitch from the previous round to expand the fabric.
- SL ST = Slip Stitch: A very short stitch used to join rounds, move yarn, or create subtle shaping.
- BLO = Back Loop Only: Inserting your hook only into the back loop of the V-shaped stitch, leaving the front loop unworked.
- FLO = Front Loop Only: Inserting your hook only into the front loop of the V-shaped stitch, leaving the back loop unworked.
- ST(s) = Stitch(es): Refers to a single crochet stitch or any other stitch being worked into.
- Rnd = Round: Refers to a complete circle of crochet stitches when working in the round.
Note for beginners: This hat is crocheted in continuous rounds, much like a spiral. This method means you won’t join each round with a slip stitch, making your stitch marker an even more valuable tool to track your progress effectively.
Step-by-Step Crochet Pattern: Mini Cowboy Hat
Before You Start: A Quick Note on Counting
Consistency is vital in crochet, especially with amigurumi and shaped items. Always take a moment to count your stitches at the end of each round. This simple practice ensures your crown develops smoothly and your brim remains perfectly even, which is particularly important during the shaping phases of the pattern.
1) Starting the Magic Ring (Top of Hat)
The magic ring creates a tight, closed center for the top of your hat, preventing any gaps. Mastering this foundational technique will benefit many future small crochet projects. Follow these steps carefully to begin your mini cowboy hat with a flawless start.
Rnd 1: Magic Ring
- Begin by making a magic ring (MR). Ensure it’s secure but not overly tight, allowing you to work stitches into it.
- Work 6 single crochet (SC) stitches directly into the magic ring. Keep your stitches even and manageable.
- Gently pull the tail of the magic ring to close the center completely, forming a neat, tiny circle.
Stitch count: 6 ST. Tip: Place a stitch marker in your very last stitch to clearly indicate the end of Round 1 and the start of Round 2, preventing any confusion.
2) Increasing Rounds (Building the Top Circle)
These initial increasing rounds are crucial for creating the flat, circular base that forms the very top of your mini cowboy hat. By strategically adding stitches, you’ll gradually expand the fabric to the correct diameter before moving on to the crown. Maintain even tension throughout these rounds.
Rnd 2: Increase in Every Stitch
- For this round, you will make one increase (INC) in each single crochet stitch around the entire circle. This means working 2 SC into every stitch from Round 1.
Stitch count: 12 ST. This step doubles your stitch count, creating a noticeable expansion in your work. Ensure each increase is worked neatly into its corresponding stitch.
Rnd 3: Increase + 1 Single Crochet
This round introduces a more gradual increase pattern to keep the circle flat and prevent curling. You will repeat a specific sequence six times around the entire round.
Repeat this sequence 6 times:
- Work 1 INC (2 SC in the next stitch), then work 1 SC in the following stitch.
Stitch count: 18 ST. These early rounds successfully create a perfectly flat circle, establishing the foundation for the top of your mini cowboy hat. This piece should now lie flat without any cupping.
3) Creating the Hat Crown
Now that the top of the hat is formed, it’s time to build the crown—the vertical part that sits on the head. This section introduces specialized techniques like working in the back loop only to create a distinct edge and start building height. Careful stitch placement here ensures a well-defined hat.
Rnd 4: BLO Round (Forms a “Corner”)
This round is critical for shaping the crown. By working only into the back loop, you create a distinct ridge that acts as the “corner” where the top of the hat transitions to the side wall.
This round is crocheted in the back loops only:
- BLO: Work 1 single crochet (SC) in each stitch around, making sure to insert your hook only into the back loop of each stitch.
Stitch count: 18 ST. This BLO round neatly creates a clean edge and effectively begins to shape the crown, giving your hat its initial three-dimensional form.
Rnd 5: Gentle Increase for Crown Width
To give the crown a slight curve and the right width for a classic cowboy hat silhouette, you’ll add a few more stitches in this round. This increase is subtle but important for the overall shape.
Repeat this sequence 3 times:
- Work 1 INC (2 SC in the next stitch), then work 1 SC in each of the next 5 stitches.
Stitch count: 21 ST. This round subtly widens the base of the crown, preparing it for the brim.
Rnd 6: Even Round
This round focuses purely on building height without increasing the stitch count. It allows the crown to grow vertically, creating the body of the hat before the brim begins.
- Work 1 single crochet (SC) in each stitch around.
Stitch count: 21 ST. Maintaining an even stitch count ensures the crown walls remain straight and uniform.
Rnd 7: Increase + 6 Single Crochet
Another strategic increase round helps to gently flare the crown outwards just before the brim begins. This slight widening contributes to the hat’s characteristic silhouette.
Repeat this sequence 3 times:
- Work 1 INC (2 SC in the next stitch), then work 1 SC in each of the next 6 stitches.
Stitch count: 24 ST. This final increase for the crown ensures it has the perfect foundation for the upcoming brim.
Rnd 8: Even Round
This is the last round dedicated to the crown’s height. Working an even round provides the final vertical dimension before transitioning into the brim, ensuring a well-proportioned hat.
- Work 1 single crochet (SC) in each stitch around.
Stitch count: 24 ST. At this stage, you should clearly see a tiny crown taking shape, resembling the top portion of a miniature hat. It’s exciting to see it come to life!
4) Making the Brim
The brim is what truly defines the cowboy hat. This section will guide you through creating that distinctive outward flare, starting with another specialized loop technique to ensure a clean, professional finish that really stands out. Proper execution here is key to a well-formed brim.
Rnd 9: FLO Round (Starts the Brim)
This round is the crucial “brim-making” round, utilizing the front loop only (FLO) technique. Working into the front loops causes the fabric to naturally jut outwards, forming the foundation of the brim.
This round is crocheted in the front loops only. Repeat this sequence 12 times:
- Work 1 INC (2 SC in the next stitch), then work 1 SC in the following stitch.
Stitch count: 36 ST. Working in FLO helps the brim visibly pop outward from the crown, creating a distinct and professional-looking edge. This is a defining moment for your mini cowboy hat!
Rnd 10: Even Brim Round
After the initial flare of the brim, this round helps to establish its width and give it a bit more substance before the final shaping. It’s a straightforward round to solidify the brim’s base.
- Work 1 single crochet (SC) in each stitch around.
Stitch count: 36 ST. You should now have a relatively flat brim emerging from the crown. The next step is where the unique western shaping truly comes into play, transforming it into a cowboy hat.
5) Shaping the Cowboy Hat Brim (Signature Curves)
This is where the magic happens! To achieve the iconic western curve of a cowboy hat, you’ll combine different stitch types within a single round. Mixing slip stitches with increases creates varied tension, causing the brim to naturally curl and shape itself into that classic silhouette.
Rnd 11: Slip Stitch + Increase Pattern for a Western Curve
This intricate round is essential for achieving the gentle, undulating shape characteristic of a cowboy hat brim. By strategically placing slip stitches and increases, you create areas of flatness and flare.
Work the following in order around the brim:
- Start with 3 slip stitches (SL ST). These will pull the edge inward slightly.
- Then, repeat the sequence (1 INC, 1 SC) 6 times. This section will create a subtle flare.
- Next, make 6 slip stitches (SL ST). This will flatten the next section of the brim.
- Then, repeat the sequence (1 SC, 1 INC) 6 times. This creates another flared section on the opposite side.
- Finish the round with 3 slip stitches (SL ST).
This carefully designed sequence creates a brim with intentionally varied tension around its edges, naturally encouraging that classic cowboy hat curve. It’s truly a clever bit of crochet design.
Fasten Off
- Once Round 11 is complete, cut your yarn, leaving a tail of about 4-6 inches.
- Fasten off your work by pulling the tail completely through the loop on your hook.
- Using your yarn needle, weave in the remaining tail neatly into the stitches of the brim to secure it and hide the end.
6) Shaping the Cowboy Hat (Hands-On Finishing)
While the crocheted stitches provide the foundation, the final, iconic cowboy hat shape comes from a little hands-on manipulation. This is the fun part where you truly bring your mini hat to life with your fingers. Don’t be afraid to gently mold and adjust it.
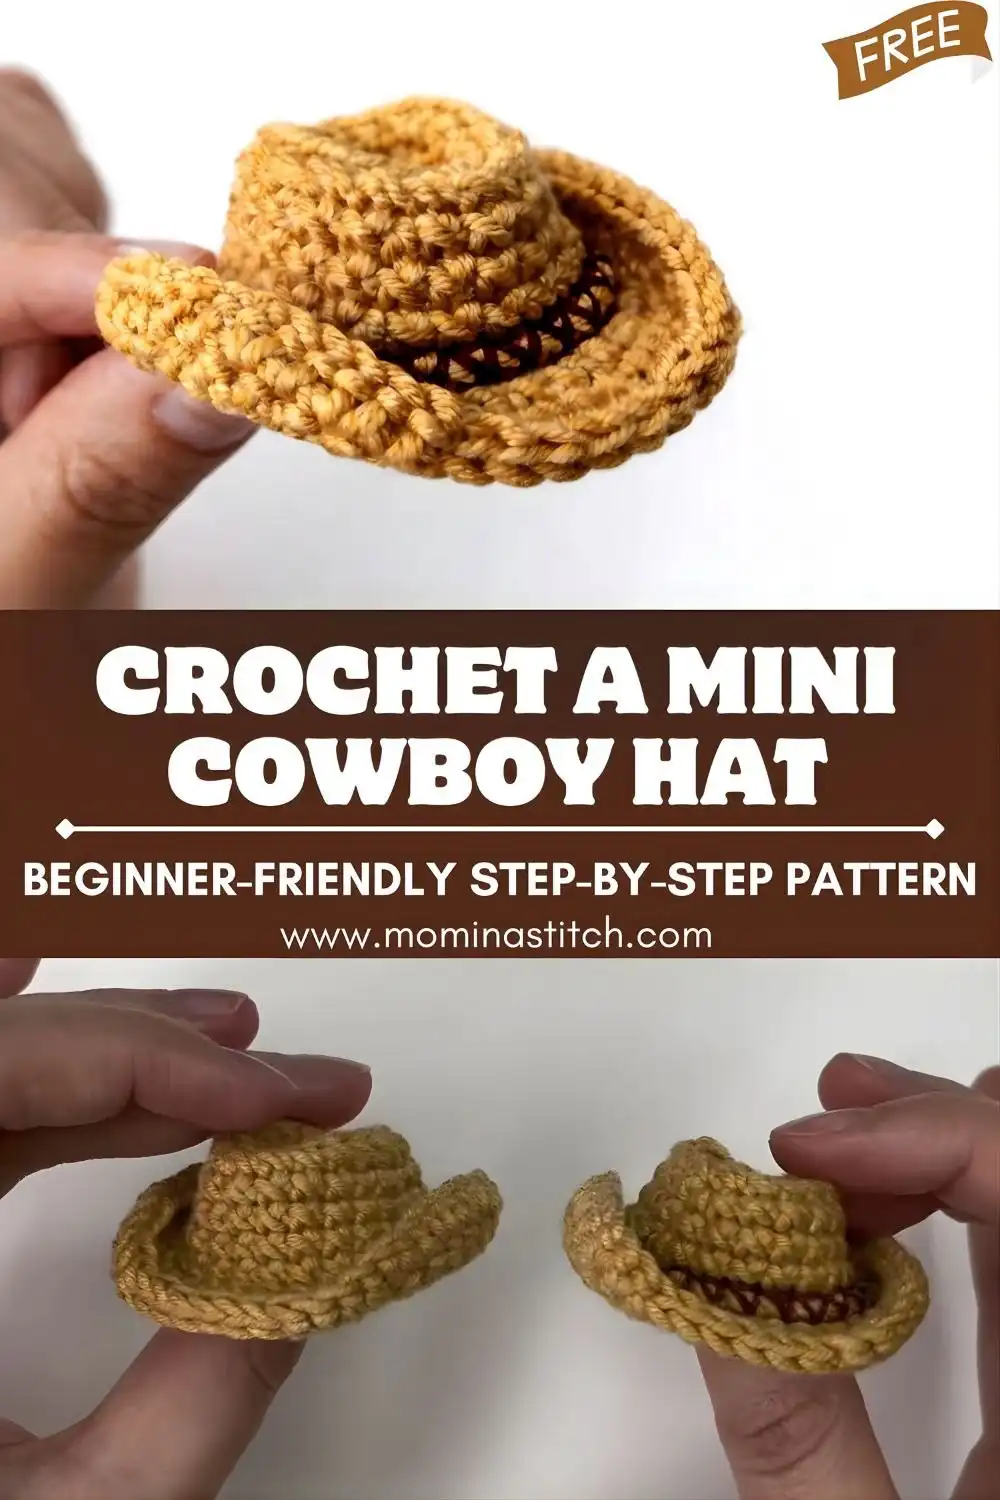
- Gently pinch the top center of the crown with your fingers to create that iconic dent that defines a cowboy hat.
- Carefully bend the sides of the brim slightly upward. This gives it the characteristic rolled-up look.
- Adjust and refine the curves until you are satisfied with the overall shape and how it looks.
If your chosen yarn is particularly soft, the shaping will hold better if you press and pinch the desired curves for several seconds. For more lasting results, you can lightly steam-block acrylic yarn (with extreme caution) or damp-shape cotton yarn, allowing it to dry in the desired position.
Optional: Add a Tiny Hat Band (Easy Detail)
To make your mini cowboy hat even more adorable and finished, consider adding a simple hat band. This small detail can significantly enhance its overall appearance and give it a more polished, realistic feel. It’s a quick addition that yields big results.
Simple Embroidered Band
Adding an embroidered band is a straightforward way to incorporate a contrasting color or texture without complex techniques. It’s an easy detail that elevates the entire project.
- Thread a yarn needle with a small piece of contrasting yarn. Choose a color that complements your main hat color.
- Embroider small, simple running stitches or whip stitches around the base of the crown, right where it meets the brim. Aim for an even look.
- Once you’ve completed the band, tie off the ends securely on the inside of the hat and carefully weave in any remaining yarn tails to hide them.
This tiny hat band adds a beautiful finishing touch, making your mini cowboy hat look more complete and polished. It’s especially effective if you’re creating these hats for gifts, craft fairs, or detailed photography.
Tips for Beginners (And Common Mistakes to Avoid)
Even though a mini hat is a small project, it employs real crochet skills that can sometimes be tricky for beginners. Heeding these tips and understanding common pitfalls will help ensure your crocheting experience is smooth, enjoyable, and frustration-free.
Helpful Tips
- Use a stitch marker every round: This pattern is worked in continuous rounds, which means there’s no distinct seam to indicate the start/end of a round. A stitch marker is your best friend here; always move it to the last stitch of the round.
- Count your stitches diligently: The specific shaping of this hat, especially the brim and crown transitions, relies heavily on accurate stitch counts. Double-check your stitch count at the end of each round to avoid errors.
- Pull the magic ring tight: A loose magic ring will leave an unsightly hole at the very top of your hat. Ensure you pull the yarn tail firmly to close the center completely before securing it.
- Keep your tension even: Consistent yarn tension throughout your work results in a smoother, more professional-looking fabric. Uneven tension can lead to a lumpy or irregular brim and crown.
Common Mistakes
- Forgetting BLO/FLO rounds: These specific rounds are integral to the hat’s structure.
- Round 4 is worked in BLO (back loop only) to create the distinct edge for the crown.
- Round 9 is worked in FLO (front loop only) to properly start the brim, making it flare outwards.
Missing these will significantly alter the hat’s shape.
- Skipping slip stitches in Round 11: The slip stitches in Round 11 are not just filler; they are precisely placed to help create the natural cowboy brim curve. Omitting them will result in a flatter, less defined brim.
- Not shaping at the end: The physical manipulation in step 6 is crucial. The hat often looks fairly flat until you pinch the crown and curl the brim. Don’t skip this final, transformative step!
Customization Ideas (Make It Your Own!)
One of the most enjoyable aspects of crocheting small accessories is how easily they can be personalized. These mini cowboy hats are a fantastic canvas for your creativity. Experiment with different colors, textures, and embellishments to make each one uniquely yours. This is where your personal style truly shines!
Change the Colors
The color of your yarn can completely transform the personality of your mini cowboy hat. Don’t limit yourself to traditional shades; explore a spectrum of possibilities to match various themes or preferences.
- Classic cowboy: Opt for a traditional tan or light brown hat paired with a darker brown or black band for an authentic look.
- Cute pastel: Create a whimsical version with a soft pink or baby blue hat, accented with a crisp white or cream band.
- Holiday theme: Use red or green yarn for the hat and a contrasting gold or silver band for festive holiday decor.
- Party theme: Match the hat and band colors to specific event themes, such as vibrant pink for a bachelorette party, or primary colors for a child’s rodeo birthday celebration.
Try Different Yarn Types
The type of yarn you choose impacts not only the look but also the drape and stiffness of your mini hat. Each fiber offers distinct qualities that can alter the final product. Explore different textures for varied results.
- Cotton yarn: Known for its crisp stitch definition and ability to hold shape well, cotton is excellent for a structured mini hat.
- Acrylic yarn: A popular choice for beginners, acrylic is soft, widely available, and comes in an extensive range of colors. It’s also very forgiving.
- Velvet yarn: For a plush, luxurious feel, velvet yarn creates a wonderfully soft and tactile hat. Be aware that stitch counting can be harder with velvet, making it better for those with a bit more crocheting confidence.
Add Decorations
Embellishments can add extra character and flair to your mini cowboy hat, turning it into a tiny work of art. These small additions can make a big impact on the overall design. Let your imagination guide your choices for unique touches.
- Sew on a tiny bead or a small, flat button to resemble a belt buckle for an authentic Western detail. Ensure it’s securely attached.
- Attach a tiny star charm to the front of the hat band or brim for a classic cowboy motif.
- Stitch on a very small, pre-made bow or a tiny crocheted flower for a touch of feminine charm.
- If making an ornament or charm, add a hanging loop by chaining a few stitches and slip stitching it back to the crown.
Uses for Mini Cowboy Hats
Once you’ve crocheted your adorable mini cowboy hat, you might wonder what to do with it! These versatile little creations have a surprising number of practical and decorative uses. Here are some fun ideas to inspire you and make the most of your charming new accessory.
- Keychains: Attach a jump ring through the top of the crown or stitch a small loop inside to create a unique and personalized keychain that’s easy to spot.
- Doll & amigurumi accessories: These hats are the perfect size for dressing up tiny plushies, crochet dolls, or amigurumi animals, adding character to your creations. Consider making a collection for different toys.
- Party decorations: Make a batch of these hats and string them together to create an adorable garland for a Western-themed party, baby shower, or rodeo event. They add a whimsical touch. For more party ideas, check out these holiday crochet patterns.
- Gift toppers: Instead of a traditional bow, tie a mini cowboy hat onto a gift with ribbon for a unique, handmade finishing touch that recipients will adore.
- Bag charms: Clip your mini hat to a purse zipper, backpack, or tote bag to add a touch of personality and flair to your accessories.
- Photo props: These tiny hats make fantastic props for product photography, craft fair displays, or themed flat lays. They add a charming and whimsical element to any picture.
Conclusion
This mini cowboy hat project, while small in size, packs a big personality and offers a fantastic learning experience for crocheters of all levels. It’s beginner-friendly, works up quickly, and boasts incredible versatility, whether you transform it into a keychain, a doll accessory, or a charming party decoration. For more quick projects, explore these easy 1-hour crochet ideas!
Best of all, tackling this pattern helps you master valuable techniques like working in BLO/FLO rounds, understanding simple increases, and shaping with slip stitches—skills that are transferable to many other crochet projects, including creating a variety of adorable amigurumi designs. Give this pattern a try, experiment with different colors, and remember that every stitch you make builds your skill. Don’t worry if your first brim isn’t absolutely perfect; practice makes progress. Once you make one, you might just find yourself wanting to create a whole collection of tiny cowboy hats!
We hope you enjoyed crocheting this adorable mini cowboy hat! Don’t forget to save this pin to your Pinterest board so you can easily find it later. Share your finished creations with us in the comments below or tag us on social media!


