Master the Easy Shell Stitch Crochet Pattern: A Comprehensive Guide
The Easy Shell Stitch Crochet Pattern is a beloved technique in the world of fiber arts, cherished for its charming texture and straightforward execution. This stitch, composed of simple single and double crochets, creates a beautiful, wavy, fan-like motif that resembles seashells, adding an elegant touch to any project. Its repeatable nature makes it a fantastic choice for both beginners eager to expand their skills and experienced crocheters looking for a relaxing, rhythmic pattern.
You’ll find the shell stitch incredibly versatile, suitable for a vast array of creations. From cozy baby blankets and garments like hats and baby rompers to stylish adult accessories such as scarves, tops, and bags, its appeal is undeniable. Its simplicity belies the intricate-looking results, making it a perfect foundation for projects where you want a striking visual without complex stitch work. Master this fundamental stitch, and unlock a world of creative possibilities with a beginner-friendly crochet kit.
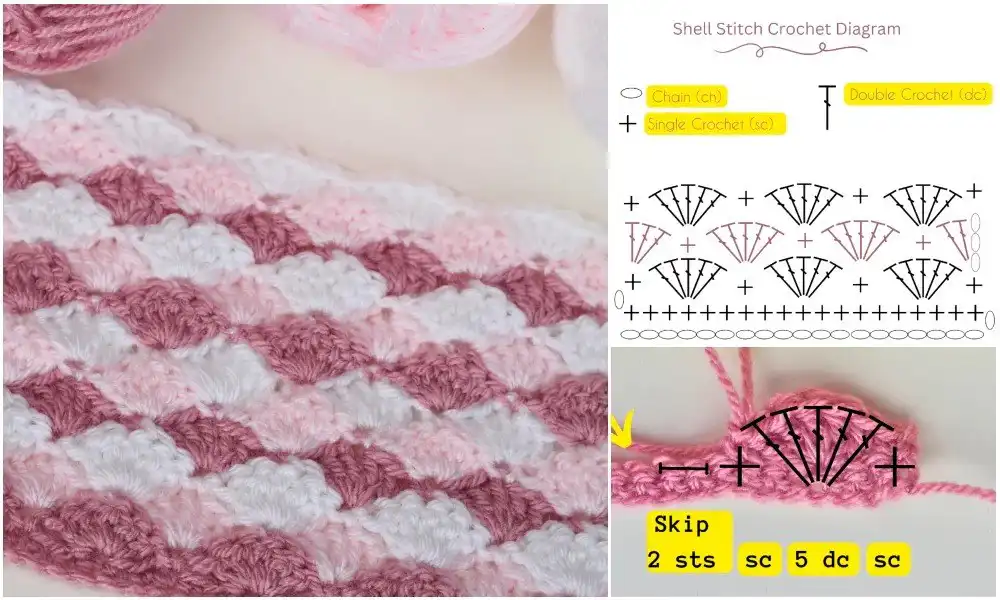
The shell stitch is remarkably simple to learn and highly repeatable, making it a go-to for many crocheters. Despite using only basic single and double crochet stitches, it yields a fascinating, undulating texture that truly comes alive with color changes. This unique characteristic allows for vibrant, multi-hued designs or subtle, monochromatic elegance.
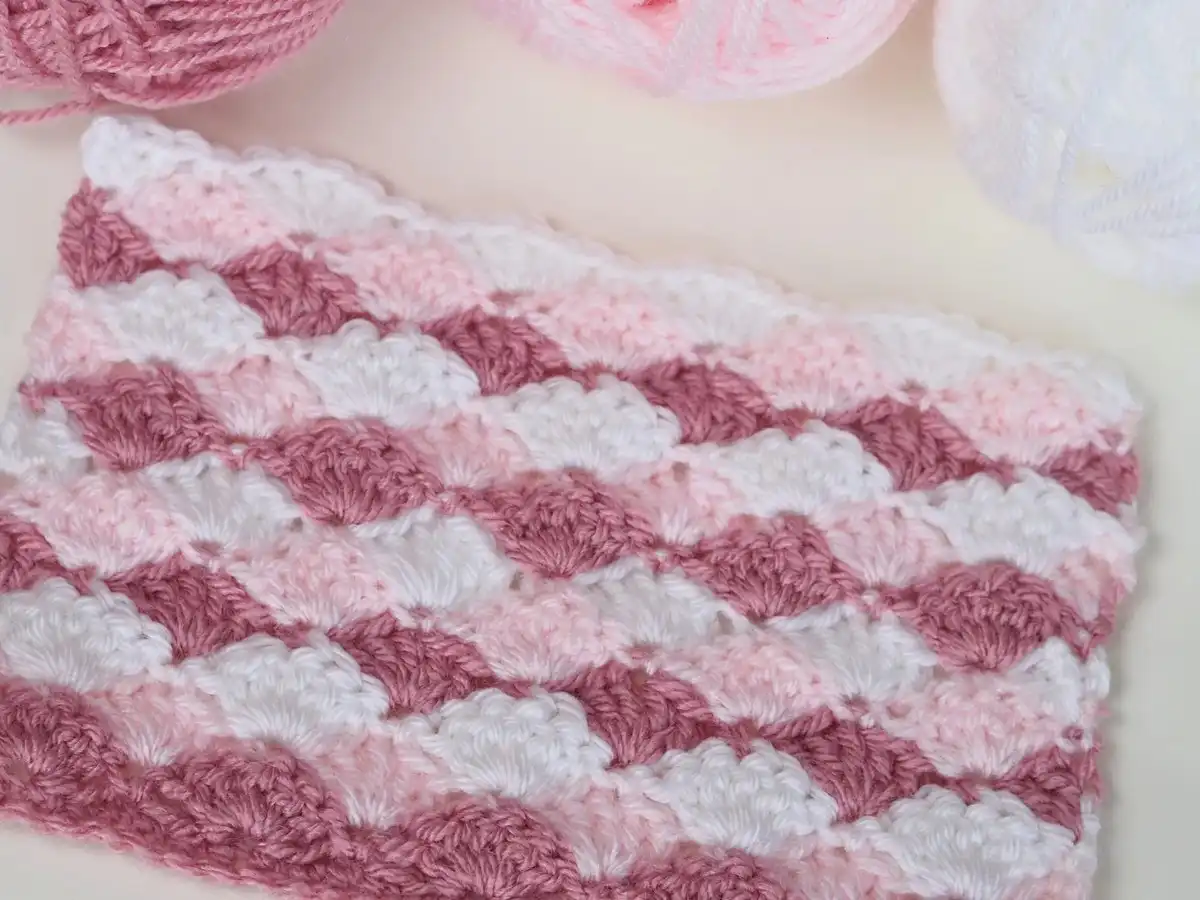
Its ease of learning makes the shell stitch an excellent choice for those new to crochet who wish to develop their skills beyond basic stitches. The pattern repeats every two rows, building confidence with each completed section. All you need is a foundational understanding of chaining, single crochet, and double crochet, and you’re ready to create beautiful fabric.
What is a Shell Stitch in Crochet?
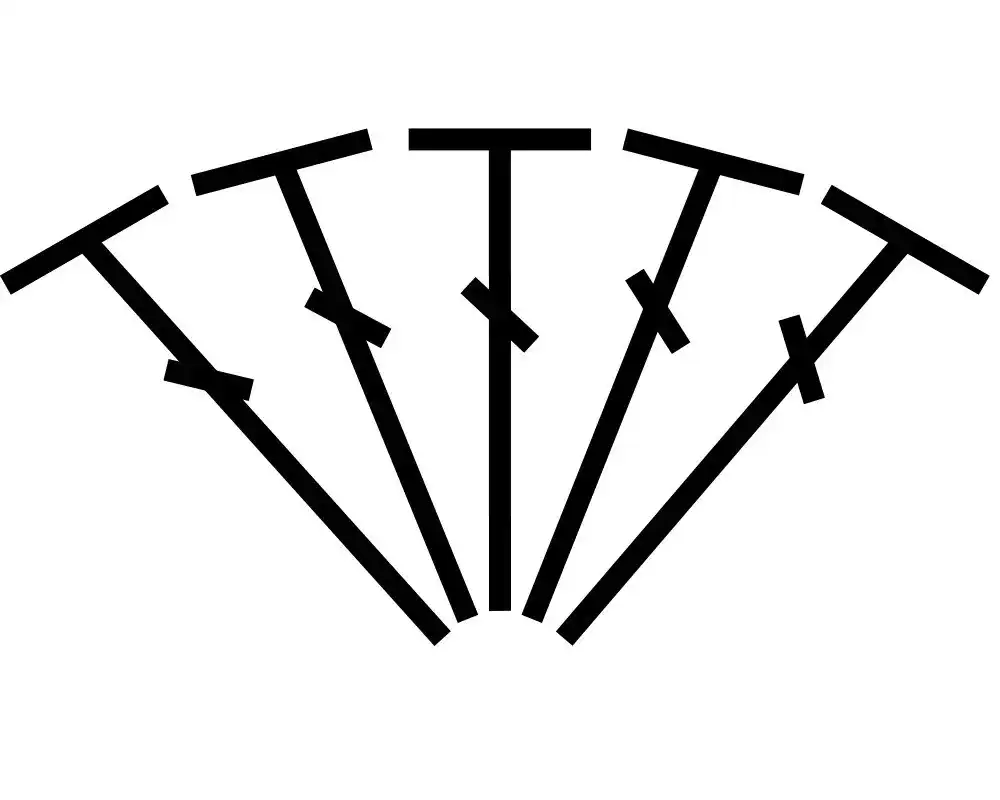
A shell stitch is a distinctive crochet motif characterized by a cluster of stitches worked into a single space, creating a fan-like shape. Typically, this involves working several taller stitches, most commonly double crochets, into the same stitch or chain space. Each shell is usually anchored by a single crochet in the previous row, forming a defined scallop along the edge. The classic version involves five double crochets into one space, followed by a single crochet in a subsequent stitch to secure the shell’s shape.
On crochet diagrams, the shell stitch is often represented by a unique symbol that clearly illustrates the grouping of stitches emanating from a single point. While five double crochets form the basic shell, variations can include more stitches or taller stitches like treble crochets to create larger, more pronounced shells. The name itself is derived from its visual resemblance to the natural curvature and ridged texture of a seashell, making it an instantly recognizable and beloved pattern.
The Shell Stitch Crochet Diagram
The shell stitch is renowned for being a lovely and highly repeatable pattern, perfect for those moments when you want your hands to work almost subconsciously, perhaps while enjoying your favorite movie. Crochet diagrams provide a universal language for patterns, offering a visual roadmap that transcends language barriers. They illustrate the exact placement and sequence of each stitch, allowing you to visualize the fabric as it builds up.
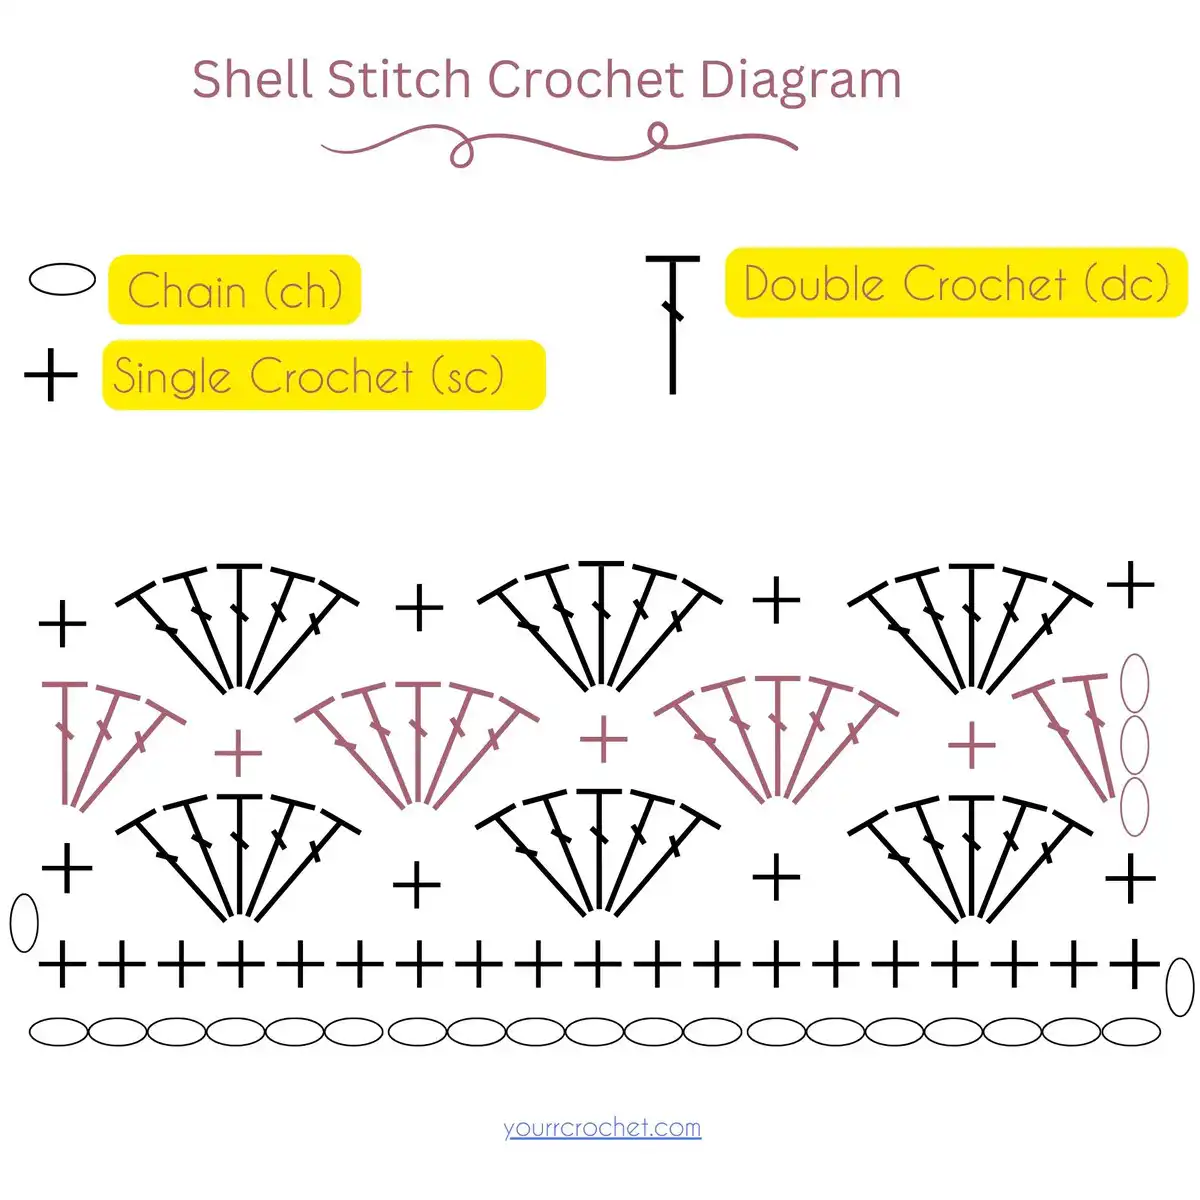
Below, you’ll find a clear diagram illustrating the precise sequence of simple stitches that come together to form the captivating shell stitch pattern. This easy-to-read chart is an invaluable tool, providing all the visual information necessary to successfully lay out and execute your shell stitch project. Even if you prefer written instructions, understanding the diagram can deepen your comprehension of the stitch’s construction and flow.
Tips to help you to read crochet diagrams
If you’re new to reading crochet stitch diagrams, there’s no need to feel intimidated; they are often simpler to follow than you might think. Diagrams use standardized symbols to represent different stitches. For the shell stitch, you’ll primarily encounter symbols for the chain, single crochet, and double crochet, each clearly marked on the diagram. Familiarizing yourself with these few symbols and a good crochet stitch dictionary is the first step to unlocking a world of patterns.
To navigate a crochet diagram, you generally start from the bottom right (for right-handed crocheters) or bottom left (as in many universal charts) with your foundation chain, reading from right to left. Subsequent rows typically alternate directions, guided by turning chains that elevate you to the next level. The diagram above explicitly shows the starting point, the initial chain count (19 in this example), and the progression across rows, making it an excellent visual aid for mastering the shell stitch.
Shell Stitch Crochet Pattern and Tutorial
The popular crochet shell stitch pattern holds a special place in the hearts of handcraft enthusiasts, and its widespread use in various projects is easily understood. Its inherently pretty and delicate appearance has solidified its status as one of the most cherished and frequently employed stitch patterns among crocheters worldwide. This guide aims to make learning this beautiful stitch as straightforward as possible, even for absolute beginners.
Prepare to be amazed at how quickly you can master this elegant technique! In less than 15 minutes, you can transform from a shell stitch novice into a confident pro. This stitch produces a fabric with a solid yet uniquely textured design, explaining its popularity for items like baby blankets, shawls, and crochet shawls, and stylish tops. Shell stitch projects are also wonderfully customizable; simply introduce your favorite colors in different combinations to create stunning striped effects or color blocks that reflect your personal style. Let’s gather our materials and begin this exciting journey!
Materials you will need:
To embark on your shell stitch journey, selecting the right materials is key to a satisfying experience and a beautiful finished product. While you can certainly use any yarn you have on hand for practice, understanding yarn weights will help you achieve specific project goals. For beginners, worsted-weight yarn (often labeled as size 4 medium) is highly recommended due to its versatility and ease of handling. It’s perfect for a wide range of items, from bags and cardigans to blankets, offering excellent stitch definition.
However, the ultimate choice of yarn should always align with your project’s intended use. Lighter yarns, such as DK (Double Knitting) or sport weight, are ideal for creating more delicate, breathable items like summer tops or dresses, offering a lovely drape. Your crochet hook is equally crucial; its size must correspond with your chosen yarn to achieve the correct tension and stitch size. A typical hook size for worsted weight yarn, often used in baby blankets, might be H-8 (5mm) or I-9 (5.5mm). Always check your yarn label for the manufacturer’s recommended hook size.
Beyond yarn and hook, you’ll need a sharp pair of scissors to cleanly cut yarn tails. Finally, a yarn or tapestry needle is indispensable for weaving in those loose ends, giving your finished piece a professional and polished appearance. These tools are all you need to create stunning shell stitch projects.
Abbreviations Used in This Pattern
To make following this tutorial as clear and concise as possible, we will be using standard US crochet abbreviations. Familiarizing yourself with these will allow you to read most crochet patterns with ease. Here are the abbreviations you’ll encounter:
- ch = chain stitch
- dc = double crochet stitch
- sc = single crochet stitch
- st/sts = stitch/es
For example, if you see “work 5 dc,” it simply means you need to make five double crochets in the specified location. These abbreviations are universal in US crochet patterns, making them a valuable part of your crochet vocabulary.
Pattern Notes
It’s important to note that this shell stitch pattern, like many you’ll find in the United States, is written using US crochet terms. This distinction is crucial because US and UK crochet terms use the same words (like “double crochet”) to refer to different stitches. Always confirm which terminology a pattern uses before you begin to avoid confusion and ensure your project turns out correctly. This pattern will guide you step-by-step through each instruction based on the US standard.
How to Crochet a Shell Stitch Step-By-Step
Below, you will find a detailed, step-by-step guide to creating an easy shell stitch. To enhance clarity, especially for those who are visual learners, this tutorial incorporates photo demonstrations for each crucial stage of the shell stitch. Follow along closely, and you’ll master this beautiful stitch in no time.
Foundation:
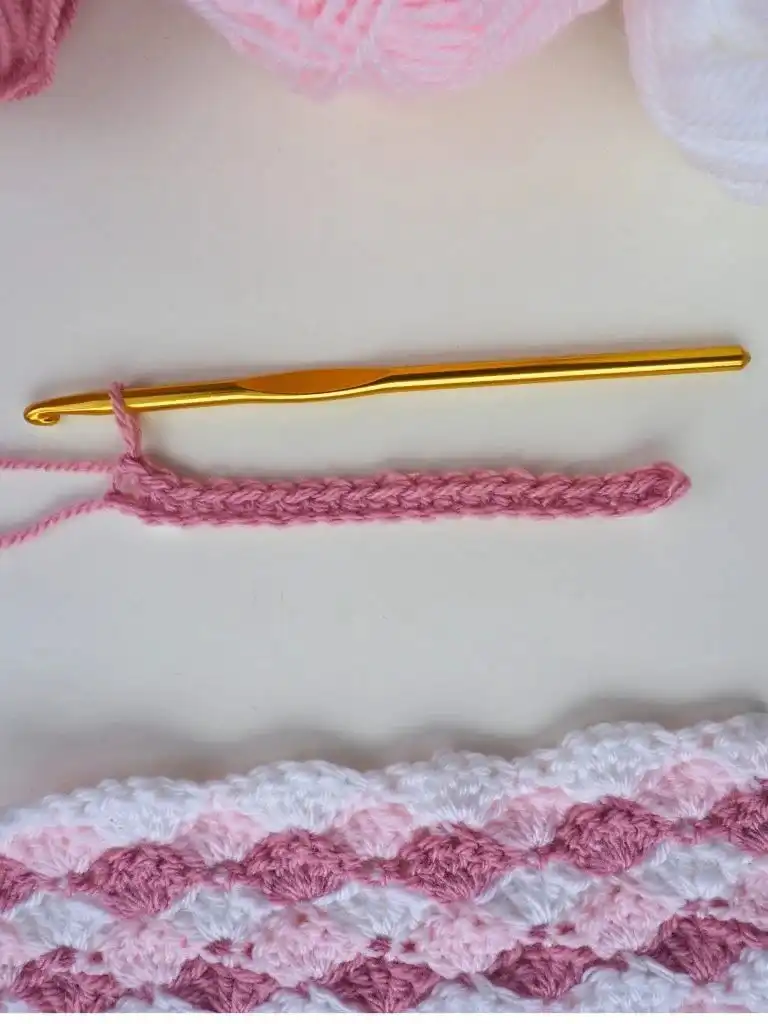
The foundation chain for the shell stitch is calculated using a multiple of 6, plus 1, plus a turning chain. This means you’ll typically chain a multiple of 6 (e.g., 12, 18, 24, etc.), then add 1 extra chain for your initial stitch, and then an additional chain for your turning chain. For instance, to create 3 shells across your first row, you would calculate 3 x 6 = 18, then add 1 (19), and finally add 1 for the turning chain, making a starting chain of 20. If you wish to add more shells, simply add 6 chains for each additional shell you plan to make.
Many patterns might state a multiple of 6 plus 2 for the foundation chain, where the turning chain is implicitly included in the “plus 2.” However, for this tutorial and for beginner clarity, we’ll start with a base row of single crochets. This approach makes it much easier to count your stitches accurately and ensures proper spacing for your first row of shells. For our example swatch with 3 shells per row, begin by chaining 19. Then, make one additional chain (your turning chain), and then work a single crochet into each of the 19 chains across, resulting in 19 single crochets in total. This creates a stable base that simplifies stitch placement for your first shell row.
Row 1:
With your foundation row of single crochets complete, we are ready to form our first beautiful shells. This row establishes the core pattern, so pay close attention to stitch placement for crisp results.
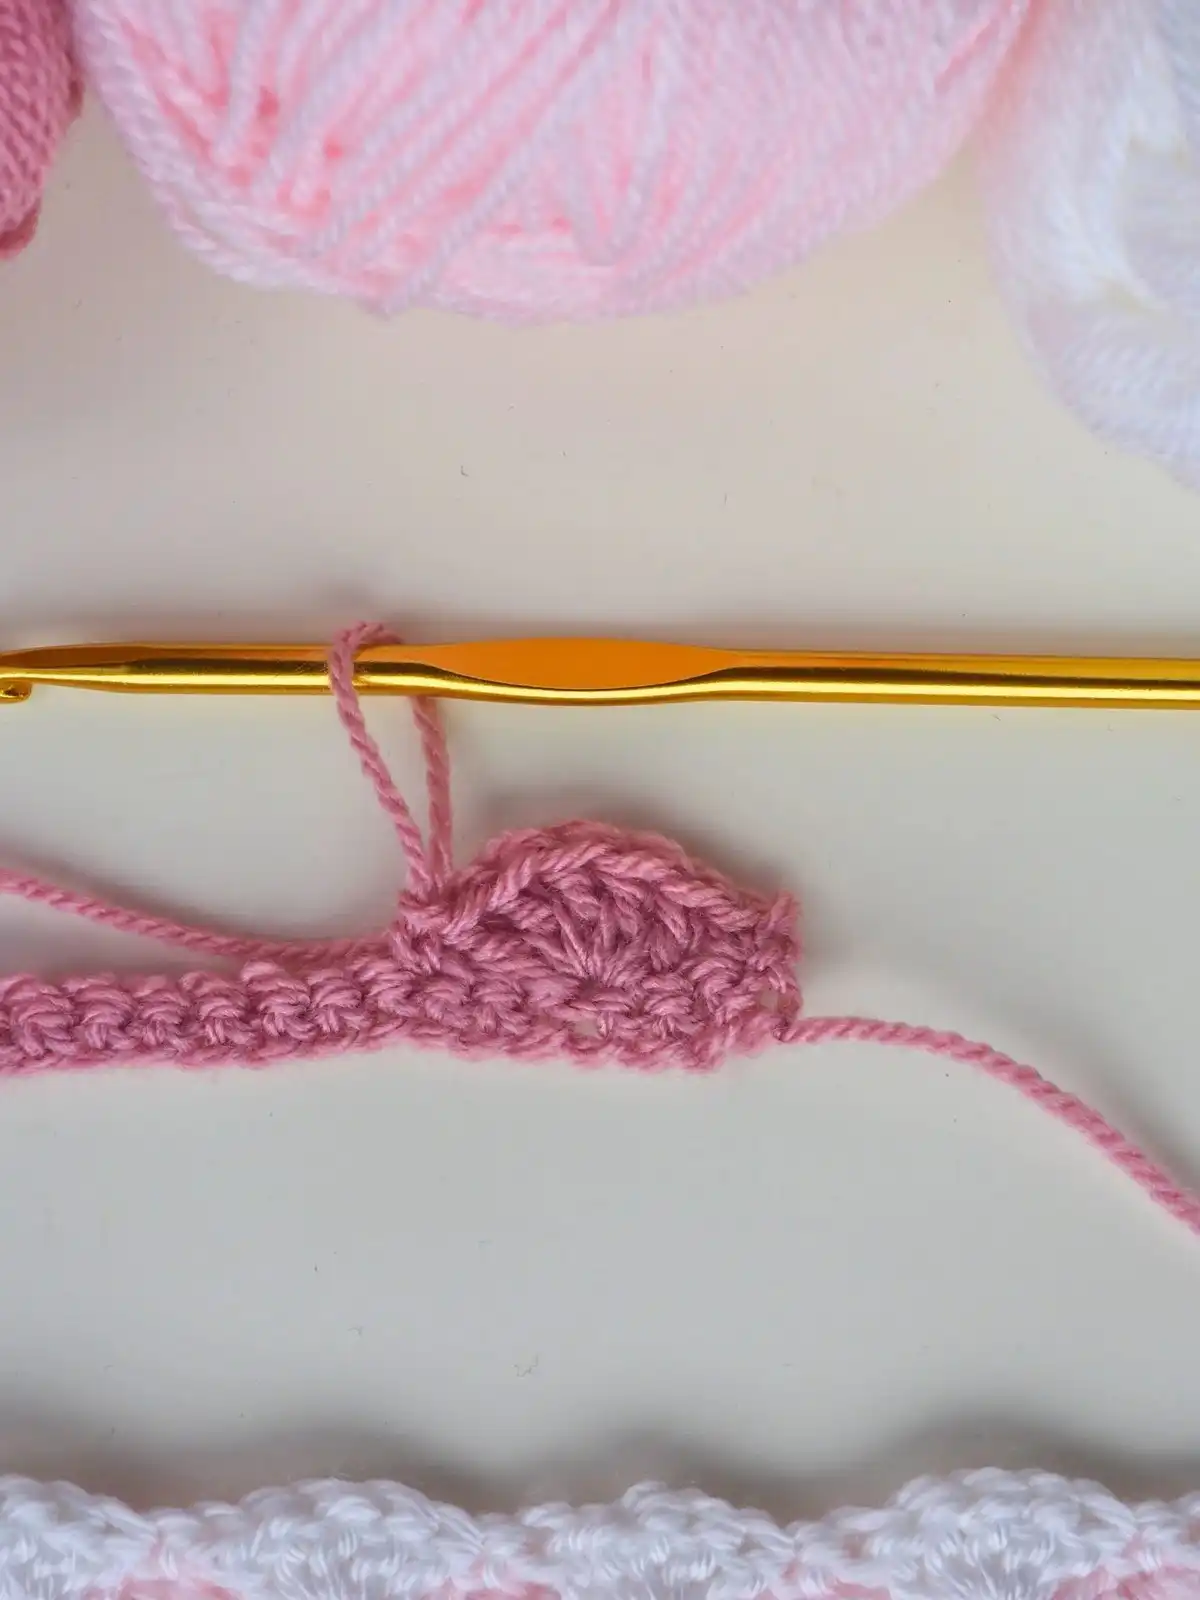
Step 1: Begin the row by chaining 1 (this acts as a turning chain, which doesn’t count as a stitch but helps bring your yarn to the correct height). Then, make one single crochet (sc) into the second chain from your hook. This initial single crochet will anchor your first shell.
Step 2: Next, you’ll create your first full shell. Skip the next 2 stitches from your hook. In the very next stitch, work 5 double crochets (dc) all into that single stitch. This cluster of double crochets forms the characteristic fan shape. After completing the 5 dc, skip the next 2 stitches again, and then make a single crochet (sc) into the next stitch. This single crochet completes and anchors your first shell, preparing the way for the next.
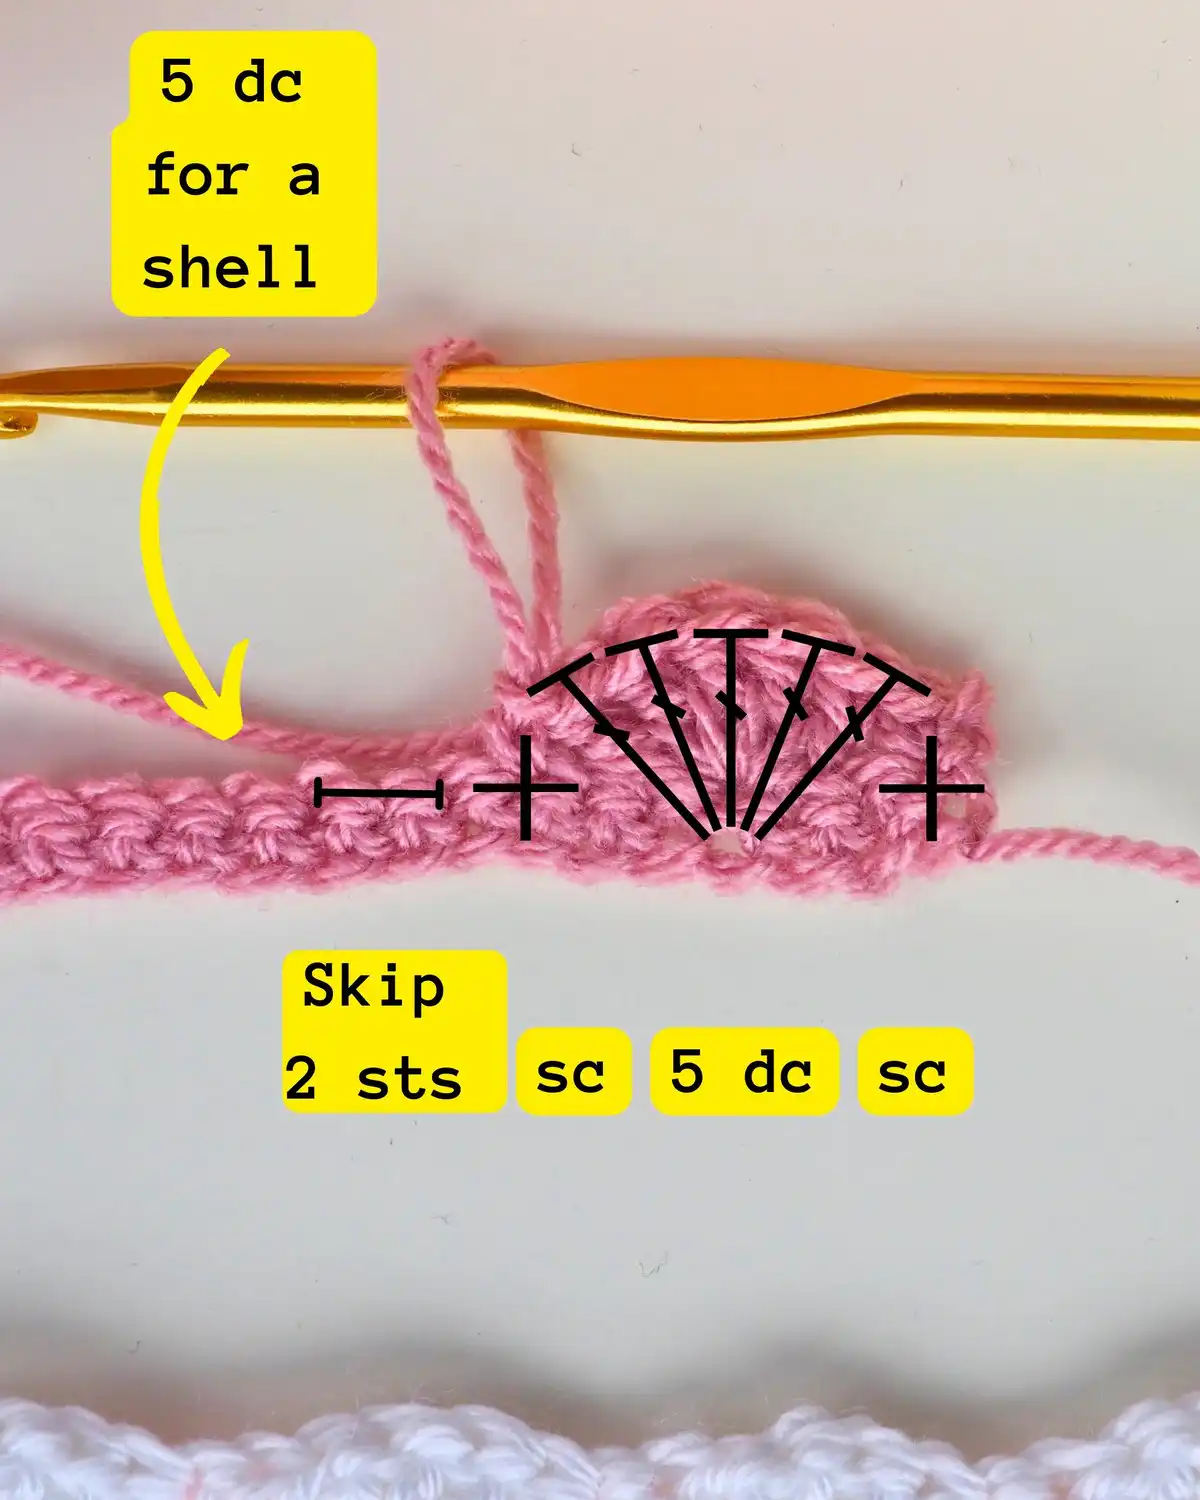
Step 3: Continue repeating Step 2 across the row until you reach the end. Each repetition will create another beautiful shell. You will skip 2 stitches, work 5 dc into the next, skip 2 stitches, and then sc into the next stitch. If you’re a visual learner, observing the schematic diagram below can significantly clarify this repeating sequence, showing exactly where each stitch should fall. This consistent repetition is what makes the shell stitch so rhythmic and enjoyable once you get the hang of it.
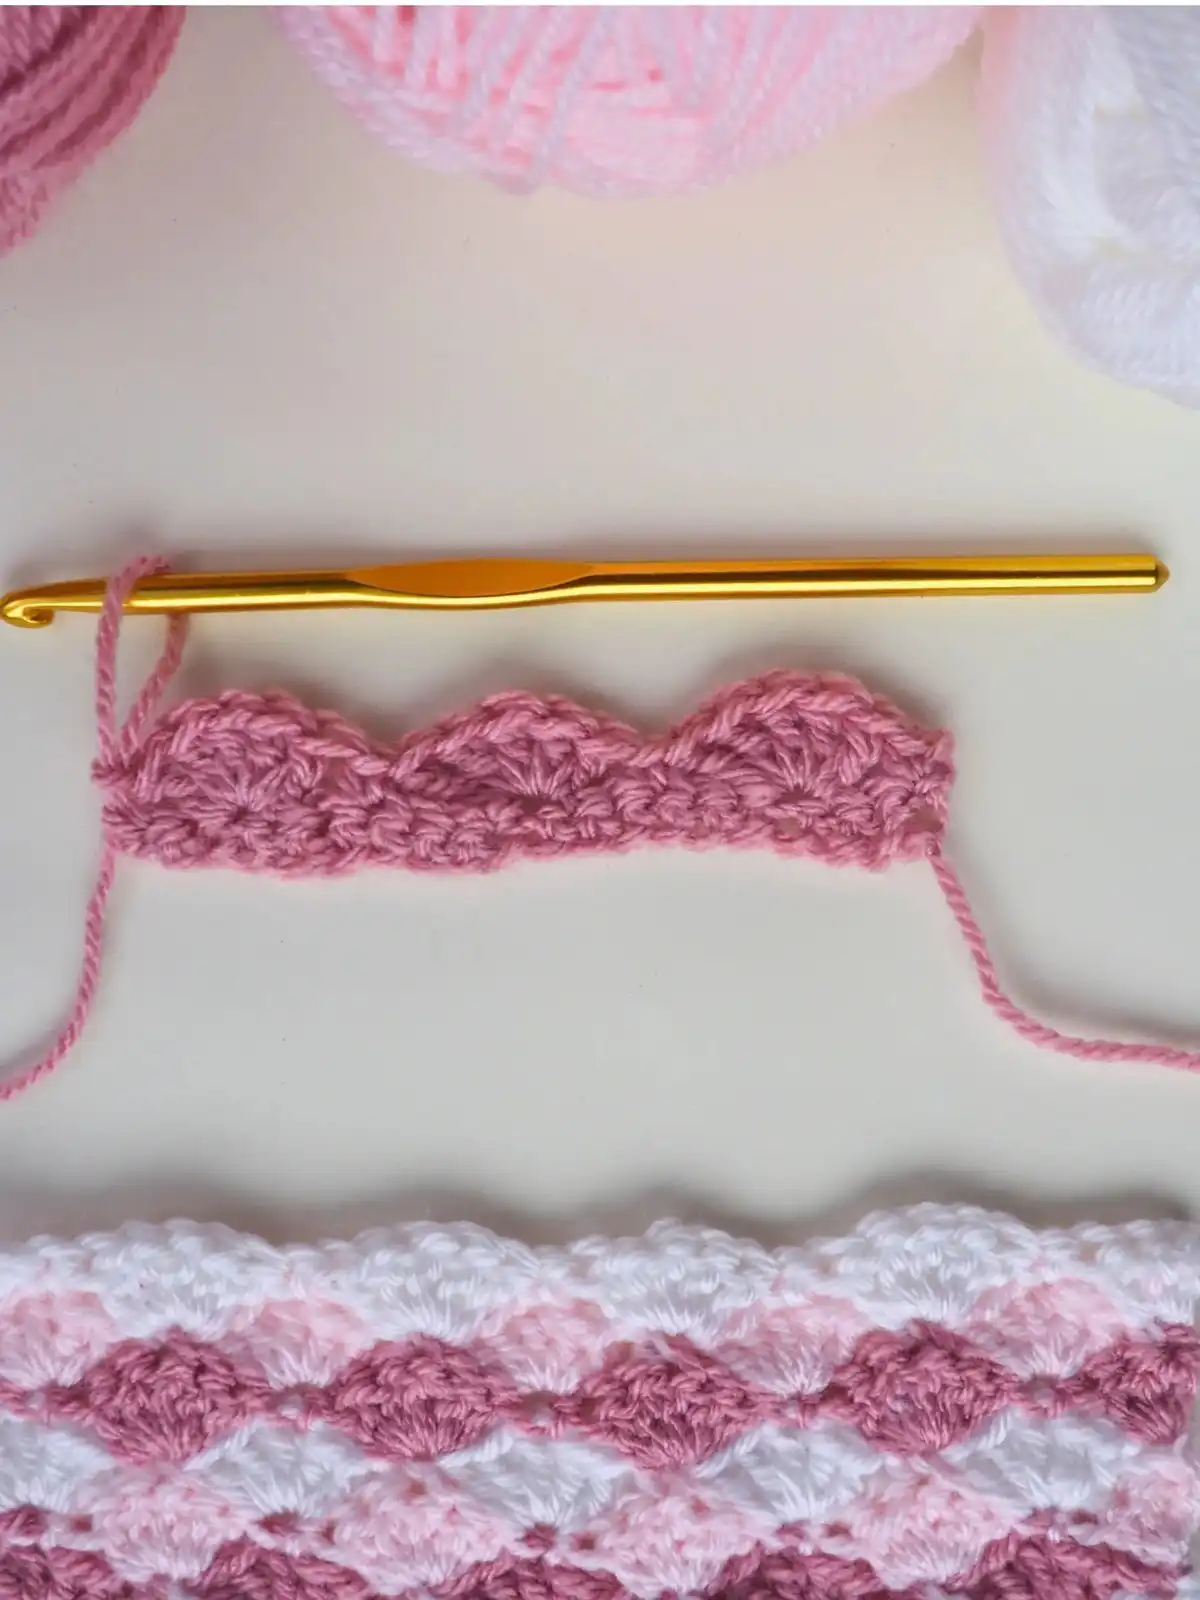
The final stitch of Row 1 should always be a single crochet (sc) worked into the very last single crochet from your previous foundation row. This ensures your row ends neatly and consistently. Once this final stitch is made, turn your work over to prepare for Row 2. Your first row of defined shells should now be visible, laying the groundwork for the rest of your project.
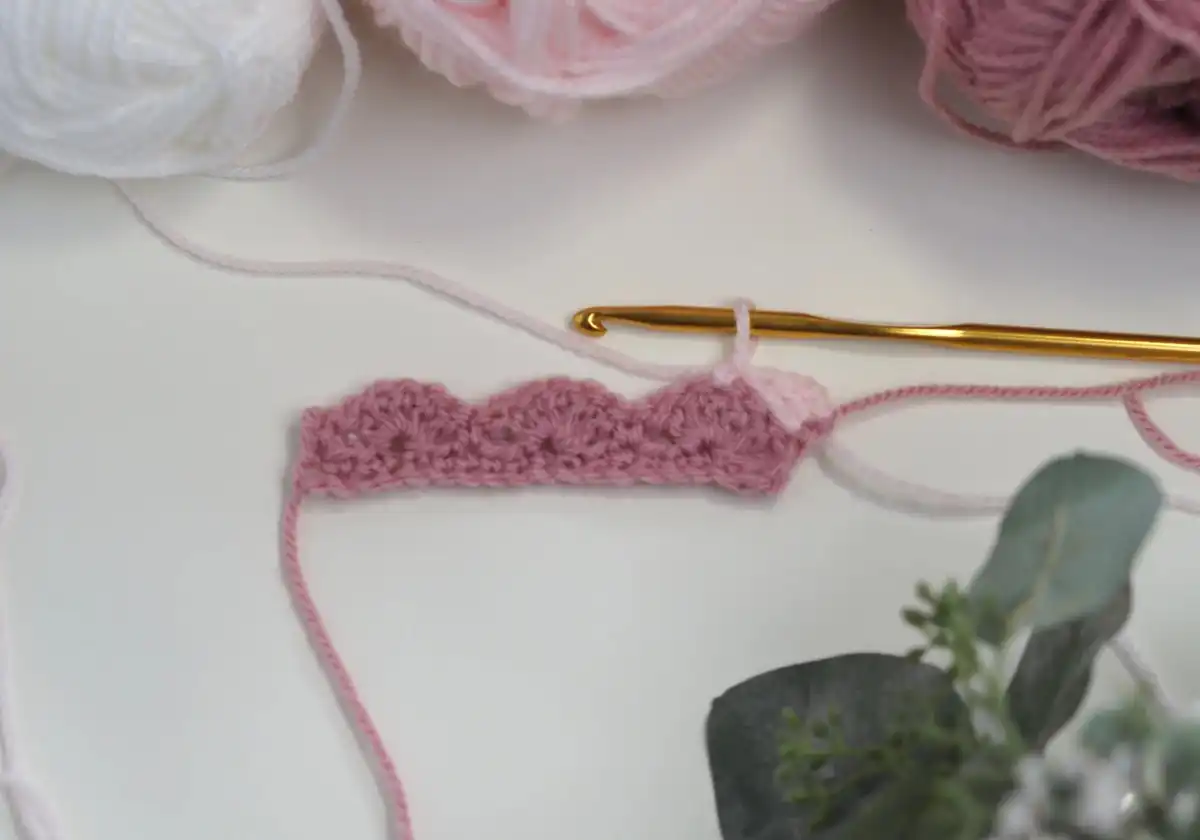
Row 2:
Row 2 introduces a slight variation to create alternating shells and maintain straight edges, forming what are known as “half-shells” at the beginning and end of the row. This method is crucial for a clean, professional finish.
Step 1: To begin Row 2, you will form your first half-shell. Chain 3 (this chain-3 counts as your first double crochet). Then, work 2 more double crochets (dc) into the very first stitch of the row. Together, this chain-3 and the 2 double crochets create a half-shell (equivalent to 3 dc) which forms a neat edge.
Step 2: Next, skip the following 2 stitches. Now, work a single crochet (sc) into the next stitch. Crucially, this single crochet should be worked into the center double crochet of the shell from the previous row. This strategic placement ensures that the shells of the current row are perfectly nestled between the shells of the row below, creating the iconic interlocking pattern.
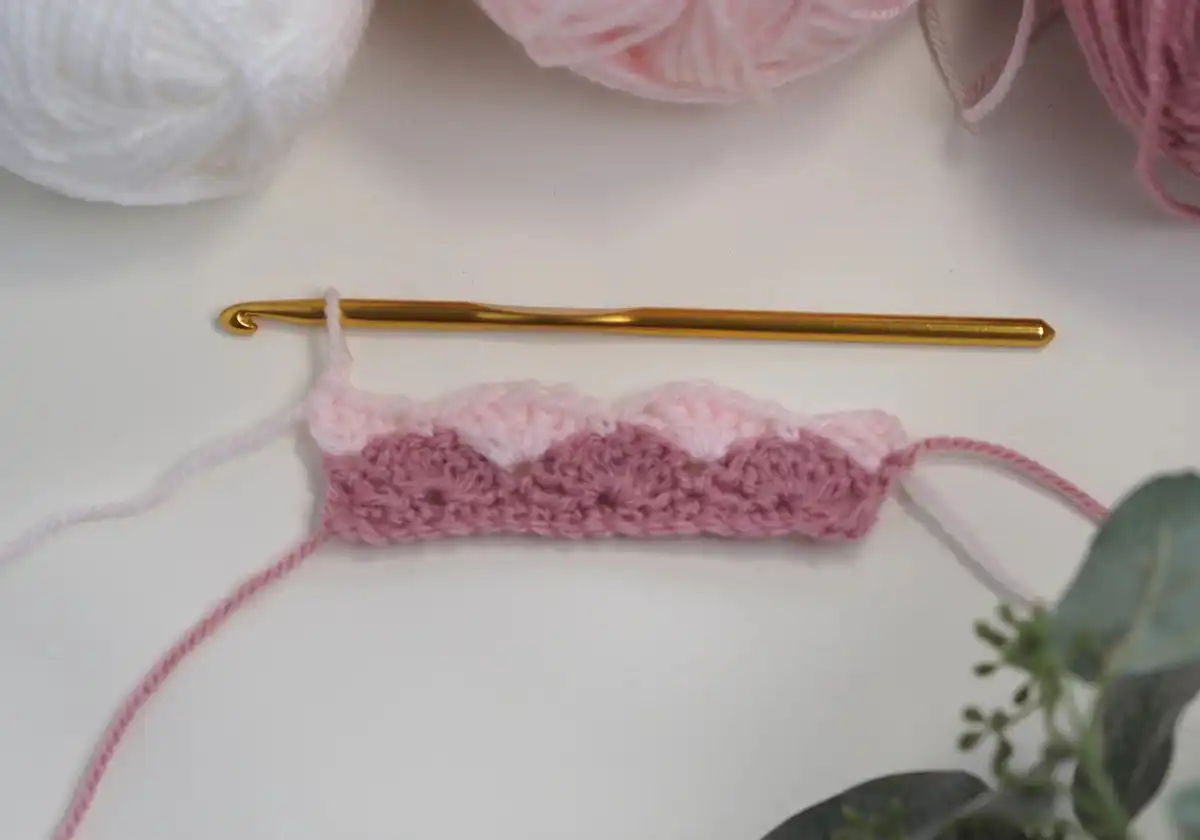
Step 3: After your single crochet, skip the next 2 stitches. Then, work 5 double crochets (dc) into the next single crochet. This single crochet should be the one you made between shells in the previous row. This creates a full shell, perfectly aligned to pop out from the fabric.
Step 4: Repeat Steps 2 and 3 across the row until you reach the end. You will alternate between making a single crochet in the center of a previous shell and making a full 5-dc shell into the previous row’s single crochet. Finish the row with a half-shell: work 3 double crochets (dc) into the last single crochet from the previous row. This mirrors the beginning of the row, ensuring both edges are straight and even.
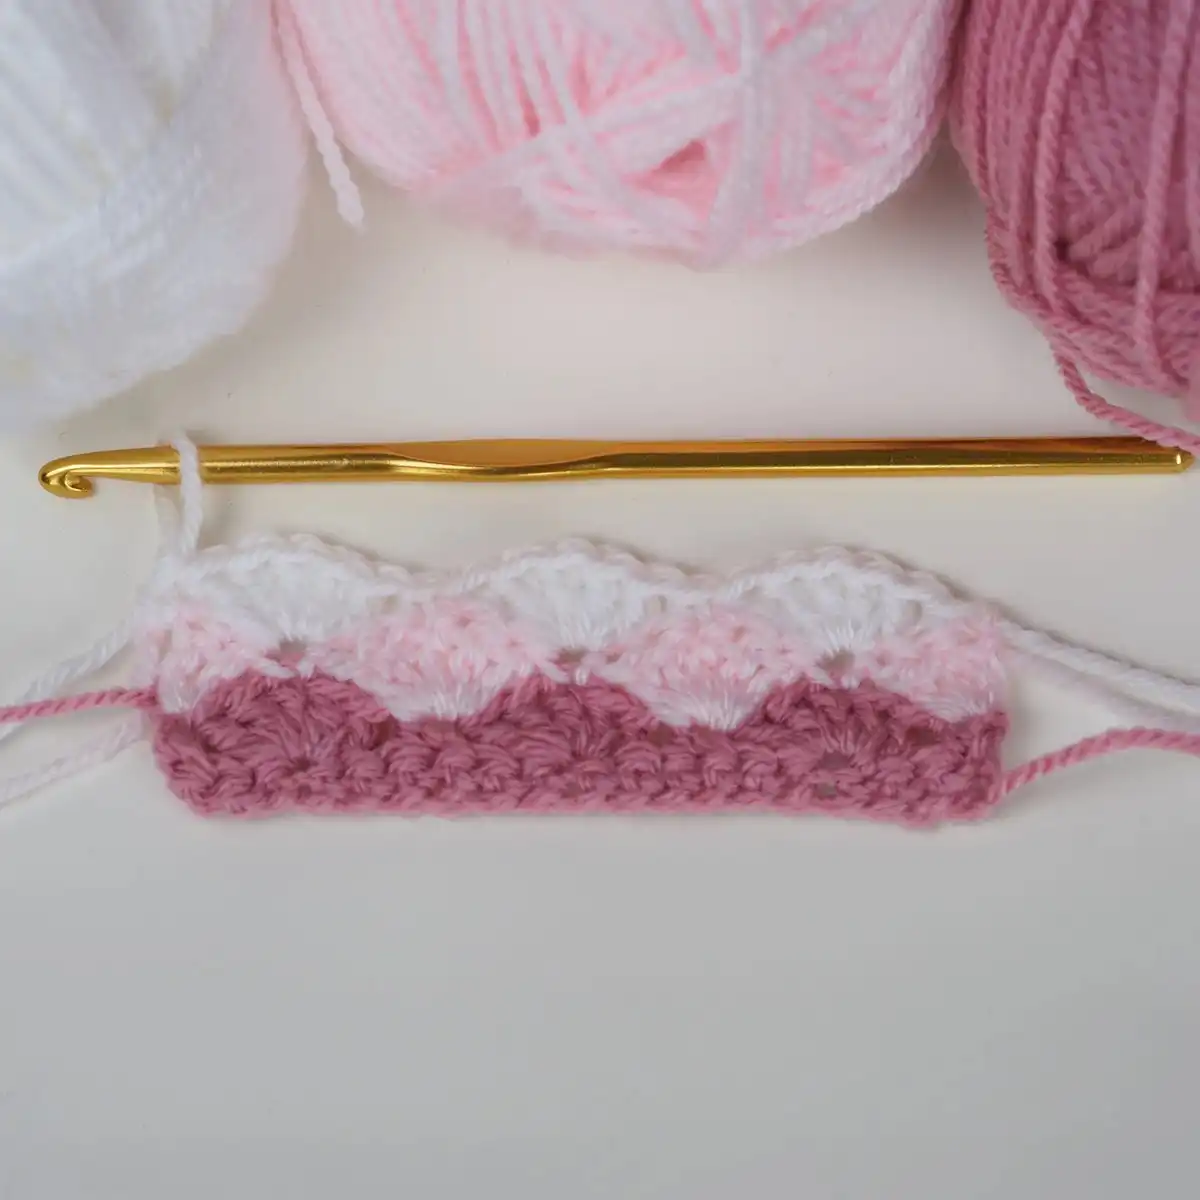
For all subsequent rows, you will simply repeat Row 1 and Row 2 in alternation. This consistent two-row repeat is what makes the shell stitch so relaxing and easy to remember once you’ve mastered the initial setup. Continue repeating these two rows until your project reaches its desired length, watching your beautiful, textured fabric grow with each pass. The rhythmic nature of the repeat allows for enjoyable, mindful crocheting.
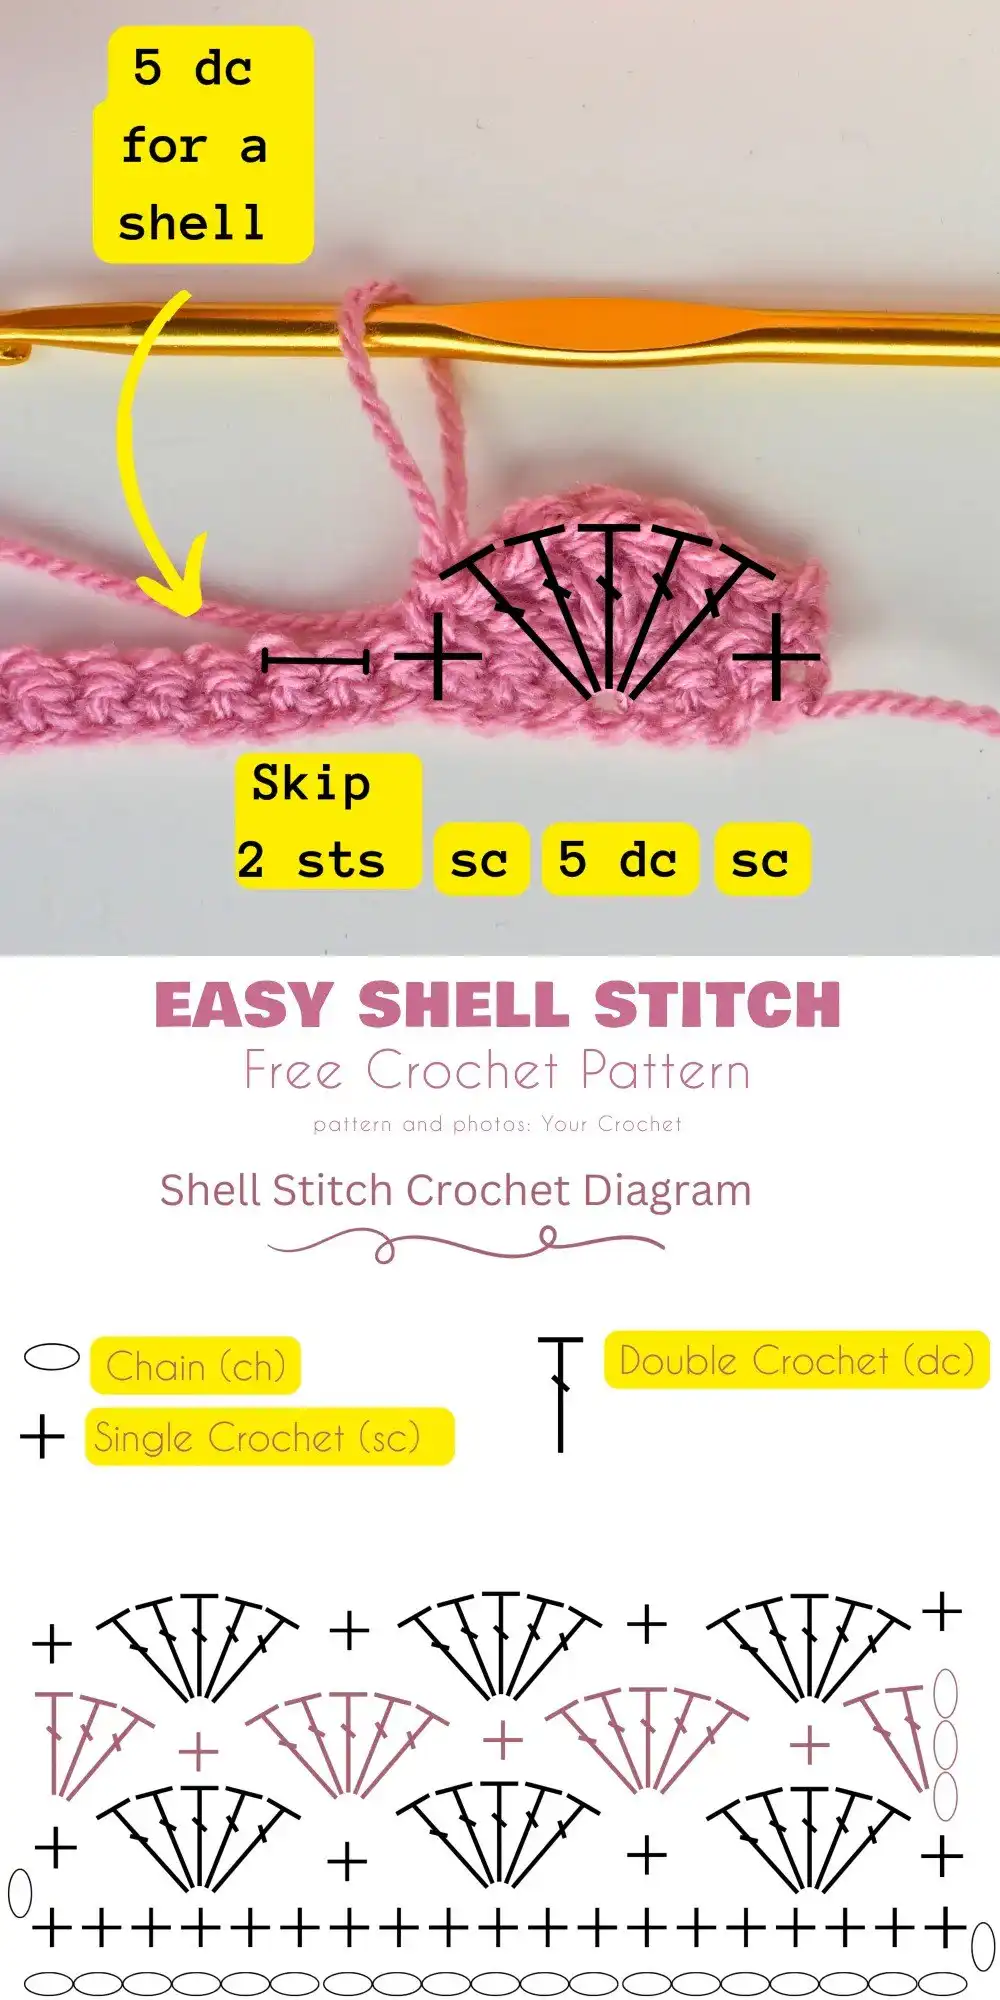
Don’t forget to save this pattern for later reference! Pin it to your favorite crochet boards on Pinterest so you can easily find it whenever you’re ready to start a new project or need a quick refresher on the shell stitch technique. Sharing is caring!
Troubleshooting Common Mistakes to Avoid
While the shell stitch is generally beginner-friendly, a few common questions and minor hurdles can arise. Knowing how to troubleshoot these will ensure a smoother crocheting experience and more professional-looking results.
How do I change colors in a shell stitch project?
Changing colors can add an incredible dimension to your shell stitch projects, making the individual shells and rows pop with vibrant stripes. There are a couple of popular methods for introducing a new color seamlessly.
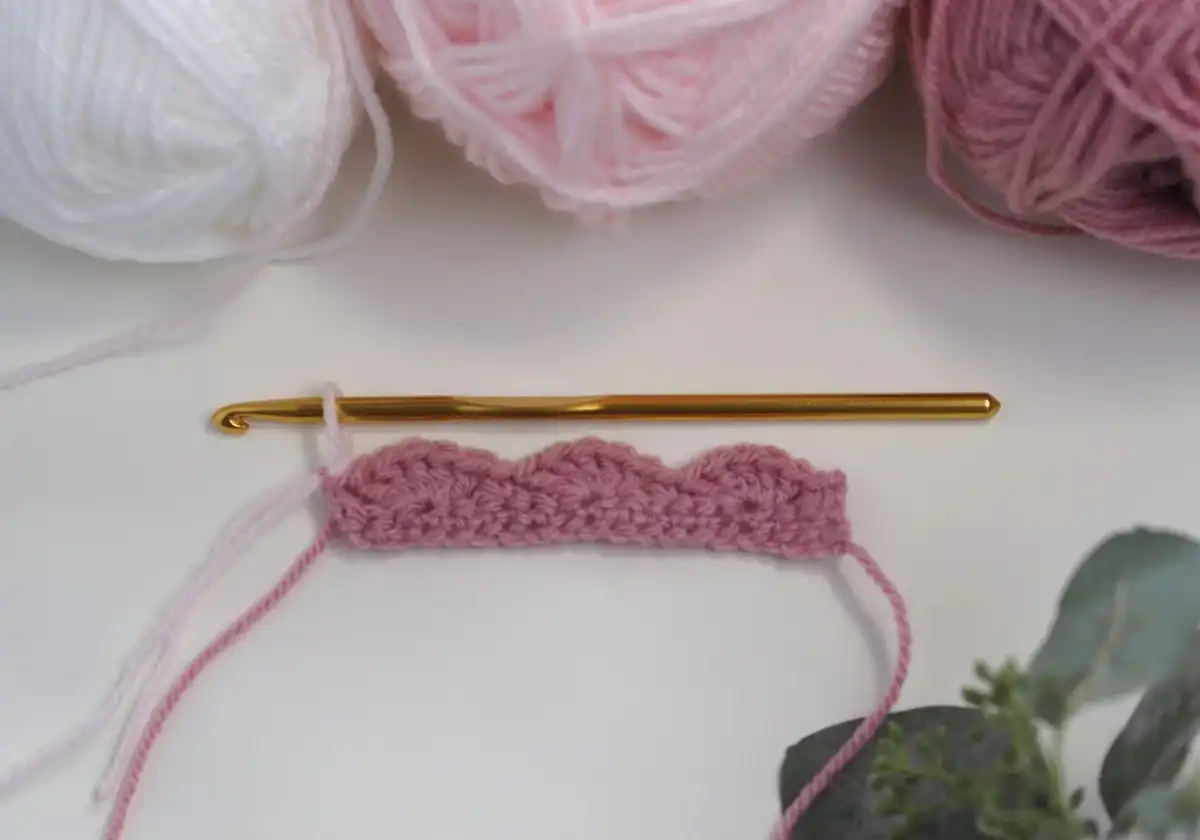
The most common technique is to change color on the last step of the last stitch of a row. When working your final single crochet (or double crochet, depending on your pattern’s end-of-row stitch) with your current color, insert your hook and yarn over as usual. You’ll have two loops on your hook. Instead of pulling through the current color to complete the stitch, drop the current color, pick up your new yarn color, and pull that new color through the two loops on your hook. This effectively “finishes” the stitch with the new color, ready for you to begin the next row.
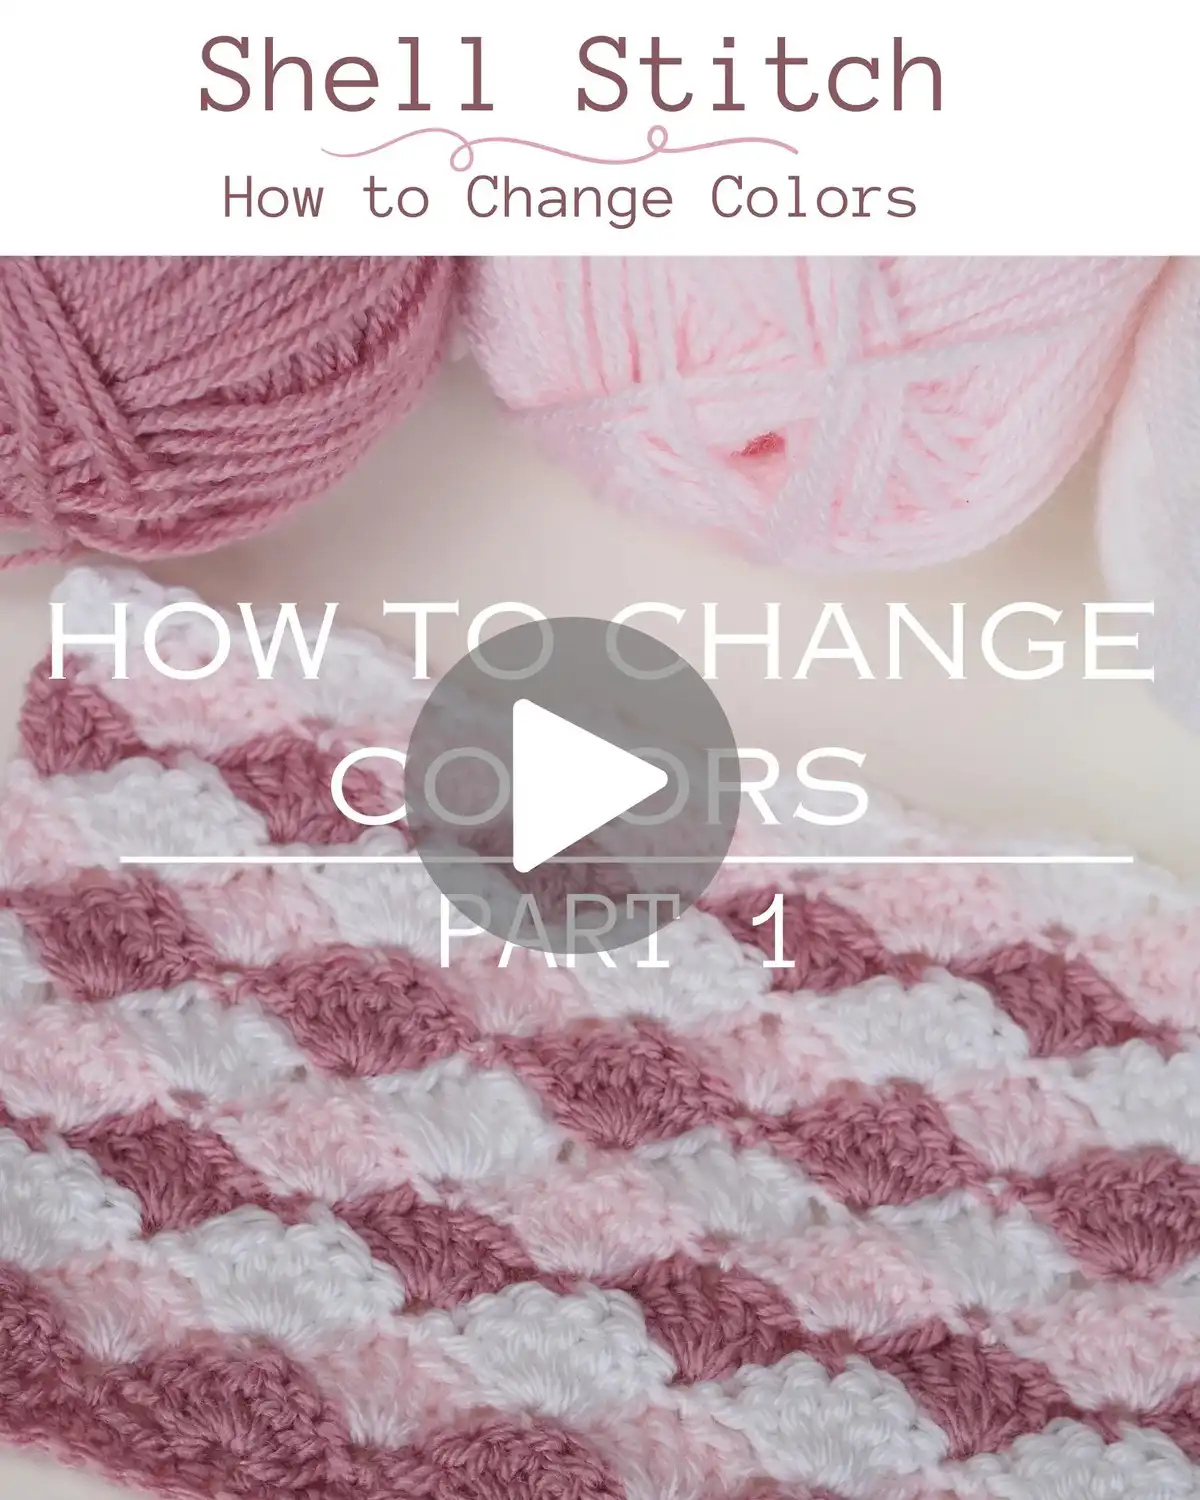
Another method, often favored for its security, involves tying a small knot. After completing the last stitch with the old color, cut the yarn, leaving a tail. Introduce the new yarn by tying it to the tail of the old yarn with a secure knot, close to the edge of your work. Then, simply continue with the new color. While this might leave a tiny knot, it can be easily hidden when weaving in ends. For a visual demonstration of both techniques, many video tutorials on platforms like Pinterest offer excellent guidance, ensuring your color transitions are clean and tidy.
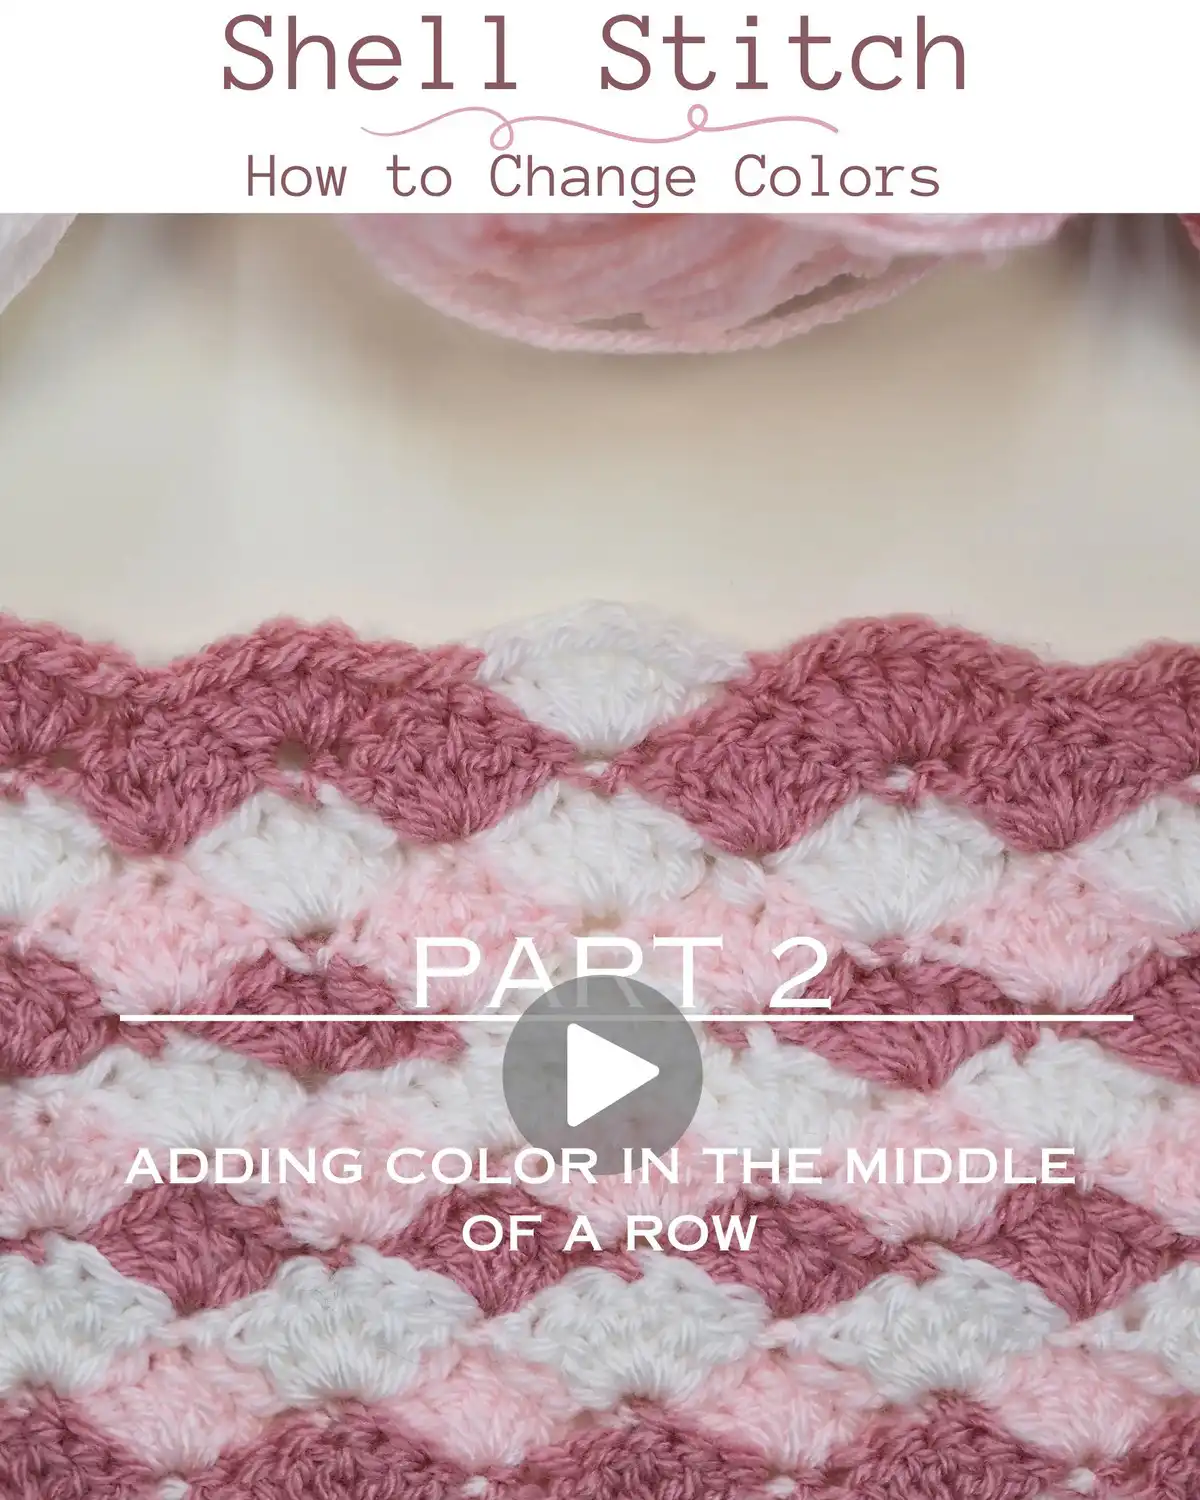
How do I change colors in the middle of a shell stitch project?
While changing colors at the beginning of a row is typical for striped effects, you’re not limited to just the edges. You can introduce a new color at any point within your shell stitch project to create more intricate colorwork or unique accents. The ideal spot for an in-row color change in the shell stitch pattern is often within the single crochet stitch that sits between two shells.
To execute this, complete the current shell using your existing yarn color. When you arrive at the single crochet stitch that follows, insert your hook into the stitch and yarn over with your current color. You’ll now have two loops on your crochet hook. To finish this single crochet with the new color, drop your current yarn, pick up the new color, and pull it through both loops on your hook. You can then continue crocheting the next shell with your newly introduced color.
If you need to change back to a previous color or introduce yet another one mid-shell (for example, on the 5th double crochet of a shell), the principle remains the same: complete the stitch up to its final yarn over, then use the new color to pull through the remaining loops. Watching a dedicated video tutorial can be incredibly helpful for mastering these precise mid-row and mid-stitch color changes, ensuring your fabric remains neat and your color transitions are smooth.
What to do with the yarn tails
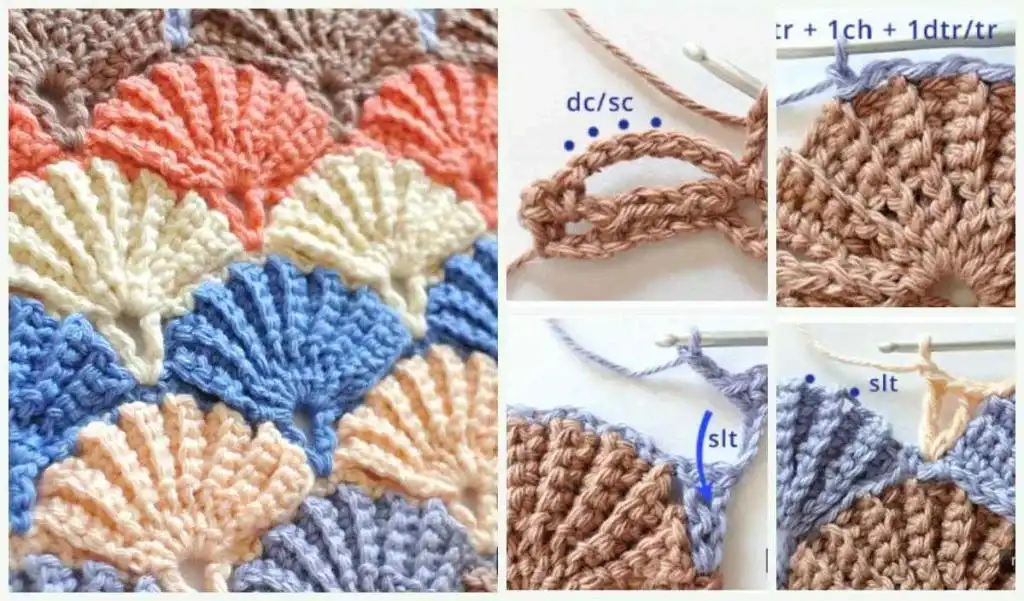
One common consequence of creating beautifully striped projects is the accumulation of numerous yarn tails. Properly weaving in these ends is a critical step that gives your project a professional, polished finish and prevents unraveling. Before trimming any excess yarn, always weave in your ends securely. Since the shell stitch is reversible, without a distinct “right” or “wrong” side, you’ll need to decide which side will be the front of your project. Weave your ends on the designated “wrong” side.
Using a yarn or tapestry needle, thread the yarn tail and weave it through several stitches of the same color. This helps the tail blend in and become invisible. To secure it even further, reverse the direction and weave the tail back under a few more stitches in the opposite direction. Changing directions creates friction, locking the yarn in place. Once secured, finish on the “wrong” side and carefully trim the yarn close to your work, taking care not to cut any working stitches.
Trim far from the edge
When trimming your woven-in yarn tails, always avoid cutting them directly at the very edge of your project. Ends that are trimmed too close to the edge are more prone to working themselves loose and becoming visible, especially with wear and washing. Instead, aim to finish weaving in the yarn tail at least an inch or more away from the edge. This provides extra security and ensures that even if the end shifts slightly, it remains tucked within the fabric.
Unless you plan to add a border to your project, which would encase the edges and provide extra security, giving your yarn tails ample space within the fabric before trimming is a best practice. This attention to detail significantly enhances the durability and aesthetic quality of your finished crocheted item.
Tips for beginners
For those just starting their crochet journey with the shell stitch, a few tips can smooth the learning curve. Firstly, consistent tension is paramount. Try to maintain an even grip on your yarn and hook; too tight, and your stitches will be rigid; too loose, and they’ll be gappy. Practice swatches are your best friend here, allowing you to find your rhythm.
Secondly, counting stitches accurately, especially the “skip 2 stitches” and placement of single crochets into the center of shells, is crucial. Use colorful stitch markers if needed to identify key stitches, particularly the central double crochet of a shell or the single crochet you need to work into. Don’t be afraid to unravel (frog) your work if you spot a mistake; it’s part of the learning process. Finally, experiment with different yarn types and colors. The shell stitch truly shines with variegated yarns or in stripes, offering endless creative possibilities as you build your confidence.
We hope this comprehensive guide has empowered you to master the Easy Shell Stitch Crochet Pattern! This versatile and beautiful stitch is a fantastic addition to any crocheter’s repertoire. Don’t forget to save this pin to your Pinterest board for future reference, share it with fellow craft enthusiasts, and leave a comment below with your thoughts or any projects you’re excited to create!


