Craft a Charming Free Crochet Rooster Keychain Pattern Today!
Please note: This post contains affiliate links. As an Amazon Associate, we earn from qualifying purchases at no extra cost to you. Explore our Amazon Crocheting Storefront for more crafting essentials.
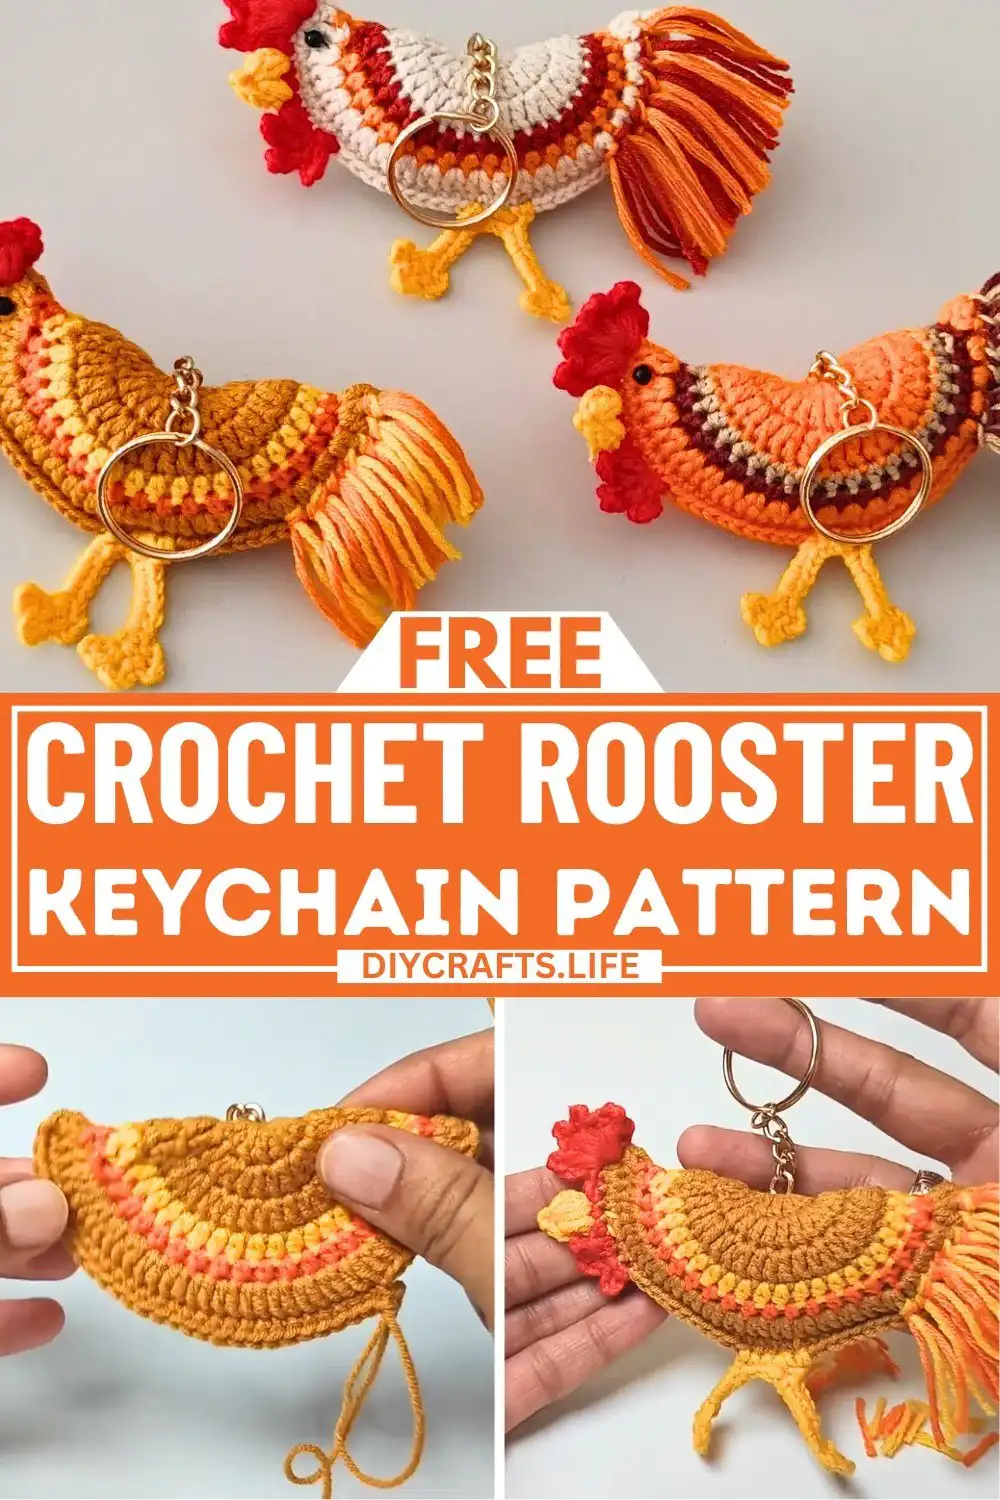
Add a delightful touch of farmhouse charm and vibrant personality to your everyday essentials with this free crochet rooster keychain pattern! Perfect for adorning your keys, backpack, or purse, this adorable amigurumi project combines colorful yarn with simple techniques and crochet tools to create a miniature work of art. Whether you’re an experienced crocheter or just starting out, this guide will walk you through each step to craft your very own cheerful rooster.
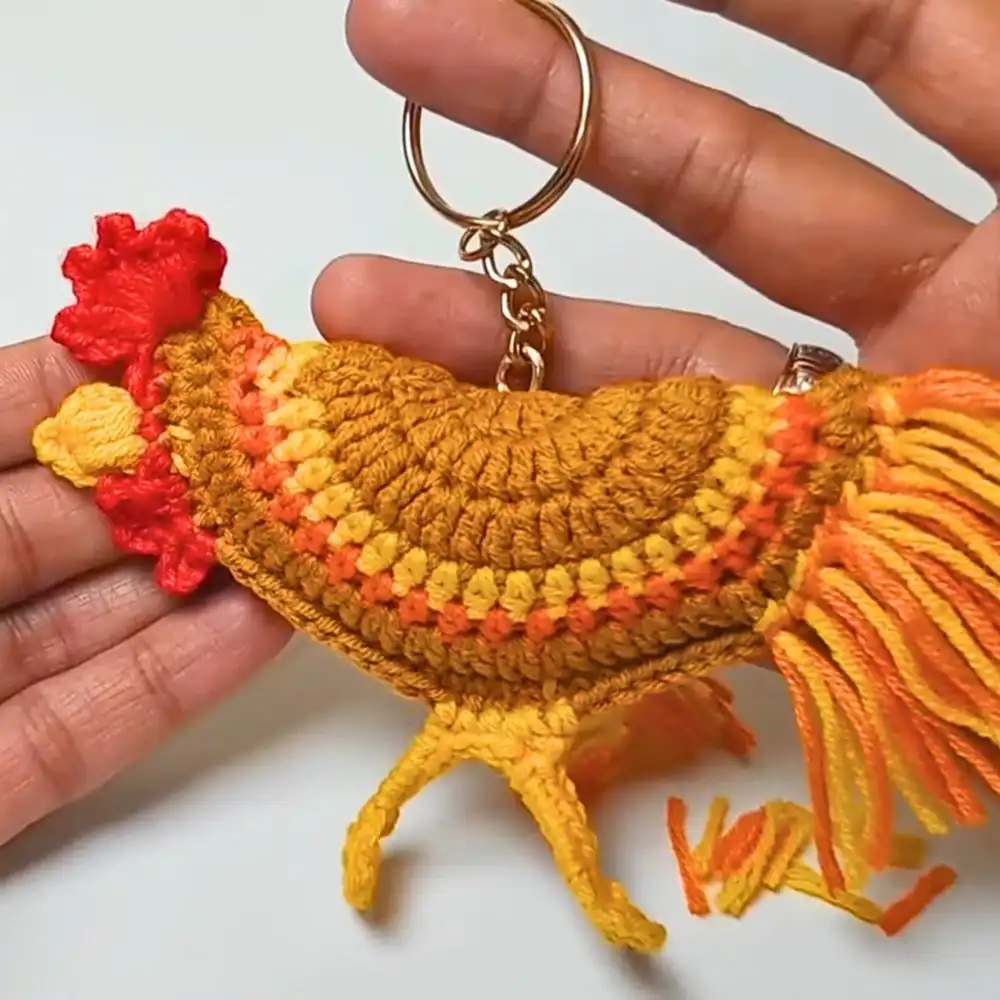
This delightful free crochet rooster keychain pattern is not only fun to make but also makes a fantastic handmade gift for friends and family. Its compact size and customizable colors allow for endless creativity, ensuring each rooster is as unique as its maker. Get ready to bring a smile to anyone’s face with this charming accessory!
Materials & Tools Needed
To bring your adorable crochet rooster keychain to life, gathering the right materials and tools is your first crucial step. The foundation of a beautiful amigurumi piece lies in selecting quality yarn that holds its shape and vibrant colors. For this project, Alize Cotton Gold yarn is recommended due to its excellent stitch definition and wide array of hues, allowing for endless customization. For similar vibrant, high-quality options, consider these colorful acrylic yarn skeins from Inscraft.
You’ll also need a comfortable 2.5 mm crochet hook, which is ideal for achieving the tight stitches necessary for amigurumi, preventing stuffing from showing through. Don’t forget a sturdy keychain ring to attach your finished rooster securely, along with soft fiberfill for stuffing, sharp scissors for trimming, and a darning needle for seamless finishing. For an extra touch of character, consider safety eyes for expressive eyes.
Finished Size & Customization Ideas
The finished size of your crochet rooster keychain will typically be small and compact, making it perfect for its intended use without being bulky. Slight variations may occur based on your tension, the specific yarn weight chosen, and how much stuffing you incorporate, giving each rooster its own unique plumpness. This miniature scale ensures it’s lightweight and convenient to carry.
The beauty of this pattern lies in its incredible potential for customization. Experiment with vibrant, seasonal colors to match various themes—think soft pastels for a spring-inspired rooster, or warm reds and greens for a festive holiday version. Beyond color, you can elevate your design with embellishments like tiny beads, a sprinkle of glitter yarn, or even small charms. For a truly personal touch, consider embroidering a tiny initial or attaching a mini tag, making it an extra special gift.
Pattern Abbreviations & Terminology
Understanding crochet abbreviations and terminology is essential for smoothly following any pattern, and this free crochet rooster keychain pattern is no exception. Familiarizing yourself with these common terms will ensure your project progresses without confusion. For comprehensive reference, check out a Crochet Stitch Dictionary. The pattern uses standard US crochet terms, making it accessible for a wide range of crocheters.
Key abbreviations include ch (chain), which forms the foundation of many projects; sc (single crochet), a basic tight stitch; dc (double crochet), a taller stitch; and hdc (half double crochet), an intermediate height stitch. You’ll also encounter sl st (slip stitch) for joining rounds, st (stitch), magic ring for starting in the round, and FO (fasten off) to secure your work. A special stitch, the puff stitch, adds delightful texture, creating the rooster’s comb and beard with character.
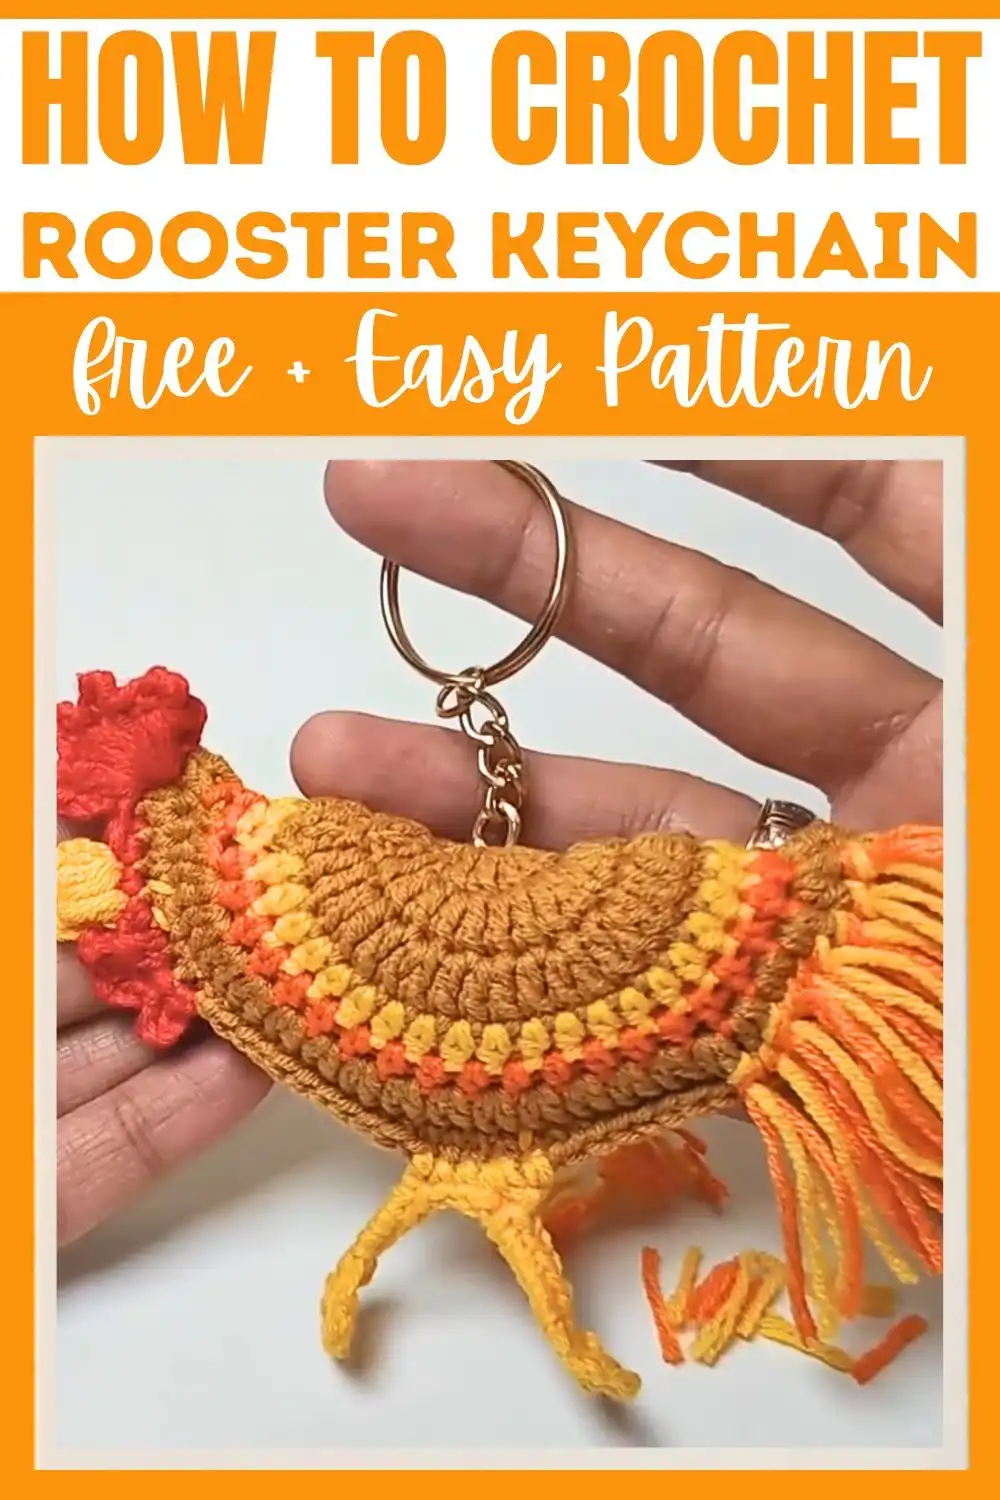
Step-by-Step Detailed Crochet Instructions
Embark on the exciting journey of crocheting your rooster keychain with these detailed, step-by-step instructions. Each part of the rooster, from its sturdy body to its charming comb and fluffy tail, is broken down into manageable rounds and actions. Pay close attention to stitch counts and color changes to achieve the best results, ensuring your rooster is both adorable and well-formed.
Remember that consistent tension is key in amigurumi to create a firm fabric that holds its shape and keeps the stuffing neatly inside. Don’t hesitate to refer back to the pattern abbreviations if you need a reminder. Following these steps carefully will lead you to a beautifully finished rooster ready to bring joy.
Part 1: Rooster Body
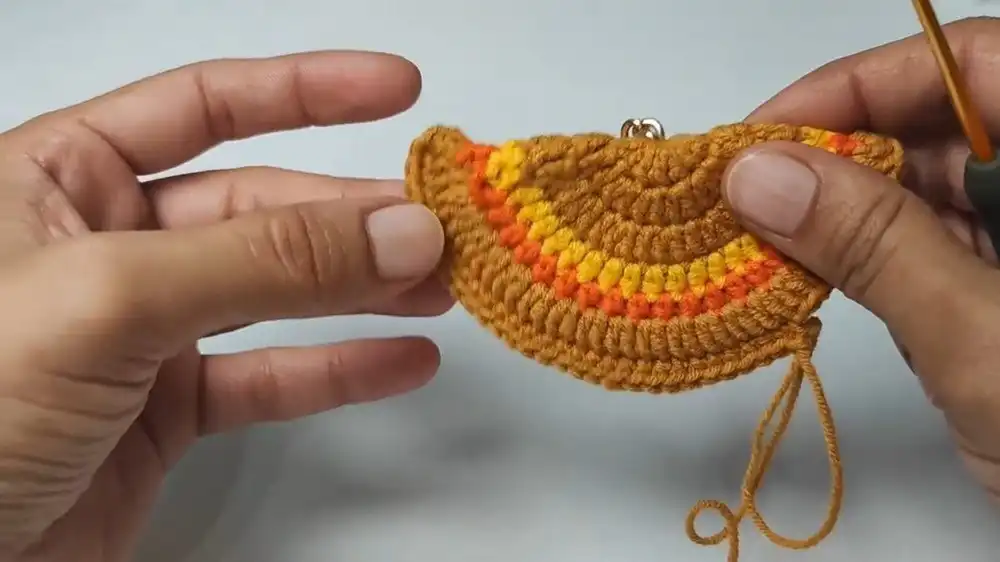
The rooster’s body forms the main foundation of your keychain, starting with a circular base that will be folded and shaped. Begin by leaving a long yarn tail at the start; this will be crucial later for attaching the keychain clip securely. Initiate your work with a magic ring, a versatile technique that creates a tight, adjustable center hole, ideal for amigurumi.
For Round 1, chain 3 (counting as your first double crochet) and then work 15 double crochets into the magic ring, totaling 16 stitches, before slip stitching to close. Round 2 expands the circle by working 2 double crochets into each stitch, resulting in 30 stitches. Round 3 further enlarges the shape with an alternating pattern of 1 double crochet and 2 double crochets, bringing your count to 45 stitches. Rounds 4 and 5 introduce half double crochet stitches, offering a chance for color changes to create vibrant sections on your rooster’s body. Round 6 is the final round, where you’ll switch back to your main color and work 2 double crochets into each stitch before fastening off. Finally, fold the circle in half, join the edges with single crochets, stuff generously, especially in the tail section for shaping, and close the remaining gap.
Part 2: Comb
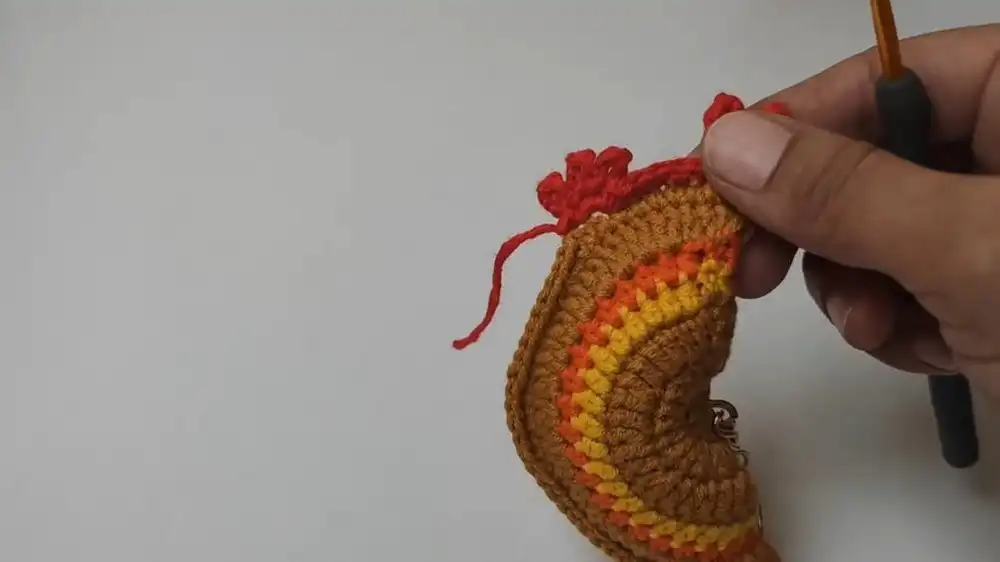
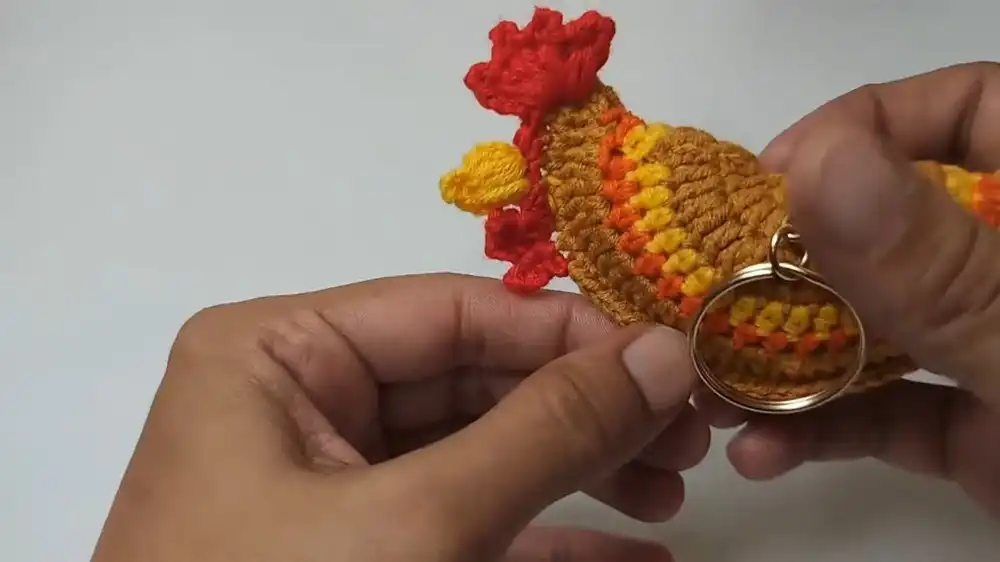
The comb is a signature feature of any rooster, and in this pattern, it’s created using eye-catching puff stitches that give it a wonderfully textured and立体 look. To begin, attach red yarn directly to the top of your rooster’s head, ensuring it’s centered for a balanced appearance. This connection point will serve as the base for all the comb’s elements.
Craft the first puff stitch by chaining 3, then yarn over twice into the same stitch to create a puffed texture. Secure this with a chain 4 and single crochet into the top of the puff stitch. Repeat this delightful puff stitch pattern four more times in the very same space to build a full, prominent comb. After completing the puffs, chain 3 and slip stitch into the same base stitch to anchor the comb. To shape the head further, skip one stitch and then work 6 single crochets across. Finish this section by adding decorative loops: chain 6 and single crochet into the same stitch, repeating this three times for an extra flourish, then slip stitch, chain 1, and fasten off.
Part 3: Beard
The rooster’s beard adds another layer of distinctive character and is typically crafted in a contrasting color, often yellow, to stand out against the main body. Attach your chosen yarn, in this case, yellow, to the top of the 3rd single crochet stitch from where the head section was formed. This precise placement ensures the beard sits correctly under the comb, contributing to the rooster’s overall charm.
To create the beard’s puffy texture, chain 3, then pull up a loop twice in the same stitch. Move to the next stitch and pull up a loop twice again, gathering multiple loops on your hook. Yarn over and pull through all loops on the hook to complete the puff stitch, creating a lovely rounded shape. Follow this with a chain 4 and a single crochet into the top of the puff stitch to secure it. Finish this delightful detail with another chain 3 and a slip stitch at the base, then fasten off, carefully weaving in any loose ends for a neat finish.
Part 4: Feet
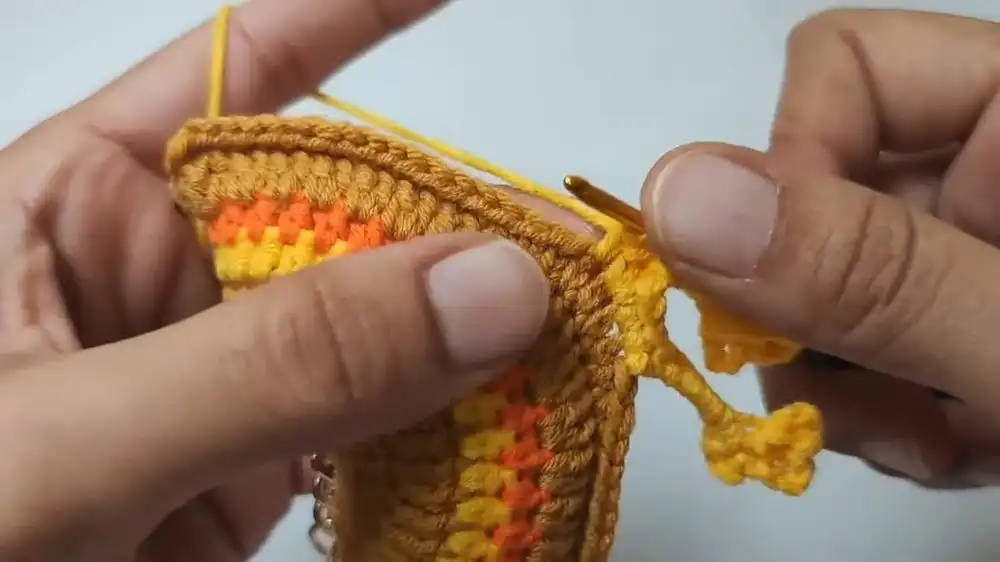
The rooster’s feet are what ground him, adding stability and an adorable finish to the keychain. Attach yellow yarn to the base of the body, making sure to align it symmetrically with where your keychain clip will eventually be. This careful placement ensures the rooster hangs correctly when attached to your keys or bag. Starting the first leg, chain 10 stitches to form the length that will include the toes.
Work back up the chain to create the distinctive three-toed foot structure. Begin by single crocheting into the 5th chain from your hook, then chain 4 and single crochet into the same chain to form the first toe. Repeat this sequence twice more into subsequent stitches for the second and third toes. Single crochet into the remaining chains to form the leg portion, then slip stitch into the body to secure the first leg. Repeat this entire process for the second leg, mirroring the first, to give your rooster a balanced and endearing stance. These small details truly bring your amigurumi creation to life.
Part 5: Tail
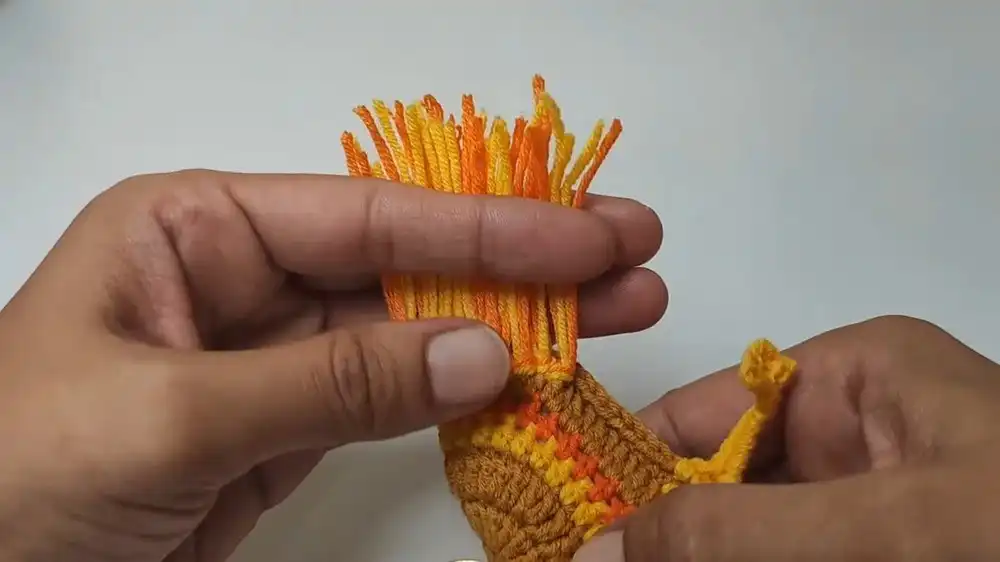
A rooster’s tail is its crowning glory, a vibrant display of color and texture, and this pattern ensures your crocheted version is just as magnificent. Utilizing the colors from your rooster body’s half double crochet rounds, you’ll create individual tassels that build into a full, fluffy tail. This method allows for a beautiful gradient or a playful mix of colors, reflecting the natural beauty of a rooster’s plumage.
To make each tassel, cut equal lengths of yarn – a consistent length ensures an even and neat tail. Fold each yarn strand in half, then insert the folded loop into a stitch along the back of the rooster’s body. Pull the ends of the yarn through the loop and tighten firmly to secure the tassel. Repeat this process, creating nine rows of tassels side by side. This density is crucial for achieving that wonderfully fluffy and full appearance, giving your rooster an undeniable charm and character that will stand out.
Part 6: Finishing Touches
The final touches are where your crochet rooster keychain truly comes to life, transforming your crocheted pieces into a complete, endearing accessory. Attention to these small details elevates your handmade creation from good to absolutely charming. First, focus on the eyes, which give your rooster its personality. You can securely attach small black beads, carefully sewing them into place with a darning needle and black thread, or if you prefer, embroider small, expressive eyes using black yarn or embroidery floss for a softer look.
Next, it’s time to attach the keychain clip. Remember that long yarn tail you left at the beginning when starting the body? Now is its moment to shine! Use this tail to tie or securely sew the keychain clip to the very top of the rooster’s head, ensuring it’s robust enough to withstand daily use. Finally, take a moment to inspect your entire rooster. Weave in any remaining loose ends neatly, trim away excess yarn, and make sure all components are secure. Your vibrant new rooster keychain is now ready to spread cheer!
Video Tutorial
For visual learners or those who prefer to see techniques in action, a video tutorial can be an invaluable resource. While this written pattern provides comprehensive instructions, watching the steps unfold can clarify tricky sections, especially for unique stitches like the puff stitch or the process of attaching the comb and feet. A video can also offer tips on maintaining consistent tension and seamlessly weaving in ends.
Search for “Crochet Rooster Keychain Pattern” on platforms like YouTube to find various visual guides that complement this written pattern. Seeing how yarn is held, hooks are manipulated, and pieces are assembled can greatly enhance your crocheting experience and help you achieve a polished final product. Don’t hesitate to pause, rewind, and rewatch as many times as needed until you feel confident in each step.
More Free Crochet Patterns
If you’ve enjoyed crafting this charming rooster keychain, you’ll be delighted to explore more free crochet patterns to keep your crochet hooks busy and your creativity flowing! The world of crochet offers an endless array of projects, from festive holiday decorations to practical accessories and adorable amigurumi. Expanding your repertoire with new patterns is a wonderful way to learn new techniques and build your skill set.
Consider delving into seasonal projects to adorn your home or give as thoughtful gifts. Holiday-themed patterns are especially popular and bring a cozy, handmade touch to any celebration. Exploring different types of patterns can also introduce you to new yarn types, stitch combinations, and construction methods, continually enriching your crochet journey. For a broader range of crocheting essentials for your next project, explore our curated selection.
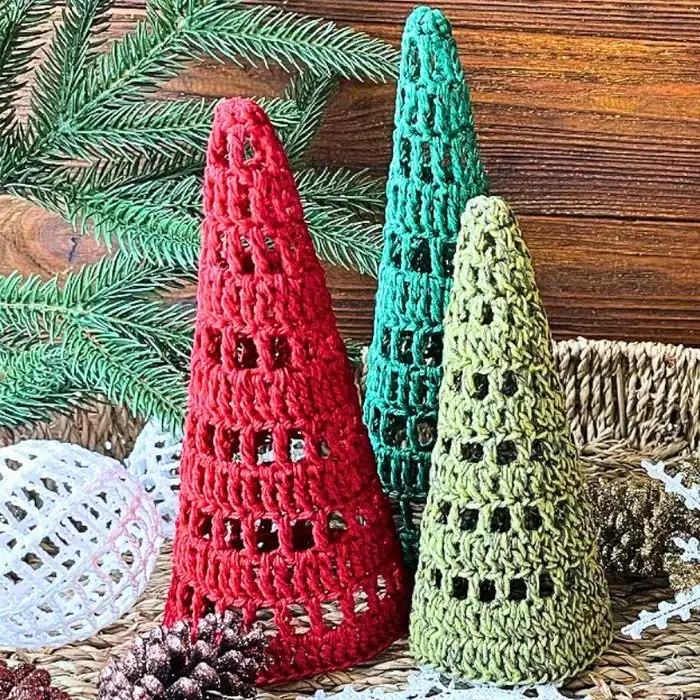
Easy Crochet Christmas Tree Pattern with Starch Stiffening
Embrace the festive spirit with an easy crochet Christmas tree pattern that adds a personalized touch to your holiday decor. This pattern is designed for simplicity, making it accessible for crocheters of all levels. The magic of this project lies in its ability to transform soft yarn into a freestanding, sculptural tree through the clever use of starch stiffening.
Crafting these little trees allows you to experiment with various shades of green, or even unconventional colors like white or silver for a modern look. Once crocheted, a simple starch solution helps them hold their conical shape perfectly, creating charming miniature trees ideal for mantels, tabletops, or as unique ornaments. They make wonderful gifts and are a fantastic way to utilize leftover yarn scraps.
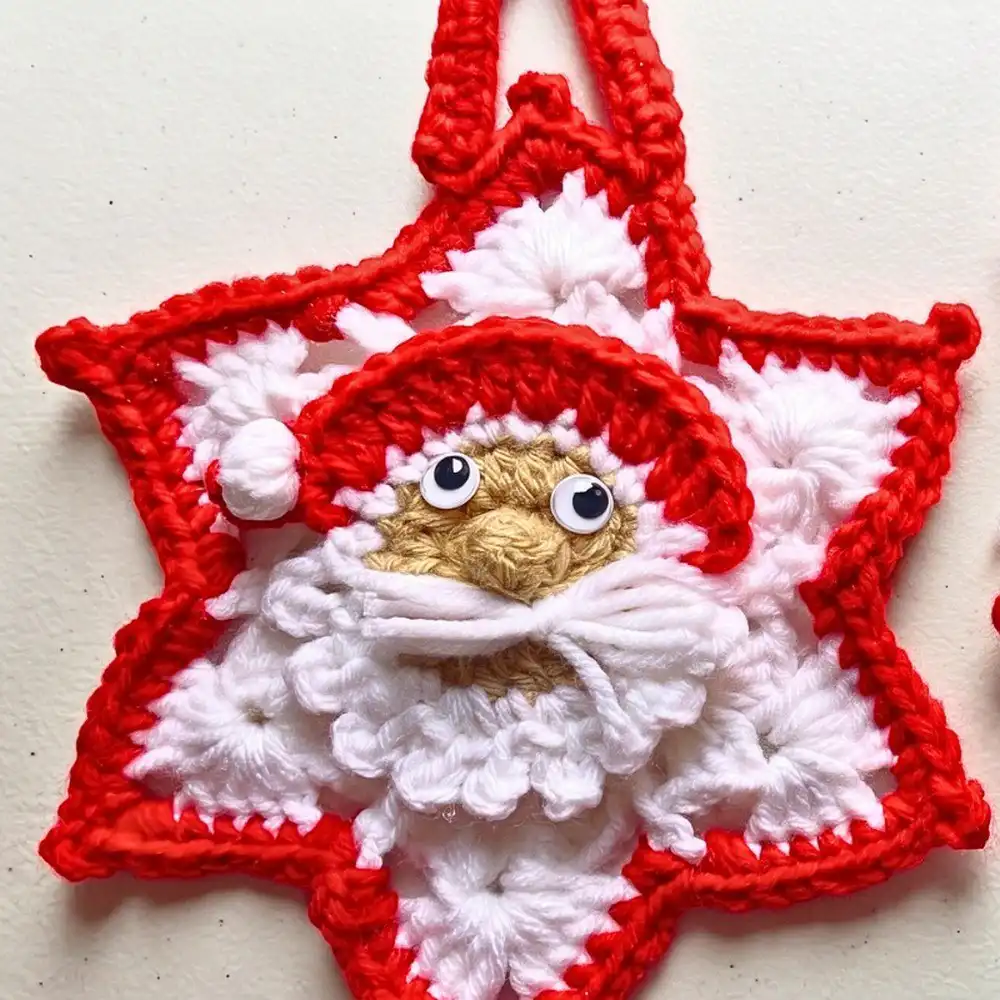
Crochet Santa Star Ornament For Festive Décor
Bring a touch of whimsical holiday cheer to your home with a delightful crochet Santa star ornament. This pattern combines the classic star shape with iconic Santa Claus elements, creating an instantly recognizable and festive decoration. It’s a perfect project for adding handmade warmth to your Christmas tree or gifting to loved ones.
Typically worked in traditional red, white, and black yarns, this ornament often features Santa’s jolly face or his hat on a star base. It’s an engaging project that often incorporates simple stitches, making it enjoyable and quick to complete. These charming stars can also be used as gift toppers, adding an extra special handmade element to your presents, spreading holiday joy throughout your home.
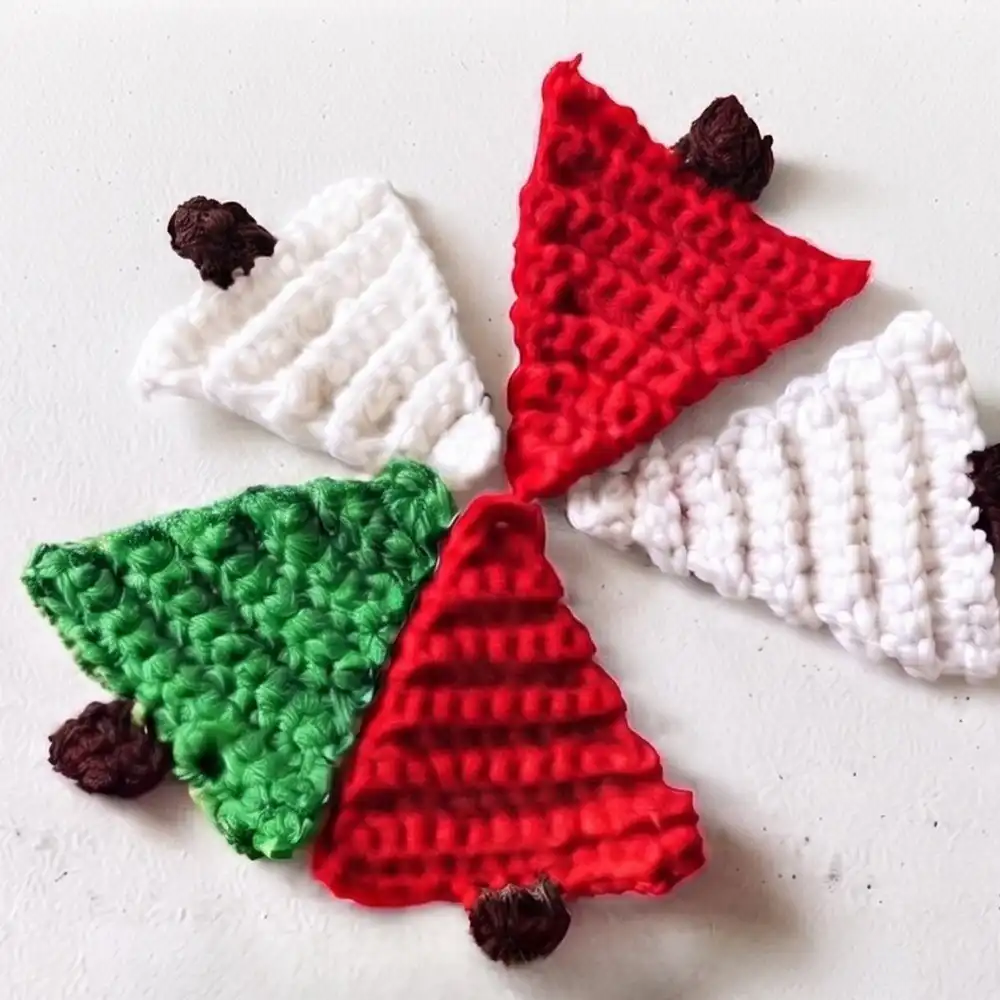
Crochet Hanging Christmas Tree Decoration Pattern Free
Enhance your holiday ambiance with a charming crochet hanging Christmas tree decoration. This free pattern offers a simple yet elegant way to craft miniature festive trees that can be suspended anywhere, from your Christmas tree to windowsills or door handles. They are quick to make, perfect for last-minute decorating or creating a collection of handmade ornaments.
These decorations often feature a simple triangular shape, sometimes with added texture or tiny embellishments like beads or embroidered stars. They are fantastic for using up small amounts of green yarn, and you can easily customize them with different colors or even add a touch of glitter yarn for extra sparkle. Their compact size and lightweight nature make them versatile and easy to display throughout your home.
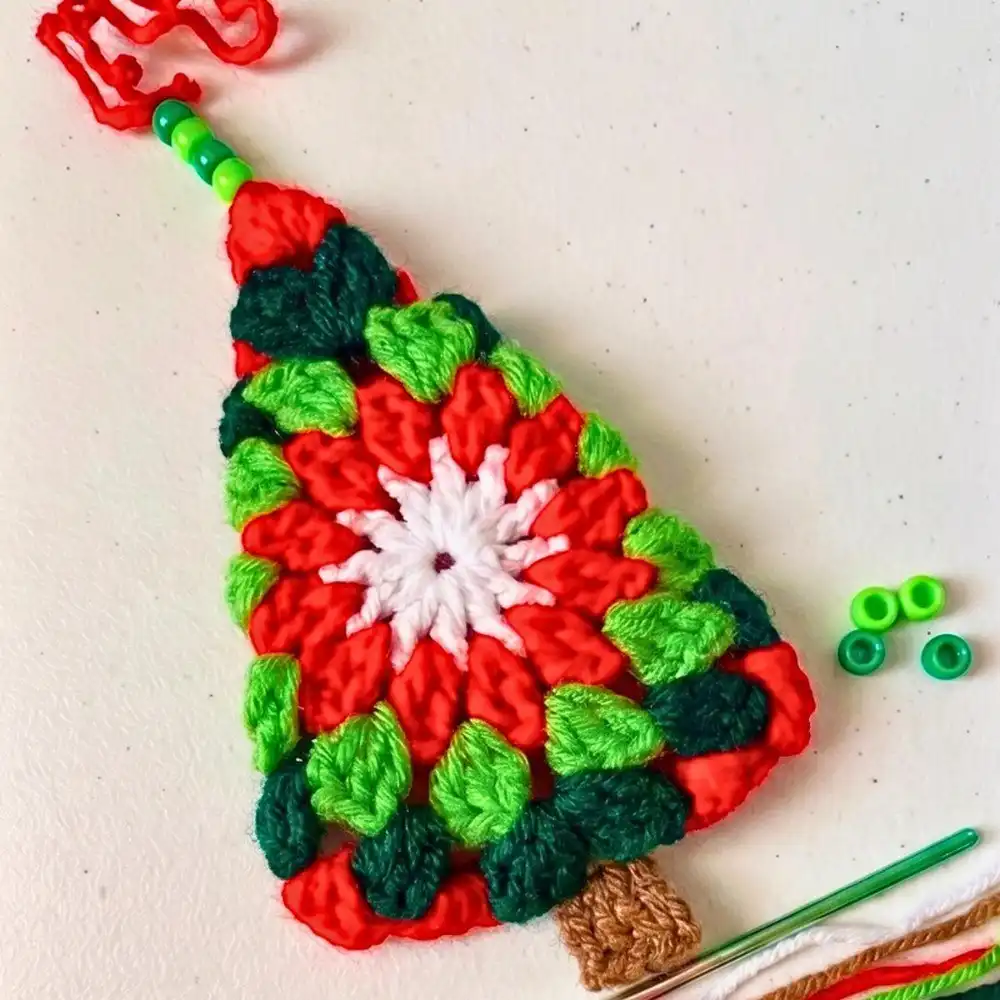
Crochet Christmas Tree Pattern For The Best Decoration
Discover a versatile crochet Christmas tree pattern that promises to be a standout piece in your holiday decorations. This pattern focuses on creating a robust and appealing Christmas tree shape, often designed to be freestanding or a prominent hanging ornament. It’s a project that allows for creativity in detailing, ensuring your tree is truly unique.
Whether you opt for a textured stitch to mimic pine needles or incorporate colorful mini-baubles and beads, this pattern provides a wonderful canvas for your festive imagination. Consider using variegated green yarn for a natural look or a sparkling yarn for a more whimsical effect. These trees can become cherished family heirlooms, brought out year after year to celebrate the festive season, making them a truly rewarding crochet project.
We hope you’ve enjoyed crafting your very own free crochet rooster keychain! Don’t forget to save this pin to your Pinterest board for future reference, share it with fellow crochet enthusiasts, and leave a comment below with your finished creations. Happy crocheting!


