Waffle Pillow Free Crochet Pattern: Your Guide to a Super Adorable Home Accent
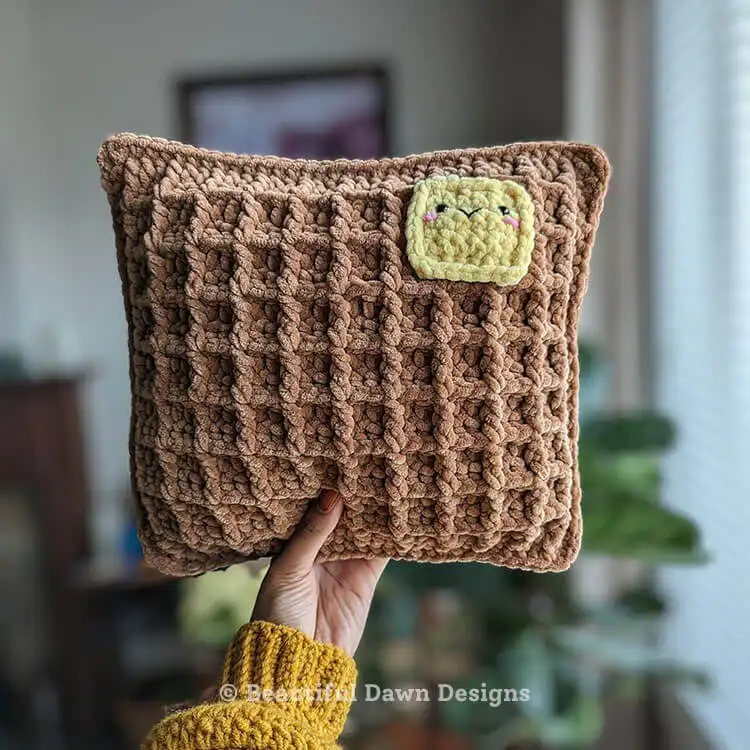
Transform your living space with this delightful and soft Waffle Pillow Free Crochet Pattern! This charming project is designed to be both easy to make and incredibly adorable, adding a unique touch of handmade coziness to any room. Get ready to crochet a decorative piece that’s sure to be a conversation starter and a cozy companion. To make your crafting experience even smoother, consider a set of ergonomic crochet hooks.
Whether you’re looking for a quick weekend project or a thoughtful handmade gift, this waffle pillow delivers on all fronts. Its inviting texture and playful design make it a perfect addition to children’s rooms, cozy reading nooks, or even your main living area. If you’re a beginner, a beginner-friendly crochet kit can help you get started with ease. Let’s dive into creating this lovable, squishy pillow.
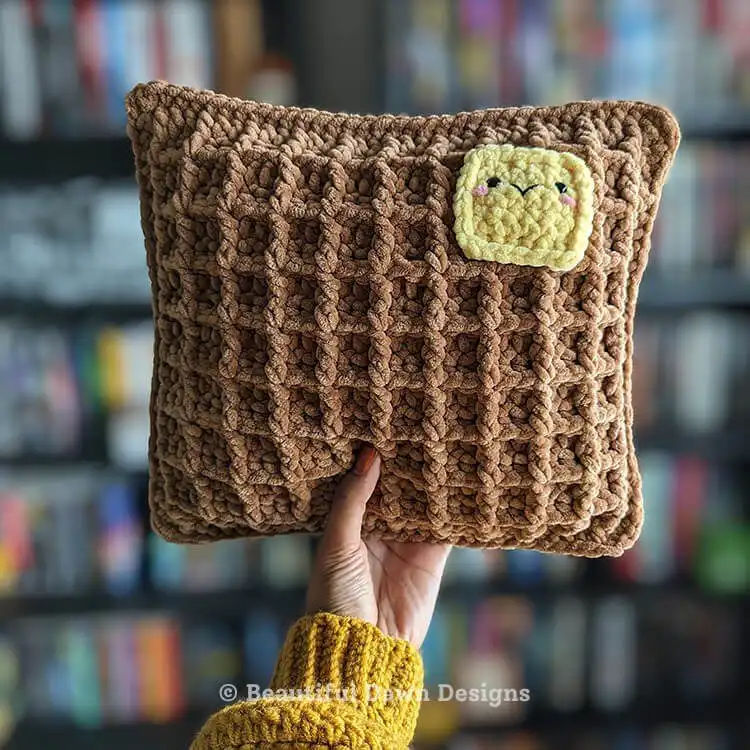
You can find the complete free pattern detailed below, guiding you through each step to craft your own unique waffle pillow. For those who prefer a distraction-free experience, an ad-free printable PDF version of this pattern is also available for purchase from our shop. It’s perfect for taking your project on the go!
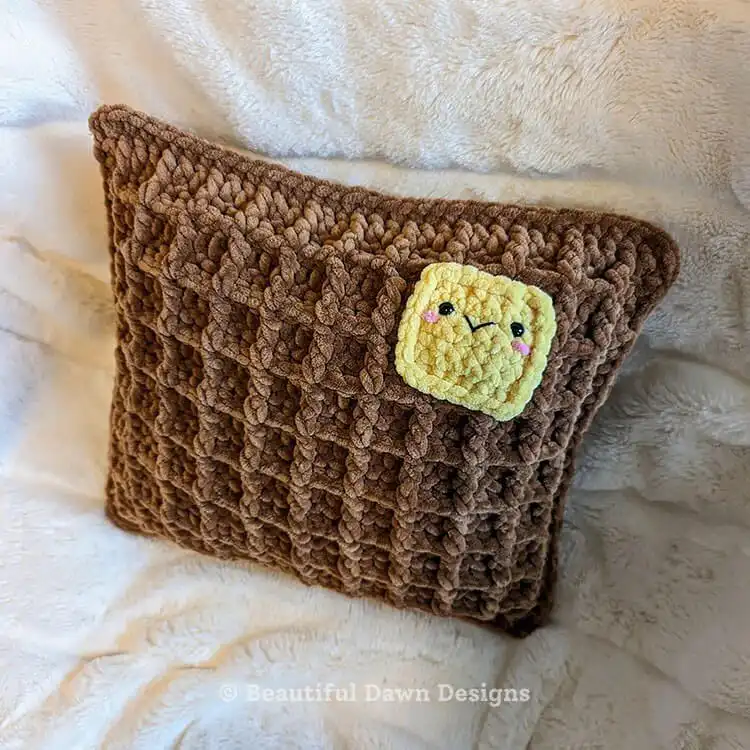
The distinctive waffle stitch forms the core of this pattern, renowned for its beautiful, raised texture that genuinely mimics the beloved breakfast treat. This specific stitch is not only visually appealing but also creates a wonderfully thick and sturdy fabric. This makes it an ideal choice for durable home decor items, ensuring your pillow stands the test of time.
To successfully complete this project, you will need to familiarize yourself with the front post double crochet (FPdc) stitch. Don’t worry if this stitch is new to your repertoire; this pattern is thoughtfully designed to be suitable for beginners ready to learn new techniques. For extra support and inspiration, a comprehensive guide on crochet tips and tricks can be incredibly helpful. We highly recommend practicing the FPdc stitch with a small swatch before embarking on the full pillow to build your confidence and ensure a smooth crafting process.
This post may contain affiliate links. As an Amazon Associate, we earn from qualifying purchases, which means we earn a small commission if you make a purchase through our links, at no extra cost to you. Check out our Amazon Crocheting Storefront. Thank you for supporting our creative endeavors!
Materials: Essential Supplies for Your Waffle Pillow
Gathering all your materials beforehand ensures a smooth and enjoyable crocheting experience. Here’s a detailed list of what you’ll need to create your soft and cuddly waffle pillow, complete with specific yarn recommendations to achieve that perfect look and texture.
- 2 Premier Parfait Chunky 131yds #6 Super Bulky in brown. We recommend using the color Teddy Bear for an authentic waffle base.
- 1 Premier Parfait Chunky 131yds #6 Super Bulky in yellow. The color Sunshine is perfect for creating the cheerful butter accent.
- Pink yarn for blush details, adding a cute, rosy cheek effect to your pillow.
- Black yarn for the mouth, giving your waffle pillow its adorable, friendly expression.
- 7.5mm safety eyes, crucial for bringing your pillow to life with expressive features.
- US size J 6.0 mm crochet hook, the ideal tool for working with super bulky yarn to achieve the desired gauge and texture. For a wider range of sizes or an upgrade, explore a Clover Amour Crochet Hook Set.
- Poly-fil for stuffing, ensuring your pillow is soft, plump, and maintains its shape beautifully.
- Stitch markers (optional, but highly recommended for beginners) to help you keep track of your stitches and rows, especially when working on the waffle stitch.
- Scissors for cutting yarn ends and tidying up your work.
- Tapestry needle for weaving in ends and sewing on the embellishments neatly.
Size (approximate): Finished Dimensions of Your Cozy Creation
Once completed, your charming waffle pillow will measure approximately 11 inches tall and 12.5 inches wide. This makes it the perfect size for a decorative accent on a couch, a comforting addition to a bed, or a sweet companion for a child.
Pattern Notes: Important Tips for a Successful Project
Before you begin crocheting, take a moment to review these crucial pattern notes. They offer valuable guidance to help you navigate the unique aspects of this design, ensuring your waffle pillow turns out perfectly and with ease. Understanding these tips will set you up for success.
- The Ch 2 at the beginning of rows does not count as a stitch throughout this pattern. This ensures your stitch count remains accurate for the main body of the waffle.
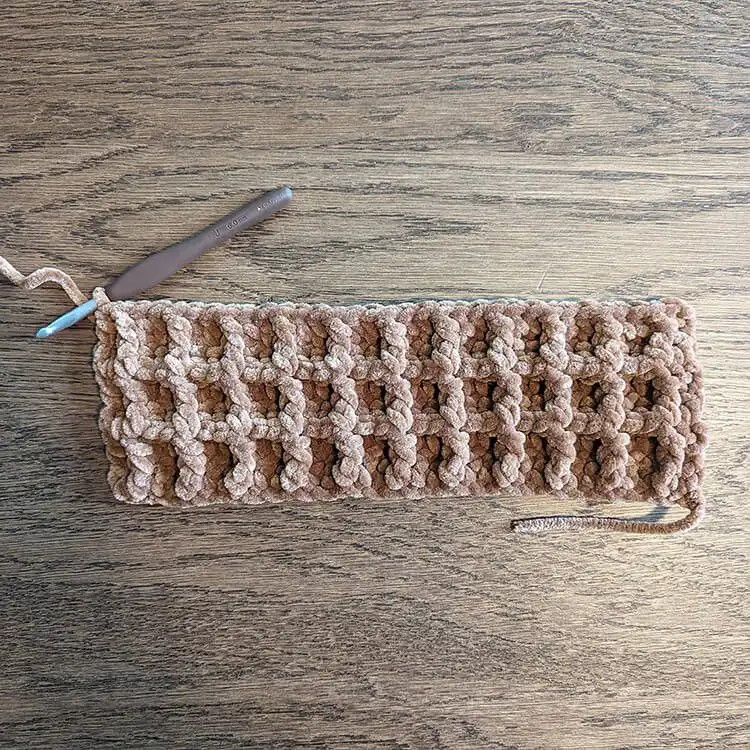
- This pattern predominantly uses the waffle stitch, which creates a rich, textured fabric. If you’re new to this technique, we highly recommend practicing with a small swatch first. A simple practice swatch can be made by chaining 14 and following the initial pattern rows to get comfortable. Consider trying other Amazing Free Crochet Granny Square Patterns for general skill building. To further expand your skills, a good Crochet Stitch Dictionary can be an invaluable resource.
- If you find yourself struggling to identify the first or last stitch of each row, utilize stitch markers. These handy tools are invaluable for keeping your place and maintaining an accurate stitch count, especially for intricate patterns.
Abbreviations (US): Decoding Your Crochet Pattern
Familiarizing yourself with common US crochet abbreviations is key to understanding and following patterns accurately. Here’s a list of the abbreviations used in this waffle pillow pattern, ensuring you can confidently read and execute each step.
- ch – chain
- st(s) – stitch(es)
- sl st – slip stitch
- sc – single crochet
- dc – double crochet
- FPdc – front post double crochet
- RS – right side
- WS – wrong side
Waffle Stitch Video Tutorial: Mastering the Key Technique
The waffle stitch is the heart of this cozy pillow, giving it its iconic texture. For visual learners or those new to this beautiful technique, a dedicated video tutorial can be incredibly helpful. This resource will guide you through the intricacies of creating perfect front post double crochet stitches and understanding the stitch repeat, ensuring your waffle texture is perfectly defined and consistent throughout your project.
Want the convenience of a printed pattern? You can easily purchase the ad-free printable PDF from our shop. This allows you to have all the instructions at your fingertips, perfect for offline crafting or for keeping alongside your project without digital distractions. If you’re just getting started with crochet, an Aeelike Complete Crochet Kit can provide all the essential tools you need.
Waffle Pillow Crochet Pattern: Step-by-Step Instructions
Make the Waffle Panels Using Brown Yarn (Make 2 Panels)
Begin by creating the main body of your waffle pillow, which consists of two identical square panels. Using your chosen brown super bulky yarn, this section walks you through the foundation chain and the initial rows that establish the beautiful waffle texture. Remember to maintain consistent tension for a uniform look.
The first few rows are crucial for setting the pattern repeat. Pay close attention to the placement of double crochets and front post double crochets, which will create the raised ridges characteristic of the waffle stitch. Ensuring your stitch count is correct in these early stages will prevent issues further into the pattern.
To begin ch 35.
Row 1 (WS): Dc in 3rd ch from hook and in each ch. Ch 2 and turn. (33 sts)
Row 2 (RS): Dc in 1st st, FPdc in next st, Dc in next 2 sts, FPdc in next st. Repeat from to . When you reach the last 2 sts, FPdc in 2nd to last stitch, and dc in last st. Ch 2 and turn.
Row 3 (WS): Dc in 1st 2 sts, FPdc in next 2 sts. Dc in next st, FPdc in next 2 sts. Repeat from to . Dc in last st. Ch 2 and turn.
Repeat rows 2 and 3 (in that order) until you have completed a total of 18 rows. Fasten off and weave in ends. Ensure your panels are identical in size before proceeding. For a small practice project, you might consider this Free Quick and Easy Crochet Coaster Pattern.
Make the Butter: Crafting the Iconic Yellow Accent
Now it’s time to add the adorable butter detail that truly brings your waffle pillow to life. This section guides you through creating a simple, square yellow piece that will be embellished with eyes, a mouth, and rosy cheeks. The clean single crochet stitches ensure a neat foundation for these cute facial features.
The final step of crocheting a border around your butter square adds a polished finish and provides a sturdy edge for sewing. This border also offers the perfect opportunity to neatly place your safety eyes and embroider the facial features, ensuring everything is securely attached and perfectly positioned for maximum cuteness.
To begin ch 8.
Row 1: Sc in 2nd ch from hook and in each ch. Ch 1 and turn. (7 sts)
Rows 2-7: Sc in each stitch, ch 1 and turn.
After you complete the final row, with your yarn still attached, ch 1 and sc around the butter. Whenever you reach a corner, place 3 sc sts in the corner. When you arrive back at the corner where you started, place 3 sc sts in that corner. Fasten off and leave a long tail for sewing.
– At this point, you will add the eyes, mouth, and blush to your butter. Carefully place the 7.5mm safety eyes between rows 6 and 7, ensuring they are approximately 4 stitches apart for a balanced look. Use pink yarn for delicate blush and black yarn to embroider a sweet, simple mouth.
Assemble the Waffle: Bringing Your Pillow Together
With all your individual pieces crocheted, it’s time for the exciting final assembly. This stage involves carefully sewing the butter onto one waffle panel and then joining the two panels together to form the plush pillow. Precision in sewing ensures a neat finish and a well-formed, plump pillow.
Stuffing the pillow correctly is crucial for maintaining its shape and cuddliness. Ensure you don’t overstuff, as this can distort the waffle texture and make the pillow too rigid. Distribute the Polyester Fiberfill Stuffing evenly to achieve a soft yet firm feel, perfect for both decorative purposes and comfortable snuggling.
– Sew your butter onto one of the waffle panels using the long tail you left. Be sure you sew your butter on the RS (right side) of the waffle panel for the finished aesthetic. Position it centrally or slightly off-center for a whimsical touch.
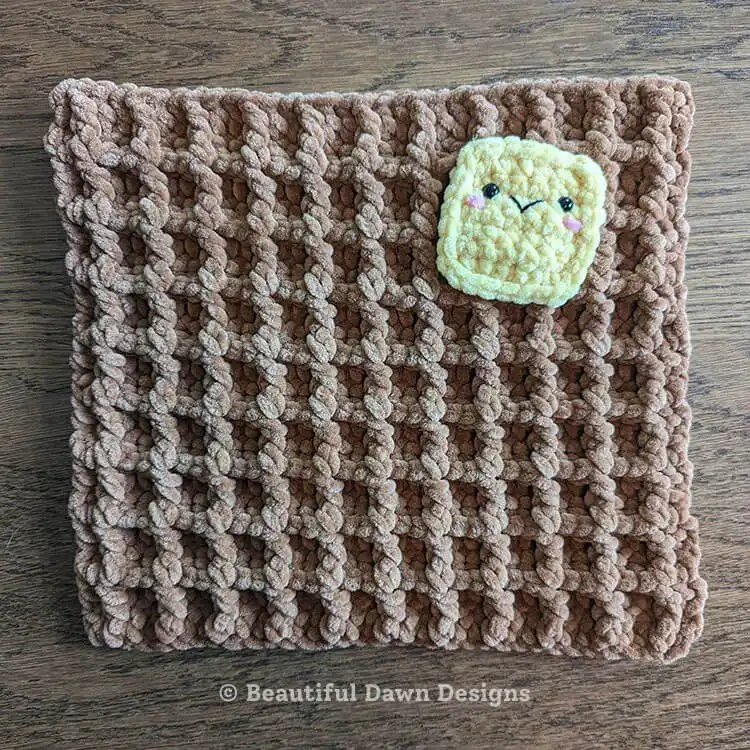
– Place your two waffle panels on top of each other with the WS (wrong sides) facing inward. This ensures the beautiful waffle texture is on the exterior of your finished pillow.
– Attach your brown yarn to the top left corner of both panels, ch 1 and sc around the waffle, joining the two pieces. Whenever you reach a corner, place 3 sc sts in that corner to create a neat, rounded edge. This method creates a durable seam.
– We understand that it can be a bit challenging to clearly see your stitches when crocheting the sides together, especially with bulky yarn. Just do your very best here; the exact stitch count on the seam is not as critical as achieving a secure and even join.
– When you reach the top of the waffle, pause to stuff the pillow with Poly-fil. Take care not to overstuff so that the pillow retains its intended shape and softness without bulging. Continue to sc the top closed, ensuring the stuffing remains securely inside. When you arrive back at the corner where you started, place 3 sc sts in that corner to finish the edge beautifully. Fasten off and weave in the remaining ends neatly, creating a seamless and polished finish. If you enjoy making cute projects, try this Crochet Balloon Dog: A Playful Handmade Companion.
We hope you’ve enjoyed crafting this adorable waffle pillow using our free crochet pattern! It’s a truly rewarding project that adds a cozy, personalized touch to any home. If you’re looking for your next project or need to stock up on supplies, consider exploring an Aeelike Crochet Kit for Beginners & Adults for endless creative possibilities. Don’t forget to save this pin to your Pinterest board for future reference and share your finished creation with fellow crafters. Happy crocheting!


