Cute Crochet Chicken Mug Coaster: Easy Mug Hugger Pattern & Gift Idea
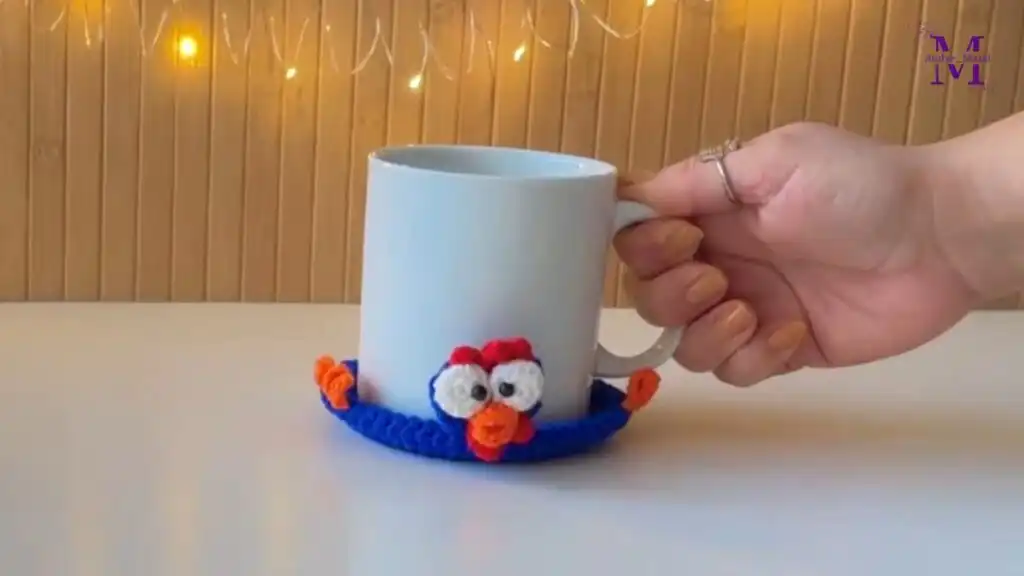
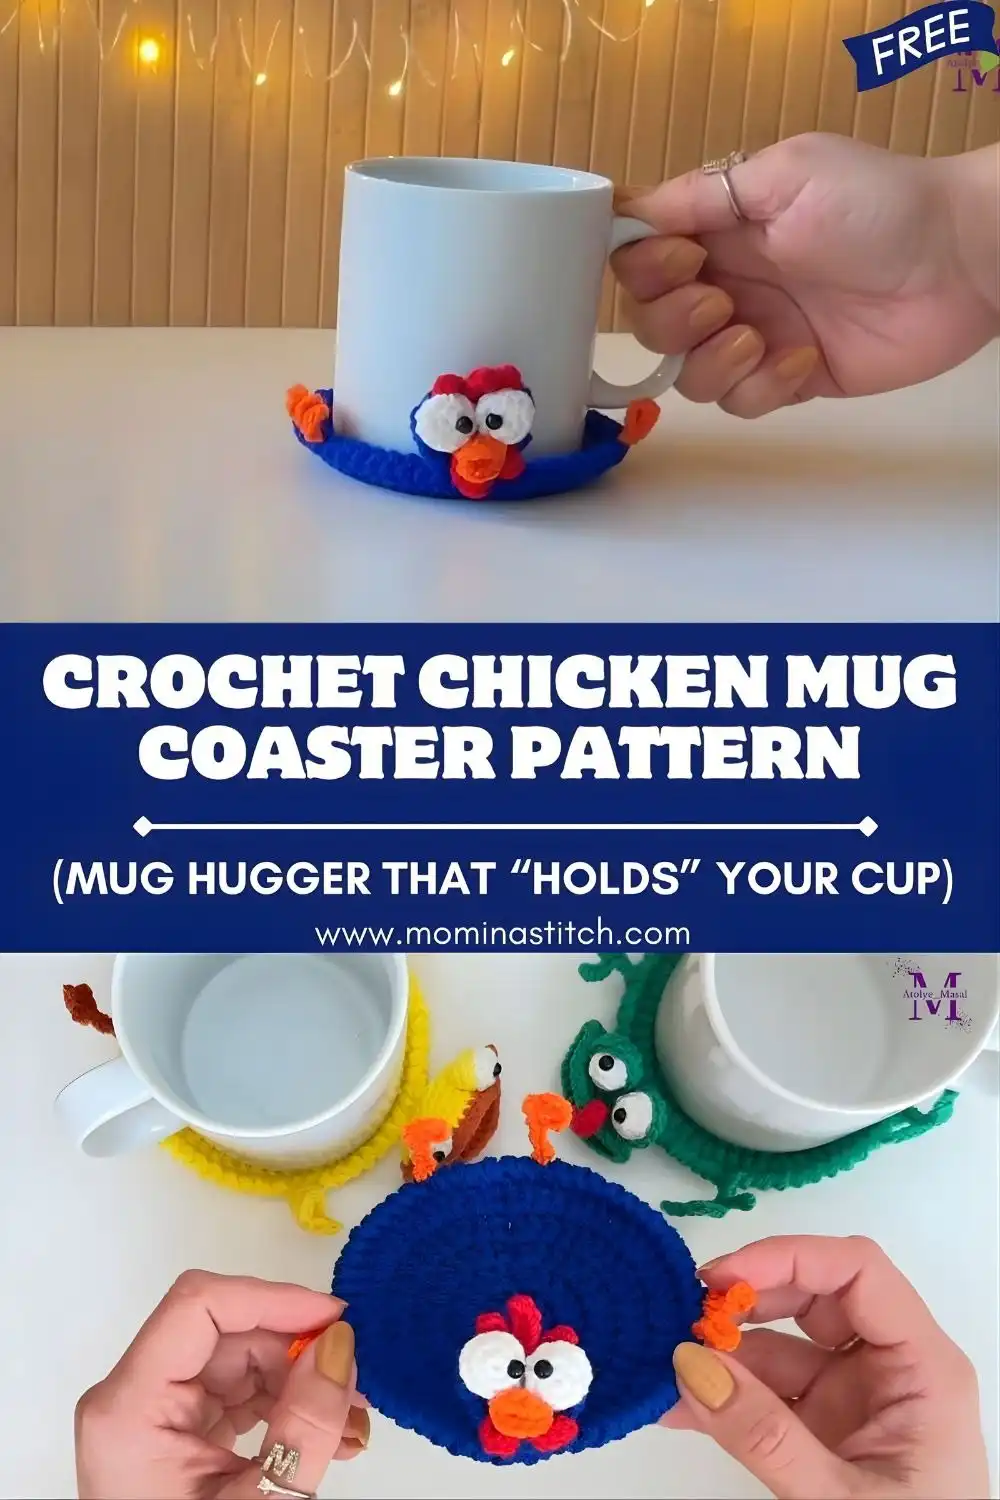
Discover how to crochet the most adorable Cute Crochet Chicken Mug Coaster, a delightful project that doubles as a charming mug hugger. This pattern guides you through creating a little chicken that appears to be cuddling your favorite cup, adding a touch of handmade whimsy to your daily routine. It’s not just incredibly cute; it’s also a practical item that protects surfaces from heat and condensation, making it an ideal easy gift idea for any occasion.
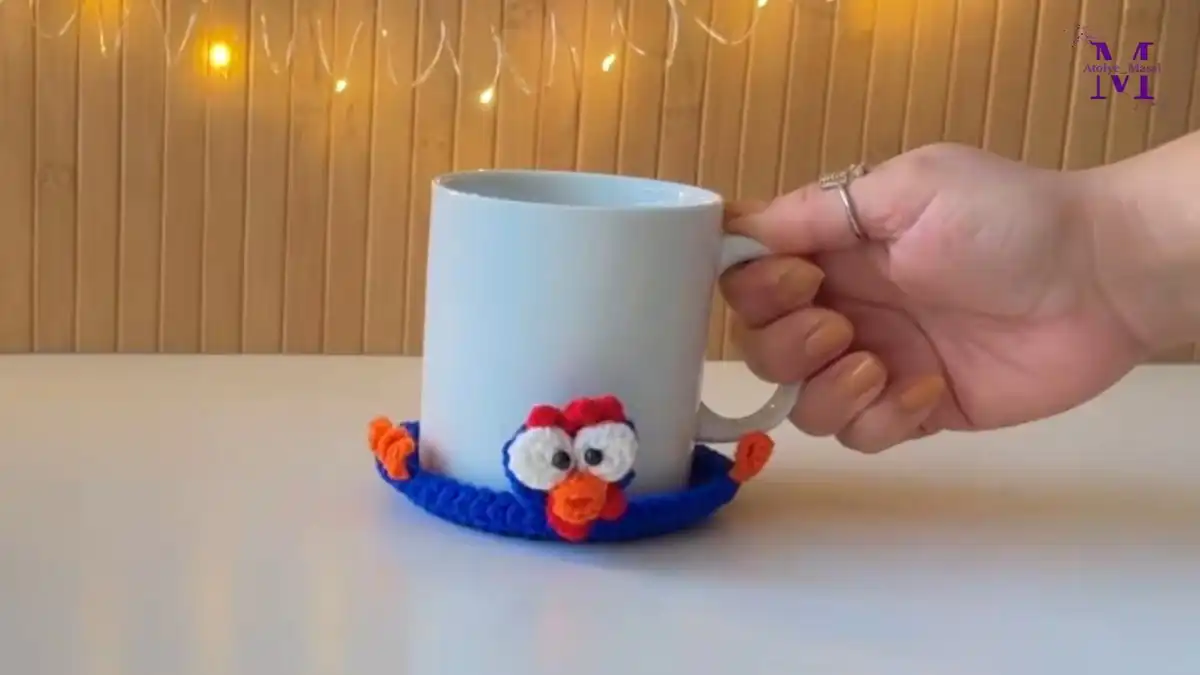
This crochet chicken mug coaster, also affectionately known as a mug hugger, brings a unique flair to any kitchen or desk. It combines a sturdy coaster base with charming amigurumi-style details like wings, eyes, a beak, and a comb, resulting in a truly unique piece. Perfect for using up scrap yarn, this project is quick to complete and offers endless possibilities for personalization. These make fantastic additions to Easter crochet pattern bundles, housewarming presents, or thoughtful tokens for teachers and coworkers, bringing smiles with every sip.
Materials Needed
Gathering the right materials is the first step to success in any crochet project, and this Cute Crochet Chicken Mug Coaster is no exception. Selecting appropriate yarn weights and hook sizes ensures your coaster is not only adorable but also functional and durable. For the best results, consider the texture and washability of your chosen fibers. Using high-quality yarn will elevate the finished look and feel of your chicken mug hugger, making it a truly special handmade item.
Yarn (worsted/medium weight is ideal):
- Blue yarn (coaster base/background): Choose a color that complements your home decor or stands out against your mugs. Worsted weight cotton yarn is excellent for coasters due to its absorbency and heat resistance.
- White yarn (chicken body): This forms the main part of your chicken. A soft, opaque white, like this pure milk cotton yarn, will give the best effect for the feathered body.
- Orange yarn (beak and/or feet accents if desired): A small amount of bright orange yarn is perfect for adding those classic chicken features.
- Red yarn (comb on top): A vibrant red will make the chicken’s comb pop, adding to its charming character.
Tools & Notions:
- Crochet hook: 4.0 mm–5.0 mm: A 4.0 mm–4.5 mm hook is recommended for a tighter, sturdier fabric, essential for a functional coaster. This prevents large gaps and ensures the coaster holds its shape. Consider a 4 mm Clover Purple Amour Crochet Hook for comfort and ease of use.
- Safety eyes (6–8 mm) or small black beads or black yarn for embroidery: Safety eyes offer a quick, professional finish, while embroidery allows for a softer, more child-friendly look.
- Yarn needle (tapestry needle): Indispensable for weaving in ends neatly and assembling the chicken’s facial features. A bent tip needle like this one can be particularly helpful.
- Scissors: For cutting yarn and tidying up. A cute pair of scissors always makes crafting more fun!
- Stitch markers: Highly recommended for marking the beginning of rounds, especially for beginners, to ensure accurate stitch counts and prevent mistakes. Grab some colorful crochet stitch markers to keep track.
- Optional stuffing: a pinch of fiberfill: A tiny bit of lightweight polyester fiberfill can be used to slightly puff up the wings or comb, adding a delightful 3D effect to your chicken.
Crochet Abbreviations
Understanding crochet abbreviations is like learning a secret language that unlocks countless patterns. For this chicken mug coaster, familiarity with these common terms will make following the instructions much smoother. Each abbreviation represents a specific stitch or action, ensuring clarity and consistency throughout the pattern. Taking a moment to review these before you begin will save time and prevent confusion, allowing you to focus on the joy of creation.
- MR – Magic Ring
- CH – Chain
- SC – Single Crochet
- HDC – Half Double Crochet
- DC – Double Crochet
- SL ST – Slip Stitch
- INC – Increase (2 stitches in the same stitch)
- DEC – Decrease (single crochet 2 together)
- BLO/FLO – Back loop only / Front loop only
- RS/WS – Right side / Wrong side
- ( ) – repeat instructions within parentheses
Finished Size
The finished size of your crochet chicken mug coaster will largely depend on your yarn weight and hook size, as well as your personal tension. Using worsted weight yarn and a 4.5 mm hook typically yields a coaster base with a diameter of 4.5–5.5 inches (11.5–14 cm), and a chicken body height of about 1–1.5 inches (2.5–4 cm). This sizing is designed to comfortably fit most standard coffee mugs, providing ample protection and a charming “hug.” If you use a thicker yarn or a larger hook, your coaster will naturally be bigger, while a thinner yarn or smaller hook will result in a more petite coaster. Always do a quick size check as you work to ensure it perfectly accommodates your favorite mug.
Crochet Pattern – Step by Step
Embark on your crafting journey with this detailed, step-by-step crochet pattern. Each section is broken down to ensure clarity and success, even for those newer to amigurumi-style details. We’ll start with the foundational coaster base, then build up the adorable chicken elements that make this mug hugger so special. Pay close attention to stitch counts and shaping instructions to bring your chicken coaster to life with personality and charm.
Coaster Base (Round)
The coaster base forms the sturdy foundation for your chicken mug hugger. Working in joined rounds creates a neat, flat circle, which is essential for a coaster that sits evenly. Choose your base color wisely, as it will peek out from under your mug and complement the white chicken body. A set of multicolored yarn can offer plenty of options. Maintaining consistent tension throughout these rounds is key to avoiding a rippled or cupped coaster. Before fastening off, always place your intended mug on the finished circle to ensure the diameter is just right – slightly wider than the mug’s base for optimal protection and aesthetic appeal.
Color: Blue (or your chosen base color)
Work in joined rounds or continuous rounds (joined rounds look neater for flat circles).
- Round 1: MR, CH 1, 6 SC in MR, join with SL ST to first SC. [6]
- Round 2: CH 1, INC in each st around, join. [12]
- Round 3: CH 1, (SC, INC) around, join. [18]
- Round 4: CH 1, (2 SC, INC) around, join. [24]
- Round 5: CH 1, (3 SC, INC) around, join. [30]
- Round 6: CH 1, (4 SC, INC) around, join. [36]
- Round 7: CH 1, (5 SC, INC) around, join. [42]
- Round 8: CH 1, (6 SC, INC) around, join. [48]
Size check: Place your mug on the circle. You want the coaster slightly wider than the mug base.
- Smaller mug: stop at R7 (42 sts)
- Larger mug: add R9 = (7 SC, INC) around = [54]
Fasten off blue and weave in.
Chicken Body Edge (Raised “Hugger” Shape)
This section is where your coaster truly transforms into a mug hugger! The raised chicken body edge will create the illusion of a little chicken peeking out from under your mug, holding it snugly. The goal is to create a curved panel that wraps partially around the mug’s base. You can adjust the width and height of this panel to perfectly suit your mug and desired chicken look. The subsequent decrease rows help to shape the top of the chicken’s back, creating a gentle curve that looks natural when assembled.
Color: White
This section creates a raised chicken shape along part of the coaster edge so it looks like the chicken is wrapping the mug.
Step 1: Attach white yarn
Carefully attach your white yarn anywhere on the outer edge of the coaster using a slip stitch. The placement is flexible, but it’s helpful to visualize where the front of your mug will sit. Typically, you’ll want the chicken to appear to “sit” at the front center of the coaster, ready to greet you with your morning coffee. Ensure your attachment is secure but not too tight, as it will be the starting point for your chicken’s body.
Step 2: Work a partial round to form the chicken body panel
This panel will form the main “body” of your chicken, extending upwards from the coaster base. The number of stitches for the initial row (18–24 SC) determines how wide your chicken will be around the mug. After a few straight rows to establish height, you’ll begin decreasing to create a rounded, chicken-like silhouette. This shaping is crucial for the “hugger” effect, allowing the chicken to gently cup the bottom of your mug.
- Body Row 1: CH 1, SC in next 18–24 sts (depending on coaster size). Turn.
- Body Row 2: CH 1, SC across. Turn.
- Body Row 3: CH 1, SC across. Turn.
- Body Row 4: CH 1, DEC, SC across until 2 sts left, DEC. Turn.
- Body Row 5: CH 1, SC across. Turn.
Repeat Rows 4–5 as needed until the panel looks like a rounded “chicken chest” (not too tall).
Fasten off leaving a long tail for shaping/sewing if needed.
Optional shaping tip: If you want the body to hug the mug more, sew the side edges of the panel down slightly so it curves upward like a little apron.
Chicken Wings (Make 2)
These small, simple wing ovals add character and complete the chicken’s silhouette. Crocheted in the round, they are quick to make and require minimal shaping. The final step of single crocheting through both layers to close the wing creates a neat, flat edge that is easy to attach to the chicken’s body. Consider adding a small pinch of fiberfill before closing if you prefer a slightly puffy, more dimensional wing that truly looks ready to embrace your mug. Ensure both wings are uniform in size for a balanced look.
Color: White
These are small, simple wing ovals.
- Round 1: MR, 6 SC in MR. [6]
- Round 2: (SC, INC) around. [9]
- Round 3: SC around. [9]
Flatten the piece and SC through both layers across the top (about 4–5 SC) to close.
Fasten off leaving a tail for sewing.
Optional: Add a pinch of stuffing before closing for a puffy wing.
Chicken Eyes (Attach or Crochet)
The eyes are crucial for giving your crochet chicken its personality! You have two main options, each offering a distinct look and level of safety. Safety eyes provide a quick, professional, and often more defined look, while embroidered eyes offer a softer, perhaps more whimsical, and definitely child-safe finish. Consider who the coaster is for when making your choice. Placement is key: ensure the eyes are evenly spaced and centered on the chicken’s face to create an engaging expression.
Choose one method:
Option A: Safety eyes (quick and cute)
Safety eyes are a popular choice for amigurumi projects due to their ease of use and secure attachment. When placing them on your chicken body panel, aim for about 2–3 stitches apart, centered near the top of the white panel where the “head” would be. If your crochet fabric is a bit loose or thin, placing a small circle of felt behind the washer on the back of the eye can add extra stability, preventing the eye from wiggling or pulling through the stitches over time. Always double-check placement before firmly securing the backs.
- Place eyes on the chicken body panel, about 2–3 stitches apart, centered near the top of the white panel.
- If the panel is thin, use a small felt circle behind the eye backs for stability.
Option B: Embroidered eyes (kid-friendly)
Embroidered eyes are a fantastic alternative, especially if the coaster might be handled by small children, as there are no small parts to become a choking hazard. Using black yarn and a yarn needle, you can create a variety of expressions. Two small vertical lines give a simple, classic look, while French knots can create charming, dot-like eyes. Experiment with a few stitches to see what best captures the character you envision for your little chicken. This method also allows for more nuanced expressions, like sleepy or curious eyes.
- With black yarn, stitch two small vertical lines or French knots for eyes.
Chicken Beak (Small Triangle)
This simple, tiny triangle forms the chicken’s beak, adding another essential characteristic to its face. By crocheting just a few chains and then decreasing, you quickly create a pointed shape that perfectly mimics a bird’s beak. The goal is a compact, firm piece that will hold its shape when sewn onto the chicken’s face. Choose a bright orange yarn, perhaps from a cotton yarn set, to make it stand out. Ensuring you leave a long tail upon fastening off will provide plenty of yarn for securely sewing the beak just below and centered between the eyes.
Color: Orange
- Row 1: CH 3
- Row 2: SC in 2nd CH from hook, SC in next CH. (2 sts)
- Row 3: CH 1, DEC over 2 sts. (1 st)
Fasten off leaving a tail. Sew beak centered under the eyes.
Chicken Comb (Top Red Part)
The chicken’s comb is its crowning glory, adding a splash of vibrant red and unmistakable poultry charm. This pattern creates a distinctive three-bump comb using a sequence of slip stitches, single crochets, and half double crochets along a chain. This combination of stitches naturally forms the undulating shape characteristic of a chicken’s comb. The varied heights of the stitches give it a playful, realistic texture. Once again, leaving a long tail for sewing will make it easy to securely attach this delightful detail to the very top of your chicken’s head, centered above its eyes.
Color: Red
This is a simple 3-bump comb.
- CH 7
- In 2nd CH from hook: SL ST
- Next CH: SC
- Next CH: HDC
- Next CH: SC
- Next CH: HDC
- Last CH: SC
Fasten off leaving a tail.
Sew comb to the top of the chicken body panel (centered above eyes).
Assembly Instructions
Bringing all the pieces together is the most rewarding part of crafting your chicken mug coaster. Careful assembly ensures your chicken looks its best and functions perfectly as a mug hugger. Use your yarn needle to neatly sew each component, ensuring all seams are secure and virtually invisible. Pay special attention to positioning the body panel and wings so they create that welcoming “hug” for your mug. A little strategic placement here makes all the difference in the final adorable presentation.
- Position the chicken body panel on the coaster edge (white section should sit where the mug front will be).
- Sew the body panel edges to the coaster base with whip stitch or mattress stitch so it curves slightly upward. This gives the chicken its body shape.
- Attach wings on each side of the body panel—angle them forward so they look like they’re “holding” the mug. This creates the hugging effect.
- Add eyes (safety eyes or embroidery) according to your chosen method.
- Sew on the beak centered beneath the eyes.
- Sew on the comb at the top of the head.
- Weave in all ends securely. This ensures your coaster is neat and durable.
Fit check: Place your mug on the coaster. If the chicken doesn’t “hug” enough, sew the wings a bit more forward or add a small tack stitch at the sides of the body panel to bring it closer around the mug.
Beginner Tips
For those new to crochet or trying this specific type of project for the first time, a few key tips can make your experience much more enjoyable and successful. Maintaining even tension is fundamental for a neat finish, especially for a flat item like a coaster. Accurate stitch counting prevents wonky shapes, while choosing the right yarn ensures durability and function. Don’t be afraid to unravel and re-do if something doesn’t look quite right – practice makes perfect, and the end result will be worth the effort.
- Maintain even stitches: Tight, consistent tension makes coasters sturdier and helps them lie flat. Inconsistent tension can lead to wavy edges or a lopsided shape.
- Count stitches each round: Coaster circles rely on accurate increases to prevent ruffling or cupping. Using stitch markers can be incredibly helpful for keeping track.
- Choose the right yarn thickness: Worsted cotton is excellent for coasters because it’s heat-resistant, absorbent, and washable. Acrylic works too, but can feel softer and less structured, which might make it less ideal for preventing mug wobbles.
- Block if needed: If your finished coaster curls or doesn’t lie perfectly flat, a simple blocking can fix it. Lightly steam (for acrylic) or wet-block (for cotton) and then gently shape and dry flat.
Customization Ideas
The beauty of this crochet chicken mug coaster pattern lies in its adaptability! Once you’ve mastered the basic structure, you can unleash your creativity to design a whole barnyard of mug huggers or personalize your chicken in unique ways. Experiment with different yarn colors to match seasons or individual preferences, or even extend the concept to create a full cozy. These small modifications can lead to entirely new and exciting projects, making each coaster a unique piece of art.
- Make different animal mug coasters: The basic coaster base and raised body panel can be a fantastic starting point for other creatures. Swap the chicken details for a cat, frog, bear, or duck by changing the ear shapes, eye styles, and adding different facial features. If you love crafting unique animals, explore patterns like the 18 Adorable Crochet Turtle Patterns for inspiration. For more amigurumi ideas, check out Crochet Cute Critters.
- Change yarn colors: Go beyond traditional chicken colors! Make pastel chickens for spring or Easter gifts, or opt for farmhouse neutrals like cream and tan for year-round kitchen decor. Variegated yarns can also create a fun, speckled chicken effect.
- Turn it into a full mug cozy: Instead of just a partial body edge, extend the “body edge” into a longer band that wraps fully around the mug. Add a button closure or simply sew the ends together to create a cozy that completely covers the mug, adding warmth and insulation.
- Add embroidery details: Give your chicken extra personality with small embroidered touches. Little eyelashes can make it sweet, rosy cheeks add a blush, or stitched feather lines on the wings can enhance texture and realism.
Conclusion
This Crochet Chicken Mug Coaster Pattern truly is the perfect blend of adorable and practical. It not only safeguards your surfaces from heat and condensation but also infuses every coffee or tea break with a delightful touch of handmade charm. Whether you’re seeking a beginner-friendly crochet project or a unique gift idea, this chicken mug hugger is an absolute must-try. Its quick completion time and endless customization options make it a joy to create and an even greater joy to use or give. To get started with all your necessary supplies, consider an Aeelike Complete Crochet Kit for Beginners & Adults. Don’t forget to save this idea to your Pinterest board and share it with fellow craft enthusiasts!


