Beginner-Friendly Free Bunny Lovey Crochet Pattern Baby Gift: Craft a Cuddly Companion
This post contains affiliate links. As an Amazon Associate, we earn from qualifying purchases.
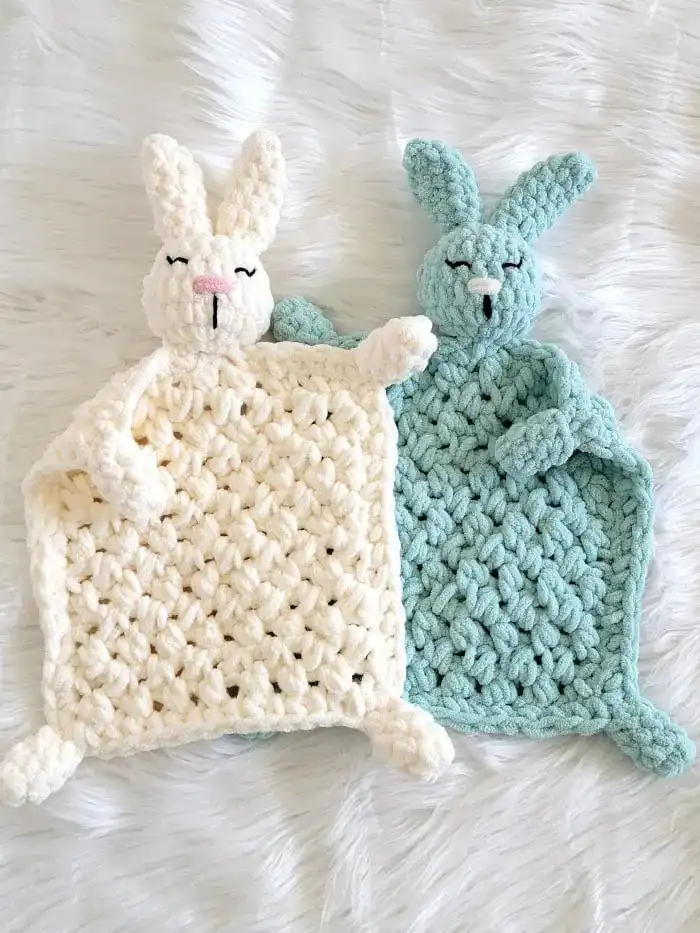
Welcome to the enchanting world of handmade comfort, where you can create a truly special cozy crochet blanket and amigurumi characters in one adorable project! This beginner-friendly free bunny lovey crochet pattern is the perfect baby gift, offering warmth, texture, and a charming friend for little ones. There’s an undeniable sweetness in crafting a soft, snuggly lovey adorned with gentle bunny ears, designed to bring joy and comfort.
The magic of a lovey lies in its ability to become a cherished companion, offering a sense of security and warmth that only a handmade item can provide. Creating a bunny lovey is not just about following a pattern; it’s about pouring love into every stitch, resulting in a unique keepsake. Once you experience the joy of seeing a baby adore their new comfort blanket, you’ll be hooked on crafting more such delightful projects, and having your crocheting essentials ready will make it even easier.
PHOTOS by Shehnaaz / crochetdreamz.com
Our goal is to make this process as enjoyable and straightforward as possible, especially for beginners. This comprehensive guide will walk you through each step, from selecting your yarn to assembling the final piece, ensuring your bunny lovey turns out perfectly. For beginners, starting with an all-in-one crochet kit can greatly simplify the process of gathering supplies. We’re excited to share this free pattern with you, hoping it inspires many more adorable lovey creations.
PHOTOS by Shehnaaz / crochetdreamz.com
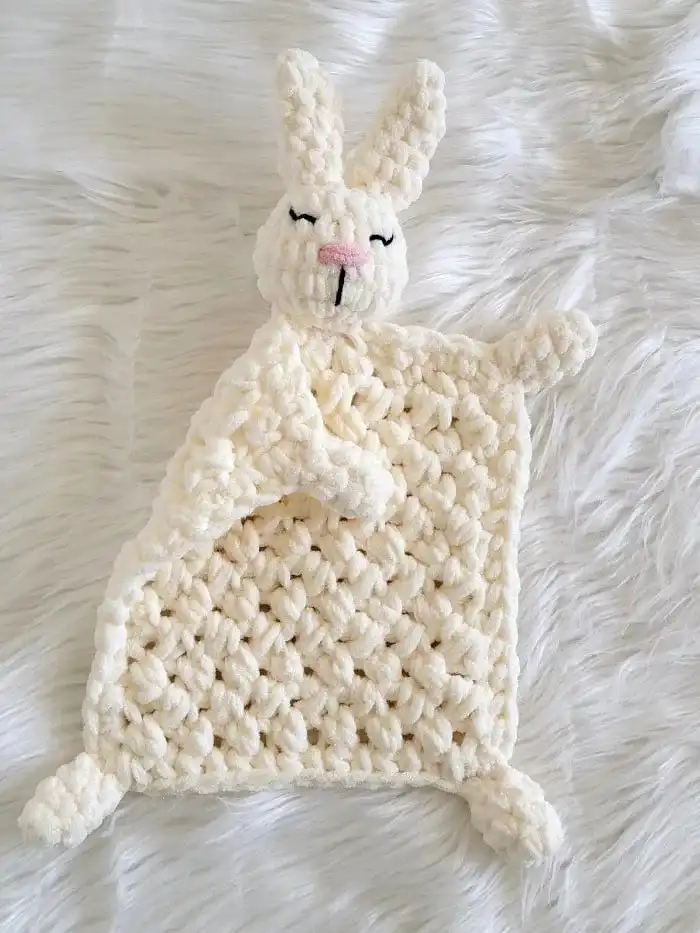
The beauty of a crochet lovey lies in its simplicity and comforting presence. It’s more than just a blanket; it’s a tactile experience for babies, a soft friend to hold onto. This design, combining a cuddly blanket with a sweet bunny head and ears, makes it an irresistible addition to any nursery or a thoughtful, personalized gift.
PHOTOS by Shehnaaz / crochetdreamz.com
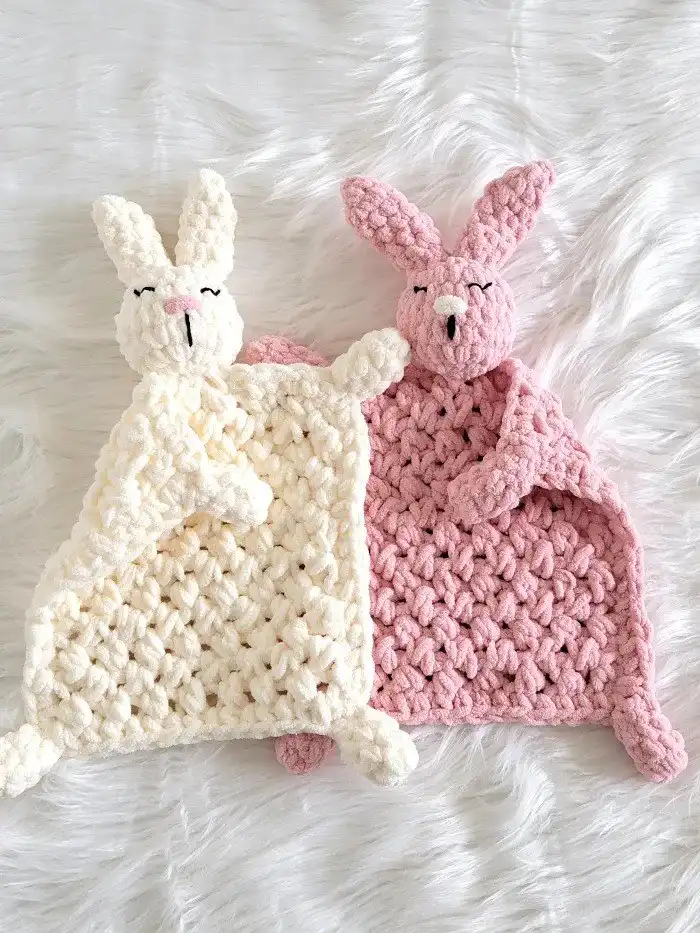
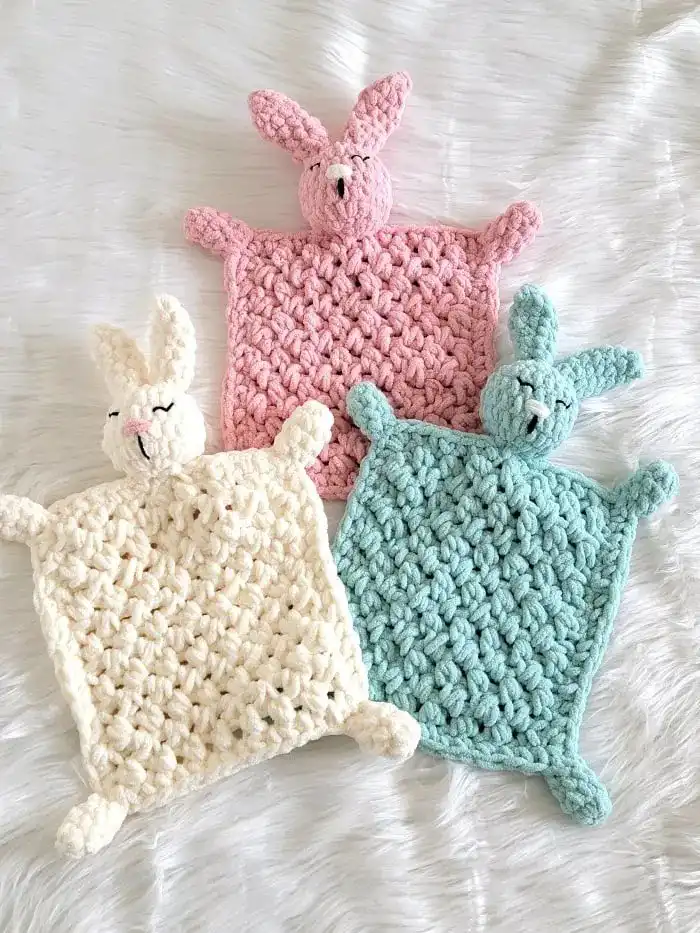
Whether you’re making this for your own little one or as a heartfelt gift, the process of crocheting this bunny lovey is incredibly rewarding. The gentle colors and super chunky yarn create an inviting texture, perfect for tiny hands to grasp and explore. We believe you’ll find immense satisfaction in bringing this charming bunny to life, stitch by stitch.
PHOTOS by Shehnaaz / crochetdreamz.com
Bunny Lovey Crochet Pattern
This charming amigurumi design is available as a free pattern below, or you can opt for the convenience of an ad-free PDF version for $3.99. Purchasing the PDF provides an immediate download link after payment, allowing you to access the pattern without interruption. Don’t forget to save this pattern for later by pinning it on Pinterest, so you can easily find it when you’re ready to start your project!
Materials
Choosing the right materials is crucial for the comfort and durability of your bunny lovey. For this pattern, Bernat Baby Blanket yarn in soft shades like Seafoam, Tan Pink, and Vanilla offers a wonderfully plush and safe texture, ideal for soft baby-friendly yarn. This size 6 super chunky chenille yarn works up quickly and creates a cozy, substantial fabric. Experimenting with other super chunky yarns of similar weight is also an option, but always check for softness and washability.
You’ll also need small quantities of worsted-weight yarn in black for embroidering the delicate eyes and mouth, and a bit of the Bernat Blanket yarn (Tan Pink or cream) for the nose, or even black for a more defined look. The pattern calls for both a K (6.5mm) hook for the smaller head and leg components and an N/P (10mm) hook for the main body, ensuring proper tension and drape. A tapestry needle is essential for weaving in ends and securely assembling the parts, while stitch markers will help you keep track of rounds. Finally, polyfill stuffing gives the bunny’s head its soft, huggable shape.
Finished Size
Understanding the finished dimensions is important for visualizing your completed lovey and ensuring it meets your expectations for a baby gift. This pattern is designed to create a rectangular body measuring approximately 11 inches long and 10 inches wide. This size is ideal for a comfort blanket, providing enough fabric for a baby to snuggle without being overly cumbersome. Achieving this size depends largely on your gauge and yarn choice, so a quick gauge swatch is recommended before starting the main body.
Yardage
Knowing the approximate yardage required helps in planning your yarn purchases and ensures you have enough to complete the project without interruption. For this bunny lovey, you will need approximately 100 yards of super chunky yarn. This estimate is based on the Bernat Baby Blanket yarn specified in the pattern. Keep in mind that individual tension can affect yarn usage, so it’s always a good idea to have a little extra, especially if you tend to crochet tightly. This will allow you to complete your lovey smoothly and without worries.
Stitch Abbreviations
Familiarity with crochet abbreviations is key to confidently following any pattern, including this one. The pattern is written using standard US crochet terms, making it accessible to a wide audience. Here’s a quick guide to the abbreviations you’ll encounter: st refers to “stitch,” ch means “chain,’ and sc stands for “single crochet.” These foundational stitches form the basis of many crochet projects.
Additionally, you’ll find abbreviations for specific techniques: YO for “yarn over,” which is a fundamental part of many stitches. dec denotes an “invisible decrease for Amigurumi,” a technique designed to minimize gaps in your work. Lastly, sc2tog indicates a “single crochet two together,” a more standard decrease method. Understanding these abbreviations will streamline your crocheting process and help you create a beautiful, professional-looking bunny lovey.
Stitch Explanations
Mastering special stitches and techniques is often the difference between a good project and a great one. This pattern incorporates a few key techniques that, once understood, will greatly enhance your crocheting skills. The invisible decrease (dec) is particularly useful for amigurumi sections like the bunny’s head, as it creates a seamless reduction in stitches, avoiding noticeable holes. To perform it, insert your hook into the front loop of the first stitch, then into the front loop of the second stitch, yarn over, pull through the first two loops, yarn over again, and pull through the remaining two loops on your hook.
For areas that don’t require stuffing, the standard sc2tog (single crochet two together) is used, which is a simpler decrease: pull up a loop in the next two stitches, yarn over, and pull through all three loops on your hook. The invisible join is a neat finishing technique that creates a smooth, continuous edge after your last stitch, ideal for closing rounds seamlessly. Finally, the SHD (single half double decrease) is a unique stitch used in the body, blending a single crochet and half double crochet for a distinct texture: insert your hook into the first stitch, pull up a loop, yarn over, pull up a loop in the next stitch, then yarn over and pull through all four loops on your hook. Practice these techniques to ensure a polished final product.
Crochet Bunny Lovey Pattern
Pattern Notes
Before you dive into the pattern, these notes offer crucial guidance for successful execution. The project is broken down into manageable steps: first, the body is created as a rectangle. Next, the head is worked, and its charming facial features are added. Two ears are then crocheted and attached to the head. Four legs are made, one for each corner of the rectangle. Finally, the head is securely attached to the top center of the rectangle, bringing your bunny lovey to life. Following this overview will help you visualize the construction process.
When working in rounds, especially for the head and ears, using stitch markers is incredibly helpful. Every time you work into a marked stitch, remember to move the marker up into the first stitch you just created in that round. This practice ensures you maintain an accurate stitch count and prevents uneven shaping. Unlike many traditional crochet patterns, you will not turn your work at the end of rounds, maintaining a continuous spiral, which is typical for amigurumi. This method helps to achieve a smooth fabric without visible seams.
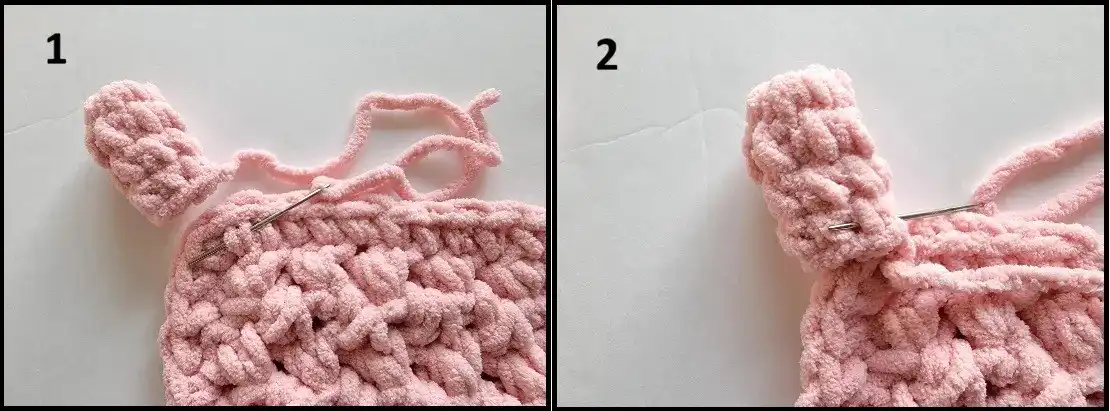
Seamlessly joining pieces is a hallmark of a professional finish. While whip stitching is a common method, for a cleaner and more polished look, consider the technique of inserting your needle under the post of a stitch on the first piece, then under the post of the corresponding stitch on the second piece. Repeat this back and forth to create an almost invisible join. This attention to detail elevates the overall appearance of your finished bunny lovey, making it even more special. This technique is also used in creating a beautiful modern granny blanket.
PHOTOS by crochetdreamz.com
Head of the Crochet Lovey
Crafting the head of your bunny lovey is where its personality truly begins to emerge. Start by forming a magic ring, a foundational technique for amigurumi that creates a tight center, preventing any gaps. Using your smaller K (6.5mm) hook, work 7 single crochets into this ring for Round 1, ensuring a snug start. As you progress through the rounds, remember to place a stitch marker in the first stitch of each round to easily keep track of your progress and maintain the correct stitch count. This is especially important for shaping the sphere of the head.
Round 2 involves increasing to 14 single crochets by working 2 single crochets in each stitch. For Round 3, you’ll continue increasing to 21 single crochets with a pattern of (2 sc in next st, 1 sc in next st) repeated around. Rounds 4 to 6 are worked evenly, with 1 single crochet in each of the 21 stitches, allowing the head to build height. Begin stuffing the head with polyfill once you’ve completed these rounds, ensuring an even and firm fill. Round 7 introduces decreases to shape the top of the head, and Round 8 further reduces the stitches before you fasten off with a long tail, which will be used for final assembly. Use a tapestry needle to whipstitch through the front loops, adding more stuffing as needed, then pull to securely close the hole, leaving a long tail for attaching the head to the body.
PHOTOS by crochetdreamz.com
Adding the Facial features to the Head
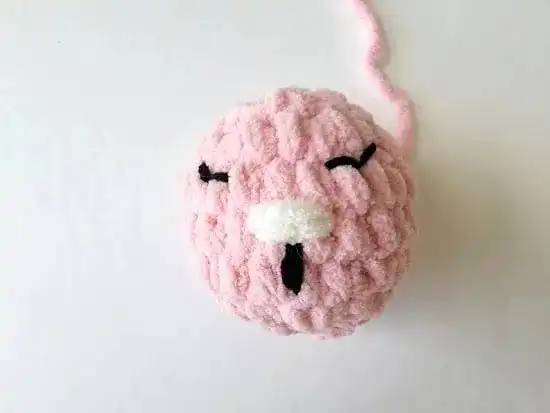
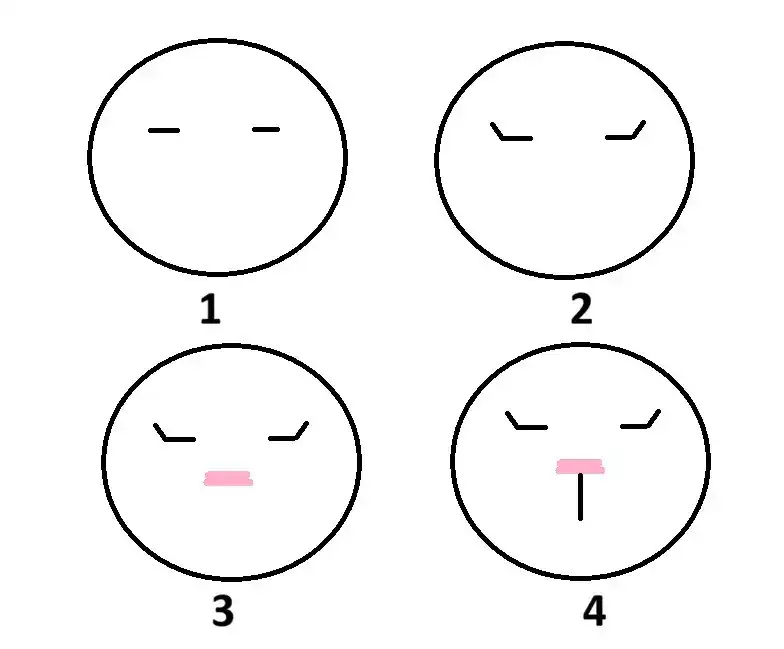
Embroidering the facial features is a delicate and important step that truly brings your bunny lovey to life, giving it a unique character. For the eyes, use black worsted-weight yarn to stitch two short horizontal lines. To add a touch of expression, create a small upward stitch at the outer corner of each eye; this angling gives the bunny a sweet, slightly sleepy look. Ensure these features are securely stitched and baby-safe.
Next, use a small amount of Tan Pink or cream Bernat Blanket yarn (or black worsted-weight yarn if preferred) to stitch the nose. Create two short horizontal strands close together to form a small, subtle nose shape. Below the nose, add a short vertical line for the mouth, completing the bunny’s gentle expression. After finishing each feature, bring the yarn tail back to your starting point, tie the two ends securely inside the head, and carefully hide the tails within the stuffing. This method ensures a neat finish and prevents loose threads, maintaining safety for the baby.
PHOTOS by crochetdreamz.com
Ears for the Lovey Pattern- Make 2
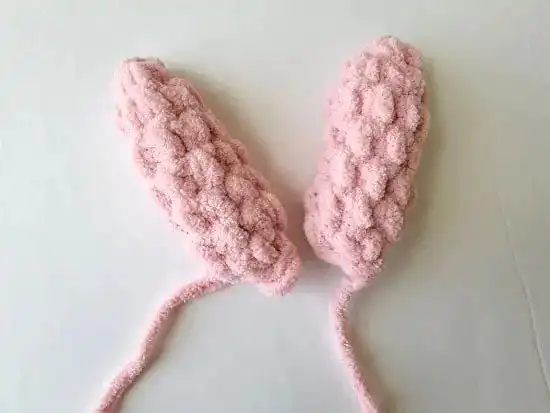
The bunny ears are a defining feature of your lovey, adding to its charm and whimsical appeal. You’ll need to make two identical ears. Begin Round 1 with your K (6.5mm) hook and create a magic ring, working 4 single crochets into it. Remember to mark the first single crochet to keep track of your rounds. A pro tip for the next round: work your first single crochet tightly by pulling the loop on your hook before making the stitch. This helps prevent any unsightly holes from forming at the base of the ear, ensuring a polished look.
For Round 2, you’ll increase your stitches to 8 by working 2 single crochets in the marked stitch and then in the remaining 3 stitches. As you proceed, push your work right-side out to make it easier to continue. Rounds 3 through 6 are worked evenly, with 1 single crochet in each of the 8 stitches, building the height of the ears. In the Last Round, you will decrease the stitches by working sc2tog across the marked stitch and the next stitch, repeating this 3 more times, and then sl st to the first stitch. Fasten off, leaving a long tail. This tail will be essential for attaching the ears to the bunny’s head, ensuring a secure and well-positioned attachment.
PHOTOS by crochetdreamz.com
Attaching the Ears to the Head
Attaching the ears is a key step in completing your bunny’s adorable appearance. Proper placement and secure attachment are crucial for both aesthetics and durability, especially for a baby item. Once you’ve crocheted both ears, position them carefully on top of the bunny’s head. Take your time to ensure they are evenly spaced and angled to your liking before you begin sewing. The long tails you left on the ears will now come in handy for this process.
Using a tapestry needle, refer to the “Stitch Explanation” section for guidance on how to attach seamlessly. This technique involves inserting your needle under the post of a stitch on the ear, then under the post of a corresponding stitch on the head, repeating this motion to create a strong yet almost invisible join. This method ensures the ears stand up nicely and are firmly secured, able to withstand gentle play. Once attached, carefully hide any remaining yarn tails inside the ears to maintain a neat and safe finish, leaving no loose ends.
Legs-Make 4
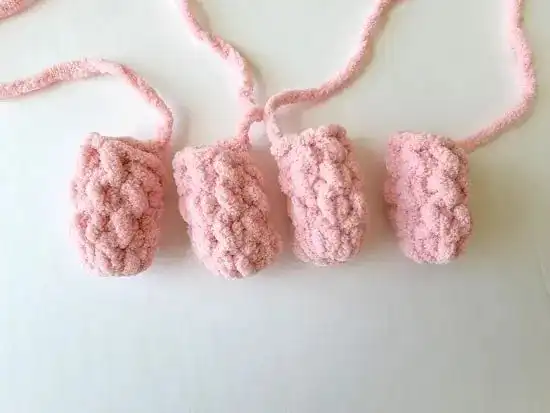
The four small legs add a playful touch to your bunny lovey, making it even more inviting for little hands to explore. You will need to crochet four identical legs. Begin Round 1 with your K (6.5mm) hook, creating a magic ring and working 7 single crochets into it, remembering to mark your first stitch. This creates a small, tight base for each leg. For Round 2, work 1 single crochets in each stitch around, keeping your stitch count at 7. At this point, gently push your work right-side out; this makes it easier to continue crocheting the subsequent rounds and shape the leg correctly.
Round 3 simply repeats Round 2, working 1 single crochet in each of the 7 stitches, building up the length of the leg. Round 4 repeats Round 2 again, followed by a slip stitch to the first single crochet to close the round. Finally, fasten off, making sure to leave a long tail. This long tail is vital for later assembly, allowing you to securely attach each leg to the corners of the rectangular body. Consistent tension across all four legs will ensure they are uniform in size and appearance, contributing to the overall polished look of your bunny lovey.
PHOTOS by crochetdreamz.com
Rectangular Body
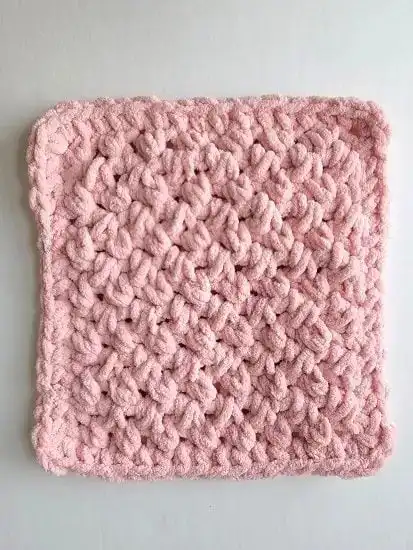
The rectangular body forms the “blanket” part of your lovey, providing a soft and cuddly area for comfort. For this section, you will switch to the larger N/P (10mm) hook to create a looser, more pliable fabric suitable for a blanket. Working the body in a specific stitch pattern, like the SHD (single half double decrease) used here, adds unique texture and visual interest. Pay close attention to your gauge to ensure the body achieves the intended dimensions and drape, making it ideal for snuggling.
Gauge
Achieving the correct gauge is paramount for ensuring your bunny lovey’s body turns out to the specified size and texture. For this pattern, the gauge is measured as 3 SHD stitches alternating with 3 chs, which should span 4 inches. To check your gauge, create a small swatch using the N/P (10mm) hook and the specified yarn. If your swatch is too small, try using a larger hook; if it’s too large, switch to a smaller hook. Taking the time to match the gauge will prevent your lovey from being too big or too small and will ensure the fabric has the desired softness and drape for a baby’s comfort.
Pattern
To begin the rectangular body, start with the bigger N/P (10mm) hook and chain 17 stitches. Row 1 sets the foundation for the unique texture of this lovey: work an SHD across the 3rd and 4th chain from your hook. Then, create a repeating pattern of (ch 1, SHD over next 2 ch) across, ending with a ch 1 and 1 single crochet in the last chain, then turn your work. Remember to refer back to the “Stitch Explanation” for detailed instructions on how to execute the SHD stitch accurately.
Rows 2 and 3 establish the continuing pattern: chain 2 (which does not count as a stitch), then work an SHD over the first single crochet and the next chain-1 space. Continue with (ch 1, SHD over next SHD, and next ch-1 space), repeating from * across to the last SHD, then ch 1, skip the last SHD, and single crochet on top of the skipped ch 2 before turning. Keep repeating Row 3 until you have completed a total of 13 rows. This consistent repetition builds the blanket portion of the lovey, creating a beautifully textured and soft fabric perfect for a baby to enjoy.
PHOTOS by crochetdreamz.com
Border
Adding a border to your rectangular body provides a neat, finished edge and helps to define the shape of the lovey blanket. After completing the 13 rows of the body pattern, you will begin working the border. Start by chaining 1 at the corner of your piece. Then, evenly distribute single crochet stitches along the left edge of the piece until you reach the next corner. At each corner, work 3 single crochet stitches into the same corner space to create a smooth turn.
Continue by working 1 single crochet in each free loop of the foundation chain along the bottom edge to the next corner, then 3 single crochets in that corner. Distribute single crochet stitches evenly along the right edge of the piece until you reach the next corner. Finally, work 1 single crochet in each stitch across along the top edge until you have 1 stitch remaining, then place 3 single crochets in that last stitch. Finish the round with a slip stitch to the first single crochet of the round. Fasten off and complete with an invisible join, as detailed in the “Stitch Explanation” section. This creates a beautifully clean and professional-looking edge, enhancing the overall appeal of your lovey.
Attaching the Head and Legs to the Body
The final assembly of your bunny lovey is where all the individual components come together to form the adorable finished product. Begin by attaching the four legs to each of the four corners of the rectangular body. Using a tapestry needle and the long tails left on the legs, securely sew each leg in place. Once attached, carefully hide any remaining yarn tails inside the legs to ensure a neat finish and to prevent any choking hazards for the baby. Strong, hidden seams are paramount for safety.
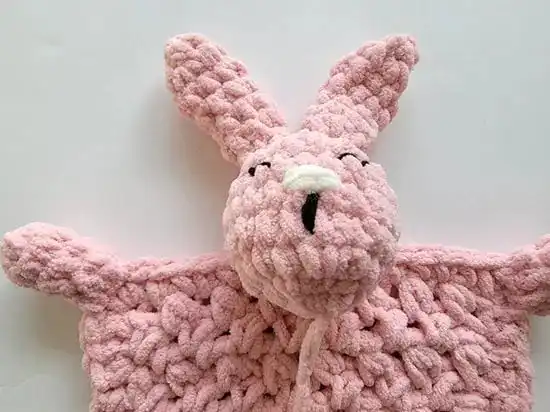
Next, it’s time to attach the bunny’s head to the top center of the rectangle. Instead of sewing it directly along the very edge, position the head about 3/4 inch inward from the edge, as illustrated in the accompanying picture. This placement allows the head to sit more naturally on the blanket, giving it a more integrated and cuddly appearance. Use the long tail from the head and your tapestry needle to securely sew it to the body. Ensure the attachment is robust enough for playful handling. Once the head is firmly in place, hide any remaining yarn tails inside the head for a clean and professional finish. Your handmade crochet bunny lovey is now complete and ready to bring comfort and joy!
PHOTOS by crochetdreamz.com
We hope you thoroughly enjoyed creating this Beginner-Friendly Free Bunny Lovey Crochet Pattern Baby Gift! Your finished lovey is not just a handmade item, but a token of love and comfort. Don’t forget to save this project to your Pinterest board for future reference, share it with fellow crafters, and let us know about your creations in the comments below. For even more inspiration, explore Crochet for Babies: 30 Modern and Classic Designs. Happy crocheting!
PHOTOS by crochetdreamz.com


