Blooming Hues Crochet Blanket Pattern – One Row Repeat: Your Next Favorite Project
Discover the joy of creating with the Blooming Hues Crochet Blanket Pattern – One Row Repeat! This stunning blanket combines beautiful texture with surprising simplicity, making it an ideal project for crocheters of all skill levels. Whether you’re unwinding after a long day or looking for a portable project, this one-row repeat design ensures a relaxing and rewarding crafting experience.
Imagine snuggling under a cozy, handmade blanket that looks intricate but was delightfully easy to make. This pattern is designed for mindful crafting, allowing you to enjoy the process without constant pattern checking. It’s perfect for gifting or adding a touch of handmade charm to your own home decor. For more easy projects, check out these 3 Easiest Easter Projects for Newbies!
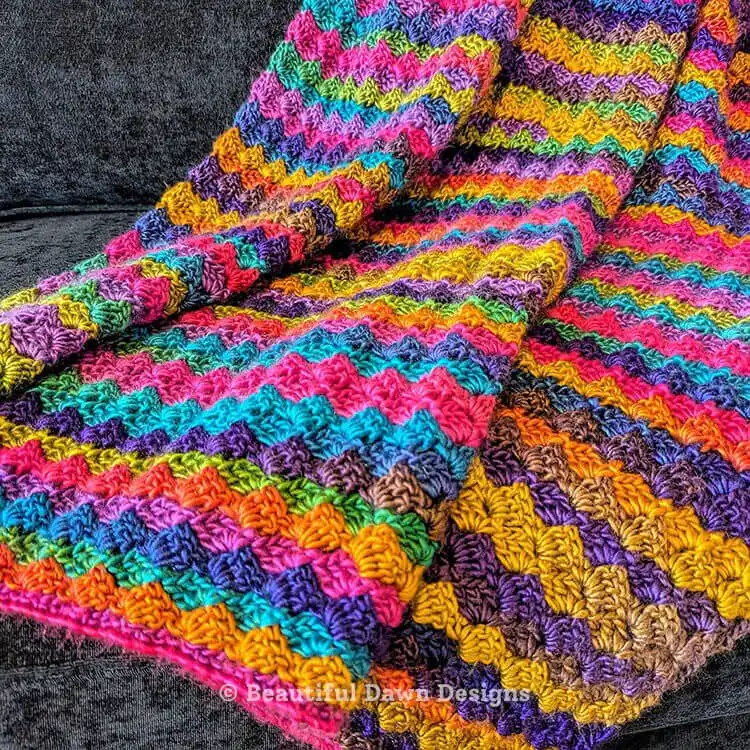
You can find the free pattern detailed below, or consider purchasing the ad-free printable PDF for convenience from the original designer’s shop. The recommended yarn, Lion Brand Landscapes, offers incredible softness and variegated colors that beautifully complement this stitch pattern, creating a flowing, painterly effect. However, feel free to substitute with any worsted weight yarn that captures your personal aesthetic.
Blooming Hues Blanket Sizing Notes
Achieving the perfect size for your Blooming Hues blanket is straightforward with these detailed notes. The pattern offers two versatile sizes: a cozy 37” x 50” Lapghan and a generous 48” x 60” Throw. These dimensions are ideal for draping over a sofa, adding warmth to a bed, or providing comfort during a quiet evening.
To customize the size of your blanket, remember the crucial chain multiple: always chain in multiples of 4 plus 2 stitches. This ensures your stitch count aligns perfectly with the pattern’s repeat, creating a flawless edge-to-edge design. Once you’ve established your starting chain, simply follow the pattern until your blanket reaches your desired length and width. This flexibility allows you to craft a piece that truly fits your needs and space.
Blanket Sizing Guide
- Baby Blanket: 36 x 36 inches – A perfect square for cribs, strollers, or a thoughtful shower gift. This size is ideal for keeping little ones warm and snug.
- Toddler Blanket: 40 x 60 inches – A slightly larger option, great for toddler beds or as a comforting companion for growing children on the couch.
- Lapghan: 36 x 48 inches – Designed for comfort, this size is perfect for covering your lap and legs while reading, watching TV, or working from home, providing just enough warmth without being bulky.
- Throw Blanket: 48 x 60 inches – A popular and versatile size, ideal for draping over a sofa, armchair, or at the foot of a bed, offering ample coverage for one person to snuggle.
- Twin Bed: 65 x 90 inches – Sized to fit a twin mattress, this blanket provides full coverage and warmth, making it suitable as a primary bedspread or an extra layer.
- Double Bed: 84 x 90 inches – A spacious blanket designed to cover a double or full-sized bed, offering luxurious warmth and a beautiful decorative element to your bedroom.
This post may contain affiliate links, which means we may earn a small commission at no extra cost to you if you make a purchase through our links. This helps support our content creation efforts.
Materials:
- Lion Brand Landscapes 147yds #4 worsted weight yarn in color Boardwalk: This variegated yarn is specifically chosen for its beautiful color transitions and incredibly soft texture, which enhances the “blooming” effect of the stitch. For the Lapghan size, you’ll need approximately 11 skeins, and for the Throw size, plan for about 18 skeins to ensure you have enough. Feel free to explore other worsted weight yarns if you prefer a different fiber content or color palette, keeping an eye on yardage.
- US size H 5.0 mm crochet hook: The specified hook size is crucial for achieving the correct gauge and drape for this pattern. Using a hook too large might result in a looser fabric, while one too small could make the blanket stiff.
- Stitch markers (optional): While not strictly necessary, stitch markers can be incredibly helpful, especially for beginners or when working on long rows. They assist in marking the beginning or end of a repeat, or identifying specific stitches, ensuring accuracy and reducing frustration.
- Scissors: A sharp pair of craft scissors is essential for cleanly cutting yarn at the end of skeins or when fastening off.
- Tapestry needle: Also known as a yarn needle, this tool is indispensable for weaving in all your yarn ends neatly and securely, giving your finished blanket a professional and polished look.
Sizes (approximate):
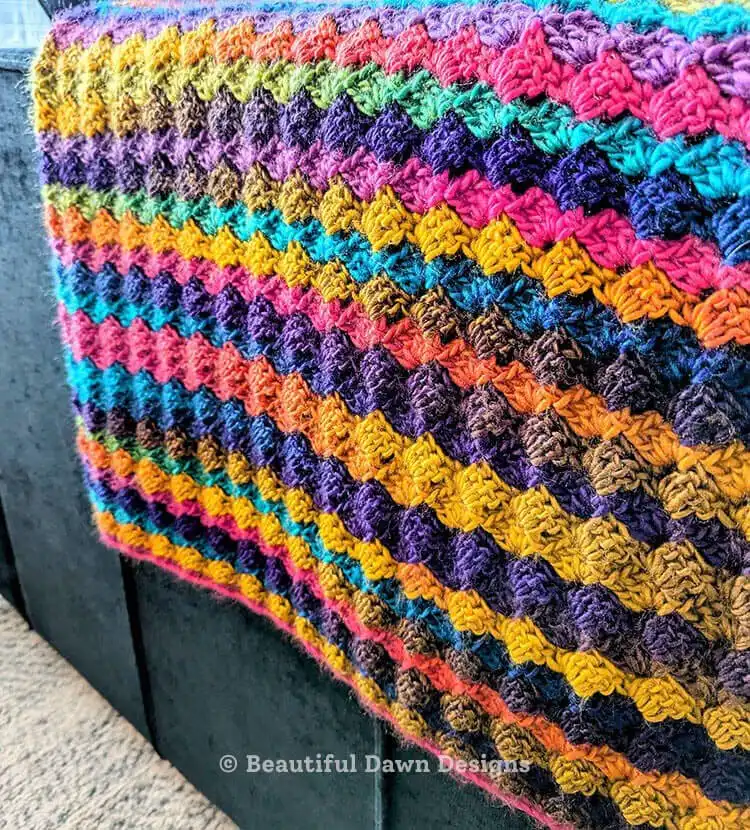
The pattern is designed to yield two main approximate sizes: 36” x 48” (Lapghan Size) and 48” x 60” (Throw Size). These dimensions are practical and widely enjoyed, offering a good balance between coverage and manageability. The Lapghan is perfect for personal comfort, while the Throw is excellent for sharing or for more extensive coverage.
Gauge (4in x 4in):
Achieving the correct gauge is vital for ensuring your finished blanket matches the pattern’s intended size and uses the estimated amount of yarn. For this Blooming Hues blanket, the gauge is approximately 4 clusters (each cluster consisting of 1 sc, ch, 3 dc) and 7 rows within a 4—4 inch swatch. Take time to create a swatch before starting; if your swatch is too small, try a larger hook, and if it’s too large, use a smaller hook until you match the gauge.
Size Adjustment:
The beauty of this pattern lies in its adaptability. To adjust the width of your blanket, you simply need to start with a longer or shorter initial chain. The pattern is built on a chain multiple of 4 plus 2 stitches. This means you first chain in multiples of 4 (e.g., 16, 20, 24) and then add 2 additional stitches to that total. For instance, if you chain 16, you would then add 2 stitches for a total of 18 chains. Always remember to consider your yarn needs when altering the size, as a larger blanket will naturally require more skeins.
Pattern Notes:
- The chain 1 does not count as a stitch: This is a common notation in crochet patterns and is important for maintaining accurate stitch counts in each row. The chain 1 is typically a turning chain that provides height for the next row’s stitches but isn’t worked into itself.
- If you have trouble identifying the first or last stitch of the row, use stitch markers to help you keep track: Especially with repetitive patterns or when working with variegated yarn, it can be easy to miss the first or last stitch. Placing a stitch marker in these crucial stitches at the beginning of a row can save you from having to recount or frog (unravel) your work later.
Abbreviations (US):
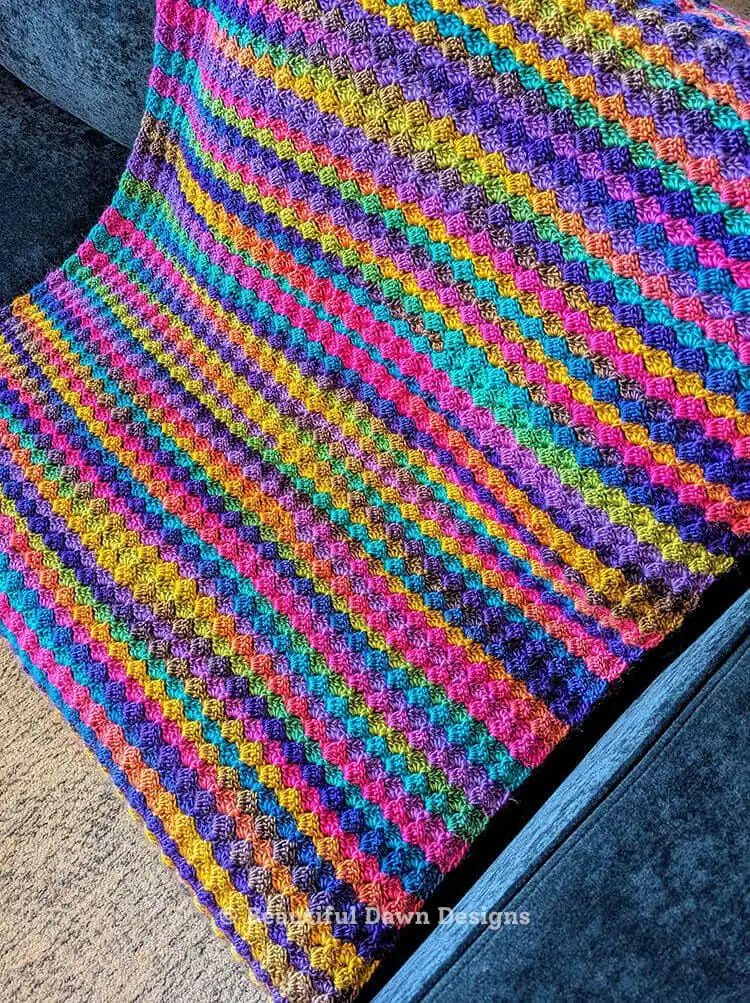
Understanding these standard US crochet abbreviations is key to successfully following the pattern. A crochet stitch dictionary can be a great reference. Familiarizing yourself with them will make reading and executing the instructions much smoother, allowing you to focus on the rhythm of your stitches and the beautiful fabric you are creating.
- ch – chain: The most basic crochet stitch, forming the foundation of many projects.
- st(s) – stitch(es): A general term referring to any completed crochet stitch.
- sc – single crochet: A fundamental stitch that creates a dense, sturdy fabric.
- dc – double crochet: A taller stitch than single crochet, offering more drape and speed.
- hdc – half double crochet: A stitch that falls between single and double crochet in height, providing a nice balance of density and drape.
Blooming Hues Blanket Video Tutorial
For those who prefer visual learning or need a little extra guidance, a video tutorial can be an invaluable resource. While not included directly here, many designers offer accompanying video guides that walk you through each step of the pattern, from creating the foundation chain to executing the special stitches and finishing techniques. Searching for “Blooming Hues Blanket Crochet Pattern video tutorial” might lead you to such helpful visual aids.
A video can clarify intricate steps, demonstrate proper hook insertion, and help you understand the stitch construction more intuitively. If you find yourself stuck at any point, a visual demonstration can often be the key to overcoming a challenge. Want to print the pattern for easy offline reference? You can purchase the ad-free printable PDF from the original designer’s shop.
Blooming Hues Crochet Blanket Pattern
This is where the magic happens! Follow these instructions carefully to bring your Blooming Hues blanket to life. The pattern primarily relies on a simple one-row repeat after the initial setup, making it incredibly relaxing and enjoyable once you get into the rhythm. Pay close attention to the stitch counts to ensure your blanket grows evenly and beautifully.
To begin ch (114, 146)
Start by creating your foundation chain. If you are making the Lapghan size, chain 114 stitches. For the Throw size, chain 146 stitches. Ensure your chains are not too tight, as this can make the first row difficult to work into. A slightly looser chain will provide a more even foundation.
Row 1:
Starting in the 2nd ch from the hook, work 1 sc. Place 1 sc in each chain across the row. Ch 1 and turn. (113, 145 sts). This row establishes a sturdy base of single crochet stitches, which is essential before introducing the textured pattern. The chain 1 at the end prepares your work for the next row without adding an extra stitch to your count.
Row 2:
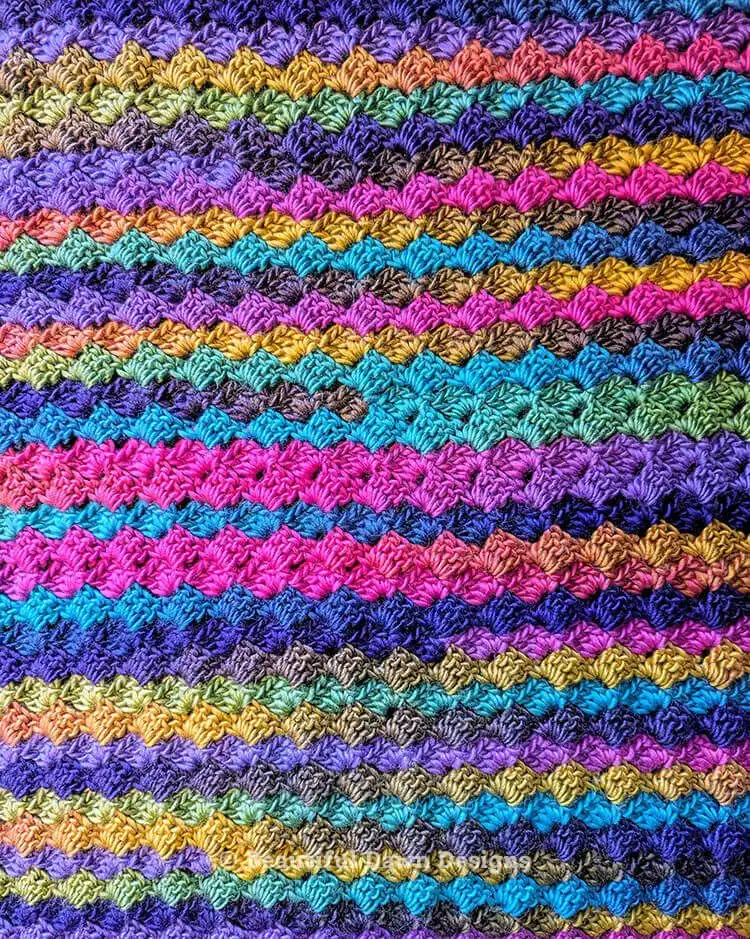
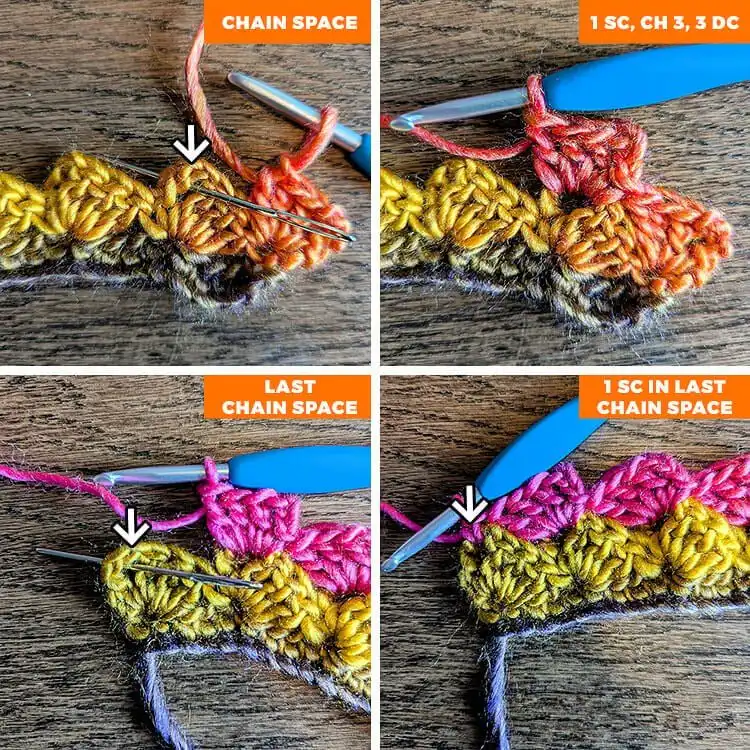
In the 1st st work (1 sc, ch 3, 3 dc) all in the same st. Sk 3 sts. In the 4th st work (1 sc, ch 3, 3 dc) all in the same st. Sk 3 sts. Repeat from to until there are 4 sts remaining and place 1 sc in the last st. Ch 1 and turn. This row introduces the beautiful cluster stitch that forms the “blooming hues” texture. The initial cluster sets the pattern, and repeating it creates the staggered, organic look. Skipping stitches is crucial for the stitch definition, and the final single crochet anchors the row.
Row 3:
In the 1st st work (1 sc, ch 3, 3 dc) all in the same st. In the next ch space work (1 sc, ch 3, 3 dc) all in the same ch space. Repeat from to until you reach the final ch space and work 1 sc in the last ch space. Ch 1 and turn. This is your one-row repeat! Instead of working into individual stitches, you’ll now be working your clusters into the chain-3 spaces created in the previous row. This simplifies the process and quickly builds the fabric, creating the signature textured look. The final single crochet ensures a neat edge.
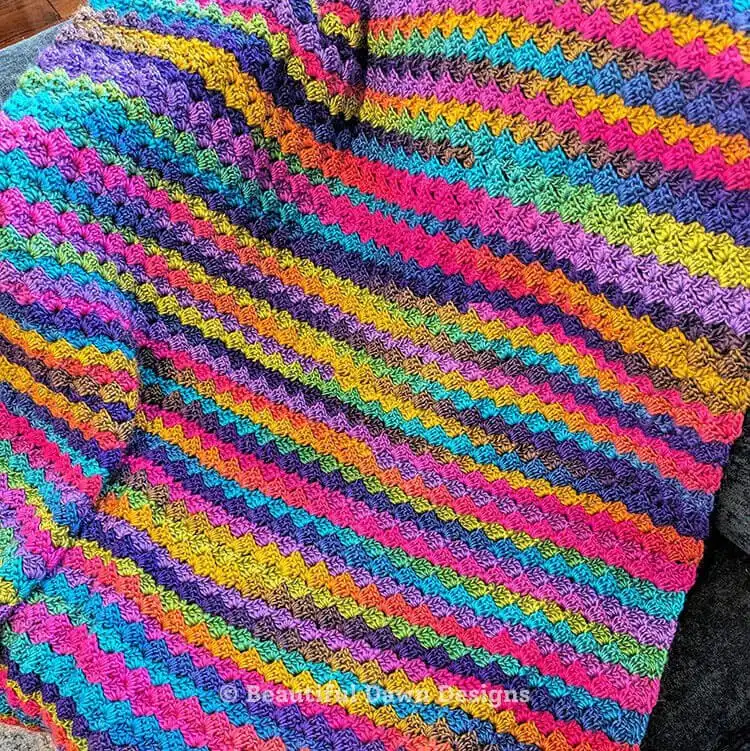
Repeat row 3 until your blanket reaches (50”, 60”) or your desired length. Once you’ve reached your desired length, do not fasten off just yet. We will finish off your blanket with a straight edge. This consistent repetition allows you to watch your blanket grow with satisfaction, making it an excellent project for binge-watching your favorite shows or listening to audiobooks. Consider adding a playful touch with a Gummy Bear Granny Square Pattern border if you’re feeling adventurous!
Finish Off Blanket with Straight Edge
To finish off your blanket, after you complete your final row of the pattern, ch 1 and turn. In the 1st st work (1 sc, ch 2, 3 dc) all in the same st. In the next ch space, work (1 sc, 1 hdc, 1 dc) all in the same ch space. Repeat from to until you reach the final ch space where you will work 1 sc. Fasten off and weave in your ends. This finishing row is cleverly designed to create a neat, straight edge that beautifully complements the textured body of the blanket, providing a polished and professional look. It eliminates any potential unevenness from the pattern’s natural flow, giving your blanket a clean conclusion.
We hope you’ve enjoyed this detailed guide to the Blooming Hues Crochet Blanket Pattern – One Row Repeat! Your new handmade blanket is sure to bring warmth and beauty wherever it goes. Don’t forget to save this pin to your Pinterest board for future reference, share it with a fellow crochet enthusiast, and leave a comment below with your thoughts or any questions!


