Crochet Wisteria Hanging Basket – DIY Craft: A Serene Home Accent
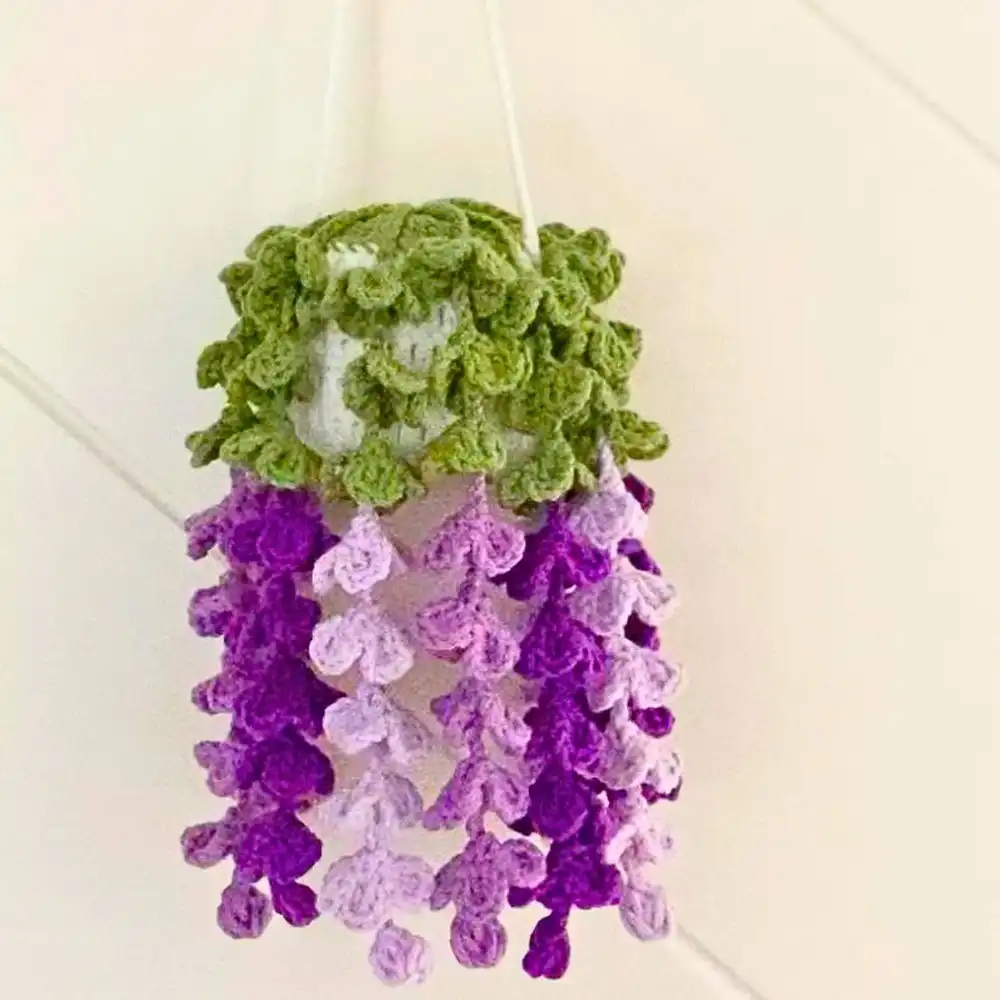
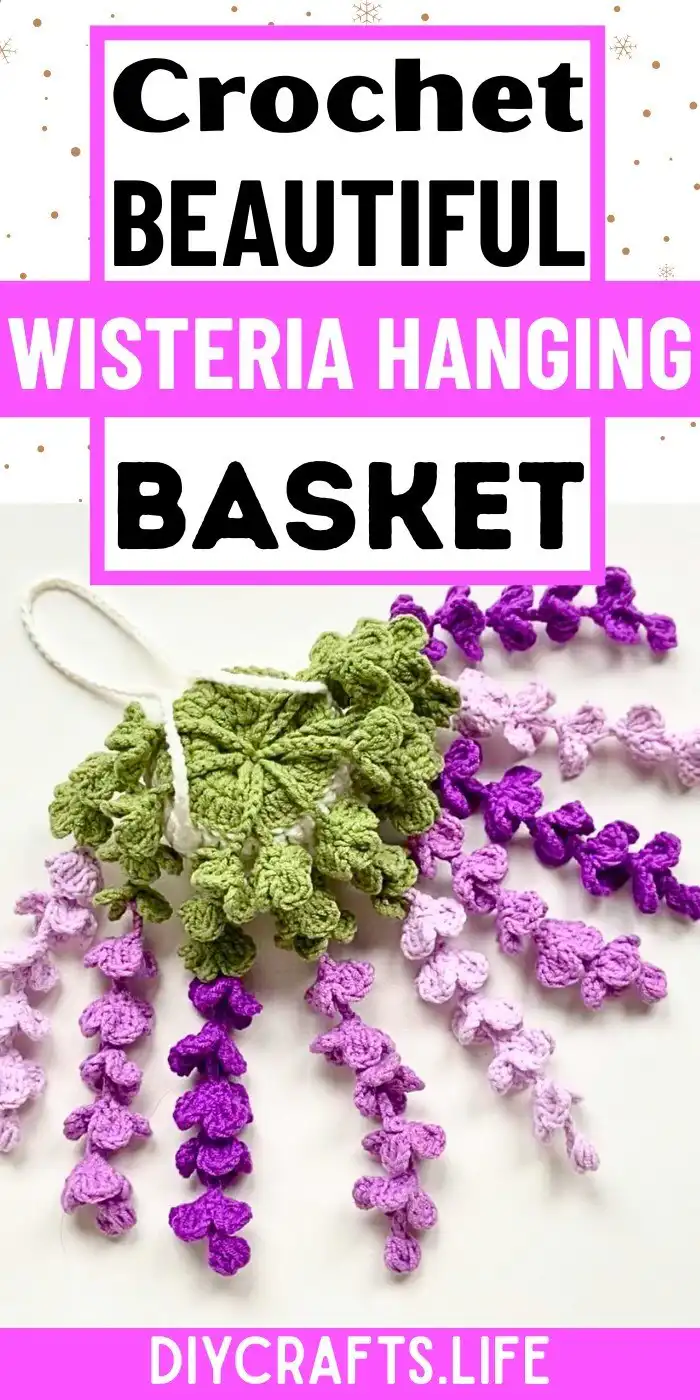
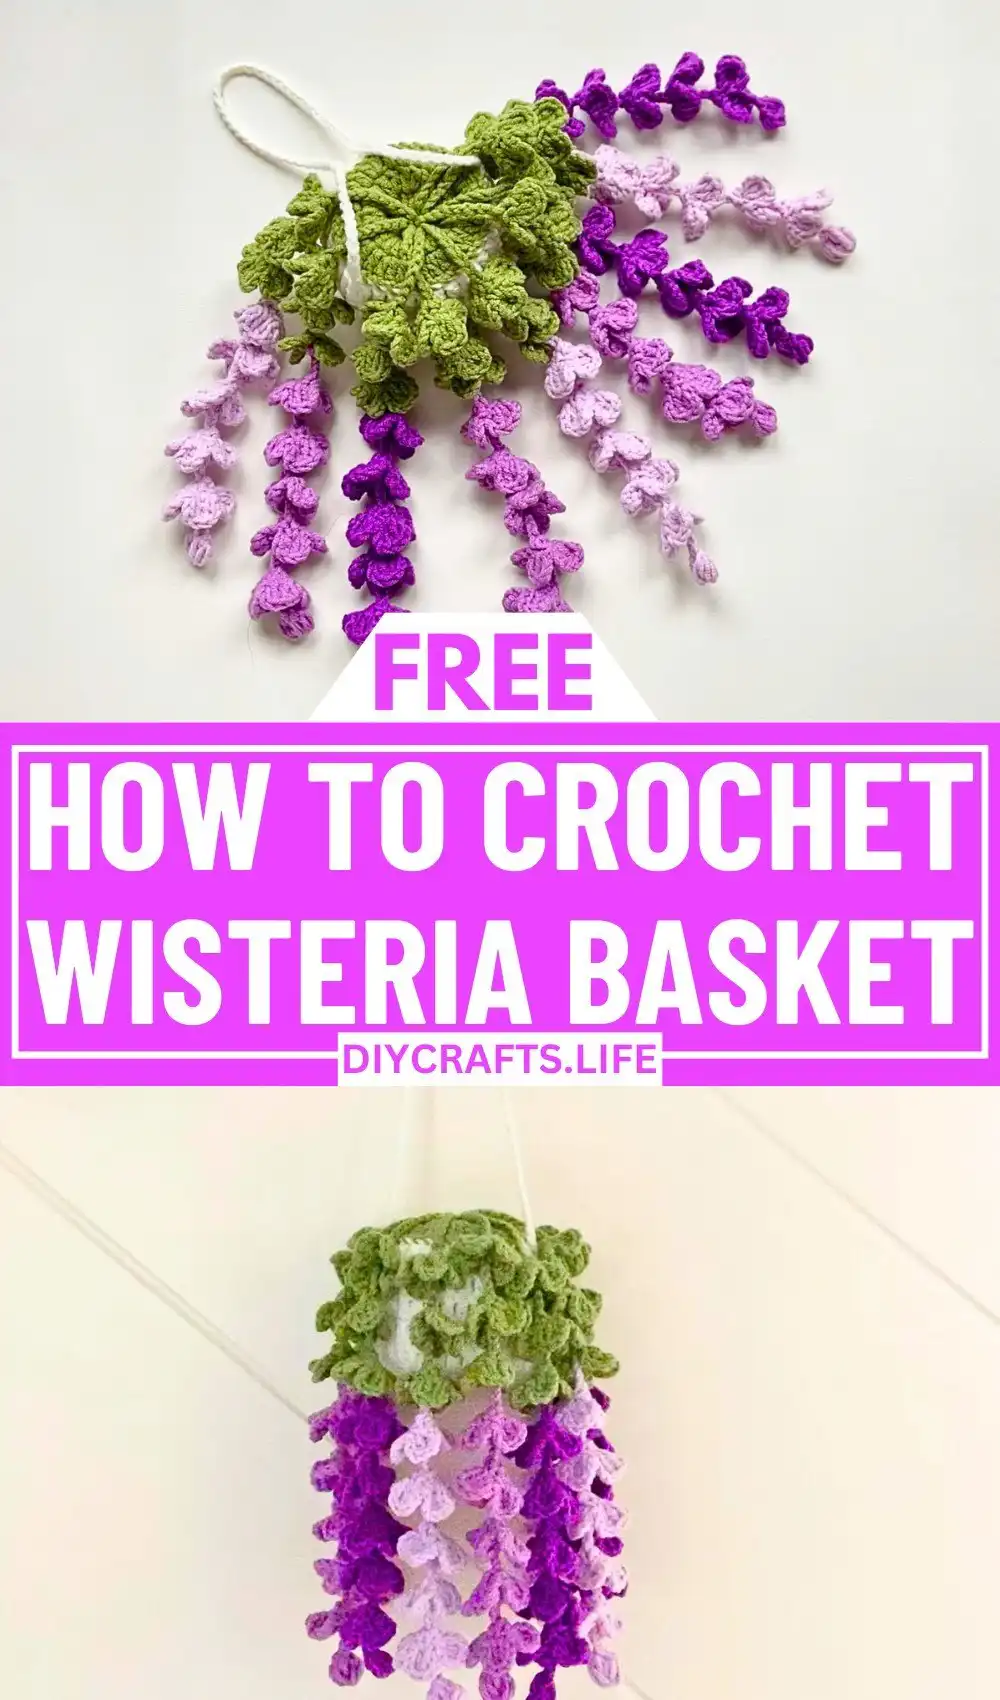
Transform your living space with the timeless elegance of a Crochet Wisteria Hanging Basket – DIY Craft. This exquisite project combines delicate floral details with practical design, creating a breathtaking decorative piece that infuses any room with nature’s tranquil beauty. Perfect for adding a touch of handmade charm, this basket makes a wonderful gift or a personal masterpiece to adorn your home.
What sets this pattern apart is its realistic portrayal of cascading wisteria blooms and the versatile, customizable flowerpot base. Every petal and cluster is thoughtfully designed to create an organic, flowing appearance. Utilizing 4-ply cotton yarn and precise stitches ensures a lightweight yet refined result, while the sturdy crochet basket perfectly anchors the entire design. It’s more than just a craft; it’s a graceful accent that showcases your unique style and creativity, reminiscent of a beautiful crochet lighting project for home decor.
Materials & Tools Needed:
Gathering the right supplies is the first step to creating your beautiful wisteria hanging basket. The choice of yarn and hook significantly impacts the final look and feel of your project, ensuring both durability and aesthetic appeal.
- Yarn: Opt for high-quality 4-ply cotton yarn. This weight provides excellent stitch definition, a lovely drape for the flowers, and sufficient sturdiness for the basket. Cotton yarn is also easy to work with and maintains its shape well.
- Colors Needed:
- Purple or Lavender Shades: Essential for the iconic wisteria flowers. Consider using two complementary shades for added depth and realism.
- Green: For the delicate leaves and stems, choose a natural medium green to contrast beautifully with the blossoms.
- Brown, Beige, or Earthy Tone: For the main basket, select a color that will complement your chosen flower shades and blend well with your home decor.
- Crochet Hook: A 2.5 mm crochet hook is recommended for this project. This size works perfectly with 4-ply cotton yarn to achieve a dense fabric for the basket and defined stitches for the flowers. Always check your gauge and adjust the hook size if necessary to match the pattern’s tension.
- Scissors: A sharp pair of craft scissors is crucial for cleanly cutting yarn tails between sections and at the end of your project.
- Tapestry Needle: An indispensable tool for weaving in all loose yarn ends, ensuring a neat, professional finish. It’s also vital for securely sewing together the various components of your hanging basket.
Finished Size & Customization Ideas:
Understanding the final dimensions and exploring customization options allows you to truly make this crochet wisteria hanging basket your own. Even small changes can result in a unique piece.
Approximate Size:
When crafted using 4-ply cotton yarn and a 2.5 mm crochet hook, your finished hanging basket will typically measure about 5-6 inches in height for the basket itself, with the delicate wisteria flowers cascading an additional 5-6 inches below. This creates a balanced and visually appealing display, perfect for hanging in various spots around your home.
Customization Ideas:
Personalize your wisteria hanging basket to perfectly suit your style and space. These creative modifications can transform your project into a truly unique piece of art.
- Change the Yarn Weight & Hook Size: To create a larger, more impactful statement piece, use a bulkier yarn weight such as a DK or worsted weight yarn, adjusting your crochet hook size accordingly (e.g., 3.5mm to 5mm). For a more delicate, miniature version, consider using a finer thread and a smaller hook.
- Color Customization: Unleash your creativity with color! While purple and lavender are classic, experiment with shades of pink, soft blues, or even a mix of vibrant hues for the flowers. You can also create a striking two-tone basket by using contrasting colors for different rounds or the base and rim.
- Adjust Hanging Straps: The length of your hanging straps dictates how your basket will hang. Add more chain stitches for longer straps, ideal for higher ceilings or a lower display. For a different aesthetic or added strength, you could also substitute the crocheted strap with a sturdy cord, decorative ribbon, or even macrame cording.
- Adapt Flower Quantity: The number of flowers you create directly impacts the fullness of your wisteria display. For a lush, abundant look, crochet extra flower clusters. If you prefer a more minimalist or understated elegance, reduce the number of flowers, allowing each bloom to stand out.
- Add Decorative Details: Elevate your basket with charming embellishments. Try attaching small beads or pearls to the ends of the hanging flower chains for a subtle shimmer. You could also embroider delicate patterns or small initial monograms onto the basket itself for a truly personalized touch. These small details can make a big difference, much like adding an intricate border to a crochet blanket pattern.
Pattern Abbreviations & Terminology:
This pattern utilizes standard US crochet terminology. Familiarizing yourself with these abbreviations will ensure a smooth and enjoyable crocheting experience, allowing you to follow each step with confidence.
- ch: chain – A series of loops created by looping yarn over the hook and pulling it through.
- sl st: slip stitch – Used to join rounds or move across stitches without adding height.
- sc: single crochet – A basic, compact stitch that creates a dense fabric.
- dc: double crochet – A taller stitch than single crochet, creating a looser fabric.
- dc-inc: double crochet increase – Working two double crochet stitches into the same stitch to add stitches.
- R: round – Indicates a completed circular row of stitches.
Step-by-Step Crochet Instructions:
Embark on the journey of crafting your beautiful crochet wisteria hanging basket with these detailed, step-by-step instructions. Each section is broken down to guide you through creating every component, from the delicate flowers to the sturdy basket.
1. Crochet the Wisteria Flowers:
The wisteria flowers are the star of this project, renowned for their delicate, cascading appearance. Focus on consistent tension to achieve the beautiful drape characteristic of wisteria. You’ll be creating individual flower units that will later be grouped.
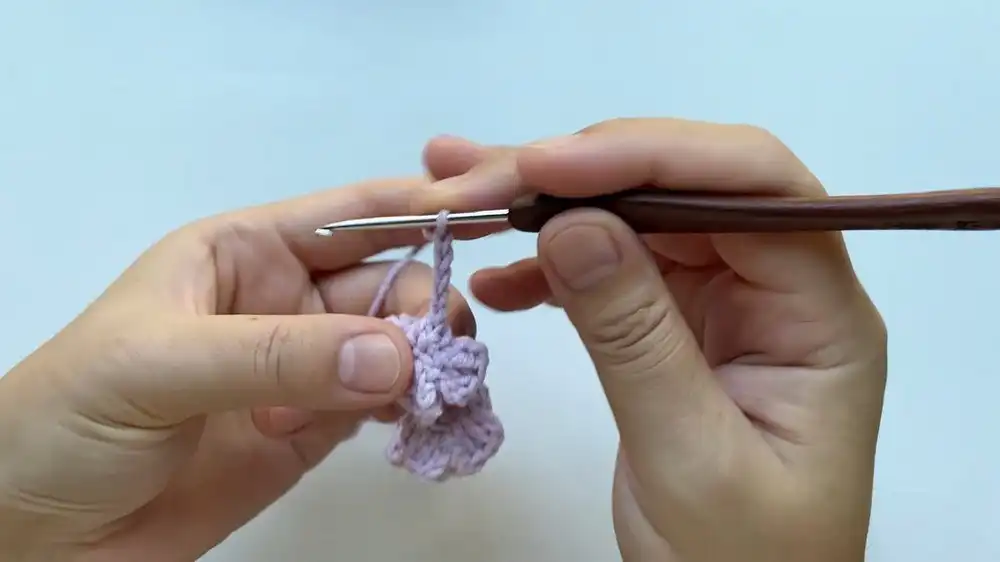
- Start Flower Base: Begin by creating a magic ring. Chain 1 (this does not count as a stitch). Pull a loop through, yarn over, and pull through both loops on the hook to create a foundation. Chain 1 again, and repeat this step to create the small central base. Finish with a slip stitch into the first chain and pull the yarn tight to close the ring, securing the base of your flower.
- Form the Petals: To create the characteristic hanging length of the wisteria flower, chain 8. Now, working into the 4th chain from your hook, create 2 double crochets (dc). Follow this with a chain 3 and then make a slip stitch (sl st) into the same chain space to neatly finalize the first petal, giving it a gentle curve.
- Repeat Petal Formation 3 More Times: To build a full, luscious flower, you will repeat the petal sequence three more times. For each subsequent petal, work (chain 3, 2 dc into the same chain space, chain 3, sl st). This will give your flower a total of 4 beautifully formed petals, creating a sense of volume and movement.
- Join the Petals Together: Once all petals are formed, chain 1 to secure your work. Work 1 single crochet stitch between the first chain and the double crochet base of your petals. Then, work 4 single crochets (sc) up through the chain spaces, neatly joining the petals. Finish with a slip stitch to firmly secure all components, completing one individual wisteria flower.
- Make Multiple Flowers: For a truly abundant and realistic wisteria cluster, you will need to create several individual flowers. Repeat the entire flower pattern (steps 1-4) at least 5 times for a single cluster. Each subsequent flower should also begin with a chain 8 to maintain uniform hanging lengths. You can vary the lengths by adjusting the initial chain number for a more natural look.
2. Crochet the Leaves (Green Flowers):
The green leaves add a vital touch of realism and contrast to your wisteria basket. By using a slightly modified version of the flower pattern, you can create foliage that perfectly complements the blossoms.
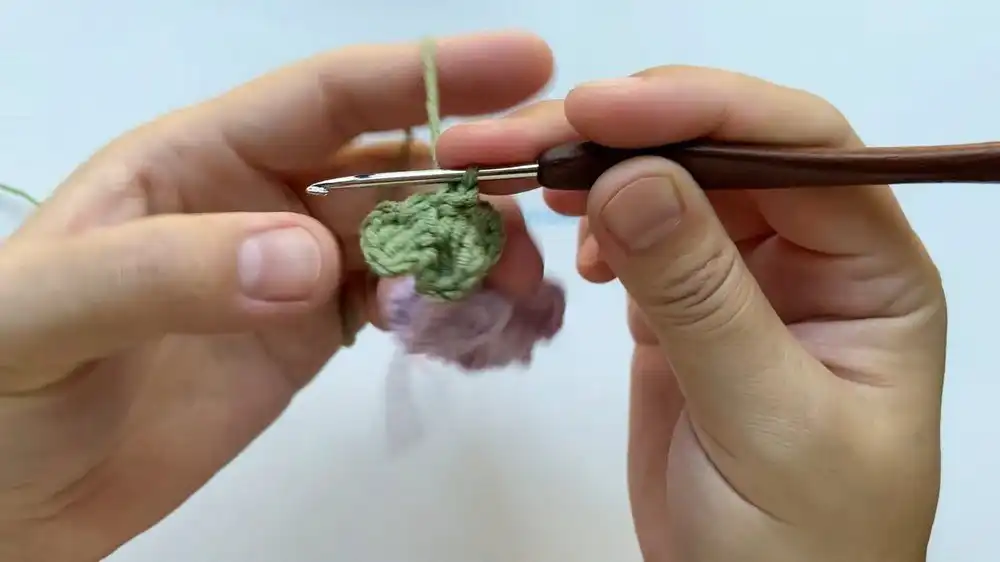
- Chain 5: Begin by chaining 5 stitches. This subtle reduction in chain length will create slightly smaller, more compact leaf shapes compared to the longer flower chains. Switch to your chosen green yarn for this section.
- Repeat the Same Flower-Making Process: Utilizing the green yarn, follow the exact flower-making process outlined in steps 1-5 above (from “Crochet the Wisteria Flowers”). The only difference is the initial chain count (chain 5 instead of chain 8). Create at least 3 green flowers using this method to serve as your wisteria leaves, providing a natural backdrop for your purple blooms.
3. Crochet the Basket Base:
The basket forms the sturdy foundation for your wisteria display. This section will guide you through creating a flat, circular base and then building up the walls for a functional and attractive pot.
- Round 1: Start with a magic ring. Chain 3 (counts as your first double crochet). Then, work 12 double crochet (dc) stitches into the magic ring. Gently pull the tail of the magic ring to close the center hole tightly. Join the round with a slip stitch (sl st) into the top of the initial chain 3. You should have 12 double crochet stitches in total.
- Round 2: Chain 3 (counts as first dc). Now, work a double crochet increase (dc-inc) into each stitch around the entire round (meaning 2 dc in every stitch). This expansion will create the flat base of your basket. Join with a slip stitch to the top of the starting chain 3. You should now have a total of 24 double crochet stitches.
- Round 3: Chain 3 (counts as first dc). For this round, you will alternate between a single double crochet and an increase. Work (1 dc in the next stitch, then dc-inc in the following stitch) around the entire round. Join with a slip stitch to the top of the starting chain 3. This round further expands your base. You should now have a total of 36 double crochet stitches.
- Round 4: To begin forming the walls of your basket, chain 3 (counts as first dc). This round is crucial for defining the basket shape. Work 36 double crochet stitches into the back loops only of each stitch from the previous round. Working into the back loop creates a visible ridge, acting as the clear transition from the base to the sides. Join with a slip stitch to the top of the starting chain 3.
- Rounds 5-8: Now, you will build up the height of your basket. For each of these rounds (Rounds 5, 6, 7, and 8), chain 3 (counts as first dc). Work 36 single crochet (sc) stitches in each stitch around. Using single crochet stitches for the walls creates a denser, more upright structure for your basket. Remember to join with a slip stitch at the end of each round to the top of the starting chain 3.
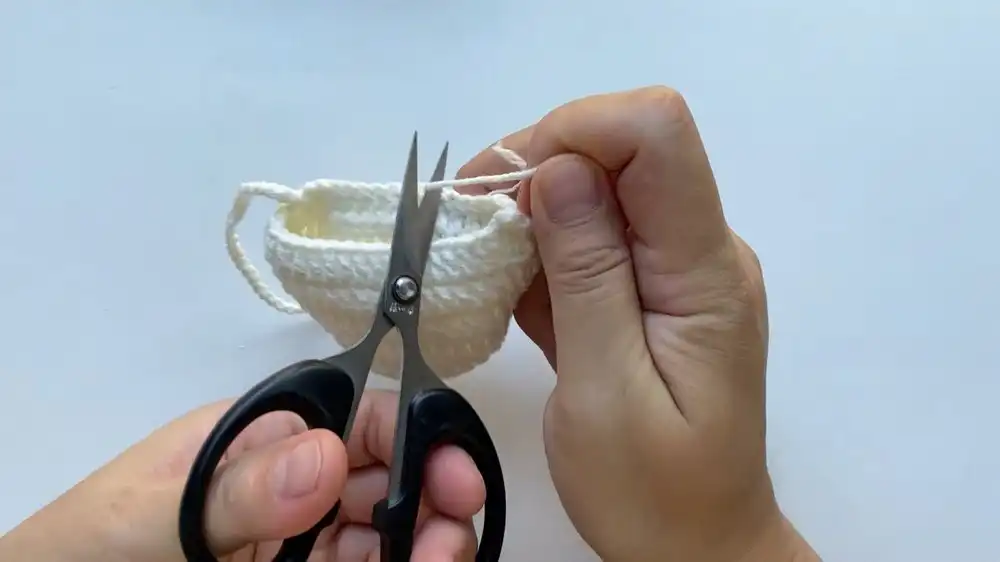
- Finishing the Basket Base: After completing Round 8, do not fasten off. Instead, you will create the hanging strap. Chain 80 stitches; this chain will form the loop from which your basket hangs. Once you’ve chained 80, slip stitch back to the opposite side of the basket’s rim to secure the strap, forming a sturdy handle. Chain 1 to secure your work, and then cut the yarn, leaving a short tail to weave in.
4. Crochet the Inner Basket (Optional):
Adding an inner basket provides extra structure, can hide any ends, and allows for a lovely color contrast. It’s a simple addition that enhances the overall finish.
- Repeat Rounds 1-3 of the Basket: Using your chosen green yarn (or a contrasting color), follow the instructions for Rounds 1, 2, and 3 of the “Crochet the Basket Base” section. This will create a smaller, flat circular piece that perfectly fits inside the bottom of your main basket.
- Finish with Chain 1 and Long Tail: Once you’ve completed Round 3, chain 1 to secure the stitch. Do not cut the yarn short; instead, leave a long tail (approximately 12-18 inches) that will be used for sewing this inner piece securely into the main basket during the assembly phase. This optional liner adds stability and a polished look, similar to how a sturdy lining supports a crochet mug coaster.
5. Assembly:
Bringing all the crocheted elements together is the final, rewarding step. Careful assembly ensures your wisteria hanging basket is not only beautiful but also well-constructed and durable.
- Attach the Wisteria to the Basket: Strategically position your crocheted wisteria flowers and green leaves around the rim of the basket. Arrange them naturally, allowing the flowers to cascade gracefully. Using your tapestry needle and a length of matching yarn, carefully sew or tie each flower and leaf securely in place. Ensure they are firmly attached so they don’t detach with handling.
- Secure the Inner Pot (Optional): If you crocheted the optional inner basket, now is the time to secure it. Place the green inner pot inside the main basket. Using the long tail you left, sew it around the edges to the inside base of the main basket. Alternatively, you can use a strong fabric glue for a secure bond. This adds additional texture and stability, hiding any interior imperfections.
- Finalize Straps: Critically, reinforce the hanging strap to ensure it is robust enough to bear the weight of the basket and withstand hanging. Use your tapestry needle to stitch across the base of the strap multiple times where it joins the basket rim. This extra reinforcement prevents stretching or tearing, making your beautiful creation durable for display.
Congratulations!
Your beautiful Crochet Wisteria Hanging Basket – DIY Craft is now complete! Take a moment to admire your handiwork. This stunning piece is ready to be hung as an exquisite piece of home decor, bringing a serene touch to any room. It also makes an incredibly thoughtful and personal gift for a loved one, a timeless beauty for any setting. Enjoy your creation!
Video Tutorial
More Free Crochet Patterns
We hope you enjoyed crafting this beautiful wisteria hanging basket! Don’t forget to save this project to your Pinterest board for future inspiration, share it with a crafty friend who might love it, and leave a comment below to tell us about your experience!


