This post contains affiliate links. As an Amazon Associate, we earn from qualifying purchases, which helps support our work. For more great crochet supplies, explore our Amazon Crocheting Storefront.
Craft a Magical Festive Crochet Christmas Kitty Fairy Light Garland: DIY Amigurumi Ideas
There’s something truly magical about crafting with yarn; each loop of the hook offers a moment of peace, each stitch telling a story. Whether you’re crocheting at home with a cup of cocoa by your side or unwinding after a busy day, the satisfaction of creating something soft, charming, and full of personality never gets old. Crochet brings imagination to life, especially during the festive holiday season. This guide will walk you through creating a captivating Festive Crochet Christmas Kitty Fairy Light Garland.
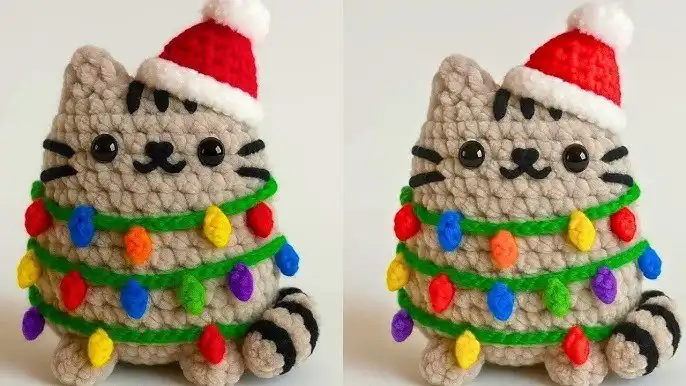
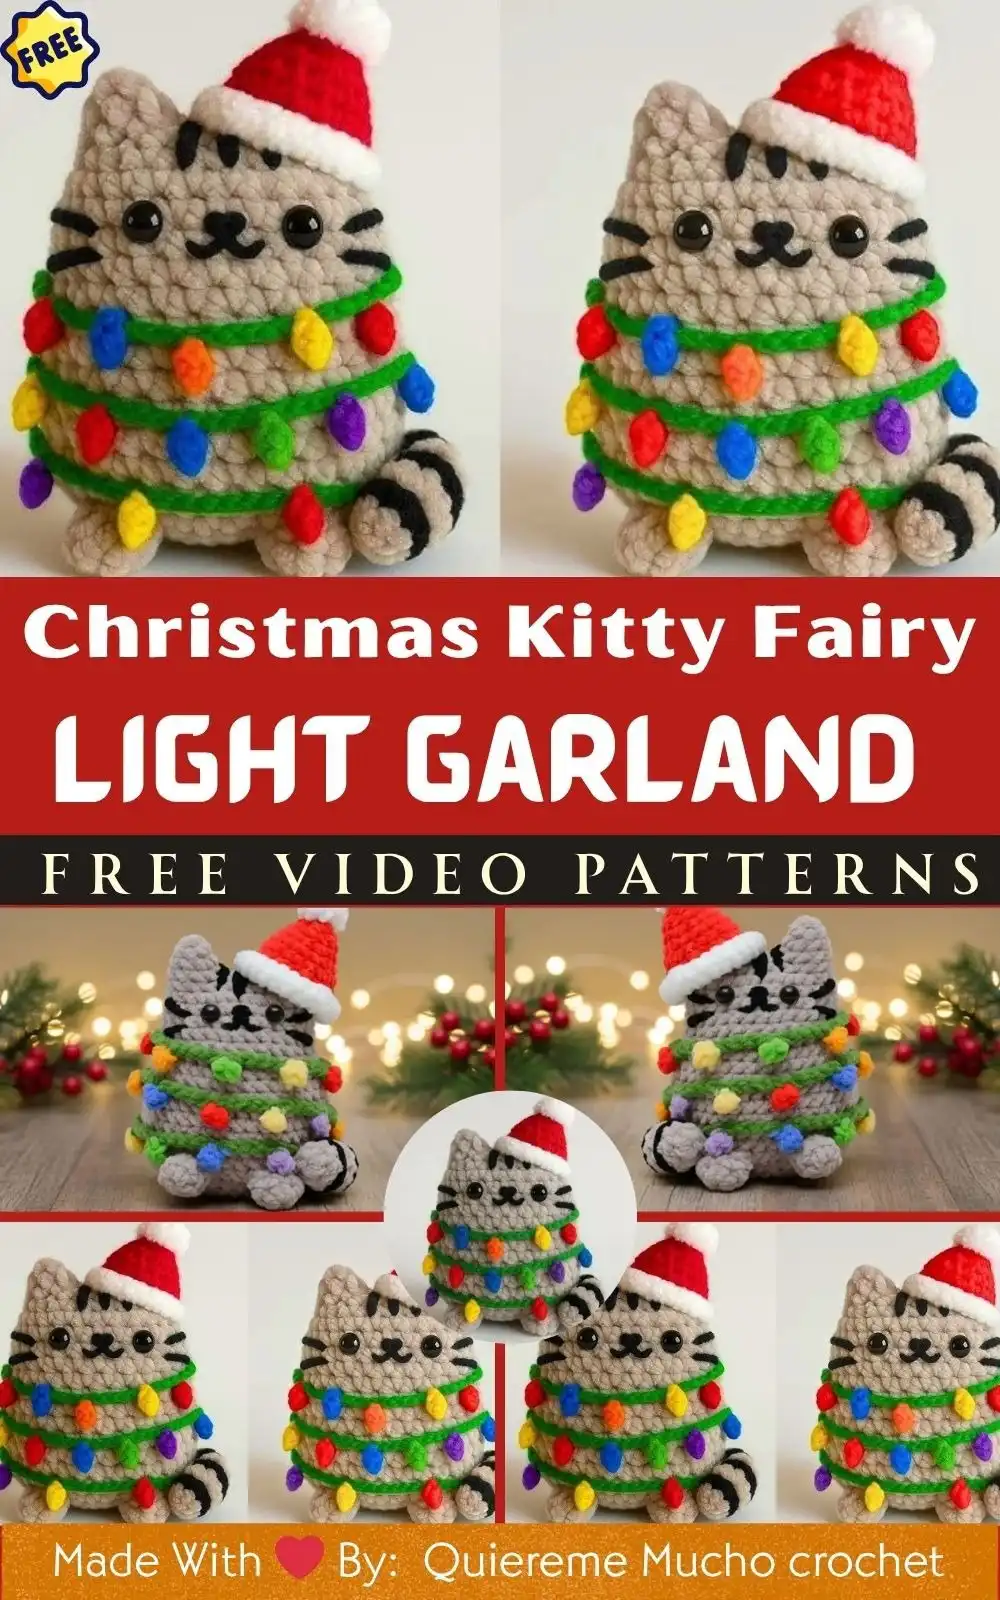
That’s exactly what makes this Festive Crochet Christmas Kitty Fairy Light Garland project so special! With its adorable kitty character wrapped in a string of twinkling holiday lights, this crochet amigurumi blends the coziness of handmade crafts with the joyful vibe of Christmas. This design is not only cute but also eye-catching and packed with holiday charm, perfect for your décor or as a thoughtful handmade gift. If you’re looking to expand your amigurumi creations, this kitty is a fantastic next step.
3. Materials & Tools Section
To create your Festive Christmas Kitty Amigurumi with a Light Garland, gathering the right materials and tools is the first crucial step. The quality of your supplies directly impacts the final look and feel of your amigurumi. Choosing the correct yarn weight and hook size ensures your kitty will have the desired structure and a polished appearance, while safety eyes and fiberfill bring your creation to life with personality and cuddliness.
Materials:
Selecting the right yarn is key for your Christmas Kitty. Medium weight (4) acrylic or cotton yarn is ideal due to its durability, wide color range, and ease of use for amigurumi. You can find a wide array of options in a beginner-friendly INSCRAFT 30 PCS Crochet Yarn Kit. Opt for a main color like white, gray, or cream for the kitty’s body, which provides a classic or neutral base. For accents, a light pink or tan yarn will beautifully define the ears, nose, and paws, adding sweet details. The garland lights call for various bright, festive colors such as green, red, yellow, and blue to mimic real fairy lights and infuse holiday cheer. Using worsted-weight yarn or DK weight yarn generally yields a plush with good structure and definition, making it perfect for this project.
Pro Tip:
For a truly soft and plushy kitty, choose an acrylic or cotton-blend yarn with a smooth texture that glides easily on your hook. Beginners should steer clear of fuzzy or furry yarns, as these can obscure stitches and make accurate counting a challenge. When selecting your color palette, think about your holiday theme; classic red and green evoke traditional Christmas, while pastels like mint, lavender, and pale blue can give your garland a modern, whimsical twist. Experiment with multicolored yarns for the lights for an even more unique effect. To ensure precision in your work, grab some colorful crochet stitch markers.
4. Step-by-Step Crochet Instructions
Let’s walk through the process of creating your adorable Christmas kitty! These instructions are beginner-friendly, focusing on fundamental amigurumi techniques like the magic ring, single crochet, and simple increases and decreases. Even seasoned crafters will find joy in the rhythmic stitching and assembly process. Take your time with each step, and don’t hesitate to refer to tutorials for mastering the single crochet stitch if you’re new to crochet.
1. Crochet the Kitty’s Head
Begin the kitty’s head by forming a magic ring, which creates a tightly closed center without a hole, ideal for amigurumi. Work single crochet (sc) stitches into the ring, then gradually increase your stitch count in subsequent rounds to shape a round, spherical head. Continue crocheting in continuous rounds, periodically stuffing the head firmly with polyester fiberfill as you go, but not so much that the seams bulge. Between rounds 6-7, carefully insert the safety eyes, ensuring they are evenly spaced and secure. Before fully closing the head, embroider a small nose and mouth with black or pink yarn using a tapestry needle to give your kitty character. Finally, decrease stitches in the last few rounds to close the sphere neatly.
2. Form the Neck and Upper Body
Once the head is complete, you’ll transition directly into shaping the neck and upper body. Crochet a few rounds without any increases or decreases to create a cylindrical neck that connects smoothly to the head. This section should be snug but not overly tight. As you move into the upper torso, gradually incorporate increase stitches in strategic places around the round. This will begin to widen the body, creating a gentle slope from the neck down to the shoulders. Maintaining even tension throughout this section is crucial for a symmetrical and well-proportioned kitty.
3. Build the Main Body
Continue building the main body by crocheting in continuous rounds, increasing stitches as needed to create a gentle curve for the tummy and then decreasing stitches towards the back to form the hindquarters. This shaping gives the kitty its distinct, rounded amigurumi form. Ensure you leave a small opening before the final closing rounds; this allows you to comfortably add the rest of the Fairfield The Original Poly-Fil, ensuring even distribution and preventing lumps. Stuff the body firmly, allowing your kitty to maintain its shape without being overly rigid. For added stability, consider placing a small pouch of dried beans or poly pellets at the very bottom before fully stuffing, helping your kitty sit upright.
4. Shape or Attach the Body Base
Once the main body is sufficiently stuffed, it’s time to close the bottom and create a stable base. You can achieve this in two primary ways: either by continuing with decrease rounds until the opening is completely closed and then fastening off, or by crocheting a separate flat crochet circle and sewing it securely to the bottom of the body. The goal is to create a flat, sturdy base that allows your Christmas kitty to balance upright without toppling over. Take care to ensure your closing stitches or sewn base are neat and secure, creating a polished finish.
5. Creating Ears, Tail, and Limbs
These smaller components bring your kitty to life. For the ears, crochet simple triangle shapes, either by starting with a magic ring and increasing, or by working in rows and decreasing. The tail can be crafted as a cropped cylinder, starting with a magic ring and crocheting in rounds for a few rows, then slightly decreasing or shaping it to give it a gentle curl. For the paws, crochet four small ovals, stuffing them very lightly so they maintain a subtle plumpness. Once all these pieces are made, they will be attached to the main body. Flat ears offer a charming, plush look, but for more perky, upright ears, you can lightly stiffen them with a piece of felt sewn inside before attaching. This attention to detail elevates the overall cuteness.
6. Add the Fairy Light Garland
This is where the festive magic truly begins! Start by chaining a long cord using green yarn – this will be the base for your fairy light string. The length will depend on how many times you want it to wrap around your kitty. Next, create tiny light bulbs by crocheting mini spheres in a variety of bright, festive colors such as red, yellow, blue, and white. These can be simple small magic rings with a few single crochet stitches pulled tight. Once you have enough bulbs, carefully sew or glue them at even intervals along the green cord. Finally, drape the completed garland around your kitty, positioning it snugly, and secure it in place with a few small stitches or dabs of fabric glue to ensure it stays put.
7. Final Assembly & Details
With all the individual pieces crafted, it’s time for the final assembly that brings your Christmas kitty to life. Using a tapestry needle and matching yarn, carefully sew the ears to the top of the kitty’s head, positioning them symmetrically. Attach the four small paws to the lower body, ensuring they are evenly spaced. Secure the tail to the back, giving it a slight curve for character. Finally, position the fairy light garland perfectly around the kitty, making sure it sits snugly and appears natural. Add any extra holiday flair such as a tiny felt star atop its head, a miniature Santa hat, or a small bow tie sewn securely in place to complete its festive look.
5. Customization Ideas
Crochet is all about creativity – make your Christmas Kitty truly your own! There are endless ways to personalize this project, transforming it into a unique piece of holiday decor or a custom gift. Exploring different color palettes and adding unique accessories can make each kitty a distinct character. Don’t limit yourself to the basic design; think about what makes your festive season special and incorporate those elements into your amigurumi.
- Color Variations: Instead of a classic white or gray, try using black yarn for a sleek, mysterious kitty, ginger yarn for a warm, playful look, or even a variegated yarn for a multi-toned effect.
- Rainbow Garland: For a dreamy, whimsical effect, use pastel colors like mint green, baby blue, soft pink, and lavender for your light bulbs. For a more playful and vibrant style, opt for bold, bright primary colors that really pop.
- Accessories: Elevate your kitty’s cuteness with tiny accessories. A small crocheted scarf in a contrasting color, a miniature Santa hat adorned with a pom-pom, or an elegant bow tie can add significant charm and personality.
- Expression options: Give your kitty a unique personality by embroidering different facial expressions. A pair of sleepy, half-closed eyes, a wide, happy smile, or curious raised eyebrows can completely change its demeanor.
6. Advanced Tips & Troubleshooting
Want to take your crochet game up a level or tackle common challenges? These expert tips will help you achieve a more polished, professional finish and resolve any issues you might encounter during your project. Mastering these techniques will not only improve this project but also enhance your skills for exploring more intricate crochet patterns in the future. Remember that using the right ergonomic crochet hooks can significantly improve your comfort and the consistency of your stitches.
- Invisible Decreases: To avoid visible bumps and achieve a smoother fabric, use front-loop single crochet decreases (sc2tog through front loops only). This technique creates a cleaner, less noticeable decrease, essential for amigurumi.
- Keep Tension Even: Consistent tension is the cornerstone of neat crochet work. Practice maintaining a smooth, even grip on your yarn and hook to produce uniform stitches. This prevents gaps and creates a professional, polished finish.
- Prevent Twists: When crocheting flat ovals or pieces meant to be flat, ensure you turn your work at the end of each round or row. This prevents the piece from spiraling or twisting, keeping it flat and true to shape.
- Fix Loose Stitches: If you notice your stitches are too loose, resulting in a gappy fabric, try using a smaller crochet hook. Alternatively, practice tightening your tension slightly to create a denser, neater fabric, which is ideal for amigurumi to prevent stuffing from showing.
- Even Stuffing: Distribute polyester fiberfill evenly throughout your amigurumi. Use small handfuls and gently push them into all parts of the piece, especially smaller limbs or ears, to avoid lumps, bumps, or flattened areas.
- Seamless Joins: When attaching limbs and other parts to the main body, use a tapestry needle and matching yarn. Employ a whip stitch or mattress stitch, pulling the seams tight to create nearly invisible joins that look professionally finished.
- Reading Patterns: Familiarize yourself with common crochet abbreviations like sc (single crochet), inc (increase), dec (decrease), sl st (slip stitch), and ch (chain). Understanding these symbols makes following patterns much more efficient and less confusing. If you’re looking for new inspiration, a Crochet Cute Critters book can provide fresh ideas.
- Sizing: To adjust the size of your finished amigurumi, you can switch yarn weight or hook size. A thicker yarn with a larger hook will yield a bigger kitty, while a thinner yarn with a smaller hook will create a miniature version. Always maintain proportional increases and decreases. For this project, a Clover 2.5 mm Crochet Hook is generally recommended, or a 3mm crochet hook for slightly larger stitches.
7. Care Instructions
To ensure your charming Christmas Kitty stays as cute and vibrant as ever, proper care is essential. Following these guidelines will help preserve its shape, colors, and overall appearance for many holiday seasons to come. Gentle handling and appropriate cleaning methods will keep your handcrafted treasure looking its best.
- Hand wash gently with mild detergent: Fill a basin with lukewarm water and add a small amount of gentle, wool-safe detergent. Submerge your kitty and gently squeeze the suds through the fabric. Avoid harsh scrubbing or twisting.
- Squeeze out water without twisting: Once washed, gently press the kitty between your hands or against the side of the basin to remove excess water. Do not wring or twist, as this can distort its shape and stretch the stitches.
- Lay flat to air dry: Reshape your kitty as needed and lay it flat on a clean, dry towel or a mesh drying rack. Ensure good air circulation around it. Flipping it periodically can help it dry evenly and prevent mildew.
- Avoid direct sunlight to prevent color fading: While drying, keep your amigurumi out of direct sunlight, which can cause colors to fade over time. A shaded, well-ventilated area is ideal for drying.
- Store in a cool dry place, or keep it dust-free in a display box: When not on display, store your Christmas kitty in a clean, cool, dry place. A breathable fabric bag or a display box can protect it from dust and humidity.
8. Display & Gift Ideas
Your finished Christmas Kitty is more than just a craft project; it’s a versatile piece of holiday cheer ready to bring joy in many ways. Whether you’re looking for unique decor or a heartfelt present, this amigurumi cat fits perfectly into various festive scenarios. Consider making several to create a cohesive theme throughout your home or to gift to multiple loved ones.
- Holiday ornament or tabletop decor: Hang your kitty on the Christmas tree as a unique ornament, or place it on your mantelpiece, bookshelf, or coffee table as a delightful festive accent.
- Cute plush for kids: With its soft texture and adorable design, this kitty makes a wonderful, huggable plush toy for children during the holidays and beyond. Ensure all components like safety eyes are securely attached.
- Desk companion to brighten your workday: Place your Christmas kitty on your desk to add a touch of festive whimsy and a constant reminder of the cozy holiday spirit, making your workspace more enjoyable.
- Personalized handmade gift: A handmade gift carries immense sentimental value. This kitty makes a perfect personalized present for cat lovers, crochet enthusiasts, or anyone who appreciates unique, handcrafted items.
- Photo prop for seasonal photo shoots: Use your festive kitty as an adorable prop in your holiday photo shoots, whether for family portraits, product photography, or simply capturing the festive mood on social media.
9. Benefits Section
Creating this crochet project offers much more than just a cute result; it provides a wealth of personal benefits that contribute to overall well-being. Engaging in slow crafts like crochet can be a deeply rewarding experience, enhancing both mental and emotional health. From the quiet focus required to the tangible sense of accomplishment, the advantages extend far beyond the finished item.
- Relaxation and mindfulness through crafting: The repetitive motion of crocheting encourages a meditative state, helping to calm the mind and reduce mental clutter. It’s a wonderful way to practice mindfulness and stay present.
- Stress relief as your hands stay busy: Focusing on stitches and patterns provides a healthy distraction from daily stressors, channeling energy into a productive and creative outlet, which naturally lowers stress levels.
- A sense of pride in completed handmade work: There’s immense satisfaction in seeing a project through from a ball of yarn to a finished, tangible item. This sense of accomplishment boosts self-esteem and confidence.
- A sustainable gift alternative to store-bought items: Handcrafted gifts are often more eco-friendly, reducing reliance on mass-produced goods and their associated environmental impact. It’s a thoughtful way to promote sustainability.
- Emotional connection from gifting something created with love: When you gift a handmade item, you’re not just giving an object; you’re sharing your time, effort, and love. This creates a deeper emotional connection with the recipient.
10. Photography & Social Media Tips
When it’s time to show off your adorable Festive Crochet Christmas Kitty Fairy Light Garland, good photography can make all the difference. High-quality images attract more attention on social media platforms like Pinterest and Instagram, inspiring others and showcasing your hard work. Follow these tips to capture your creation in the best light and make it shine online.
- Use natural light for soft, even photos: Position your kitty near a window during daylight hours. Natural light is flattering, reduces harsh shadows, and accurately portrays the colors and textures of your crochet work.
- Add props like yarn balls, fairy lights, or holiday ornaments: Create a festive scene around your kitty. Small yarn balls, extra fairy lights, pinecones, or miniature holiday ornaments can add context and visual interest without overwhelming the main subject.
- Use minimal, soft backgrounds: A plain, light-colored wall, a wooden surface, or a simple blanket can serve as an excellent backdrop. Avoid cluttered backgrounds that distract from your beautiful crochet piece.
- Create close-up shots to highlight texture and detail: Don’t be afraid to get in close! Showcase the intricate stitches, the texture of the yarn, the embroidered details of the face, and the tiny light bulbs. These details make your creation truly special.
11. Conclusion
If you’re looking for a handmade craft that’s festive, heartwarming, and fun to make – you just found it. The Crochet Christmas Kitty with Fairy Light Garland is the perfect slow craft project for the holidays. Whether you’re making it to decorate your home, give as a heartfelt gift, or simply enjoy the cozy, meditative process of crocheting – this project offers everything you need to spark joy and creativity. It’s also a wonderful addition to your collection of other festive crochet projects. If you’re just starting out, a complete crochet kit for beginners can be a great way to get started with all the essentials.
So grab your yarn, turn on some soft music or a holiday movie, and let your creativity flow. With each stitch, you’re not just creating an amigurumi; you’re crafting a memory, a piece of holiday magic, and a testament to the joy of handmade gifts. Happy crocheting!


