Cuddle Up: Plush Crochet Duck Amigurumi Pattern for Newbies & Starters
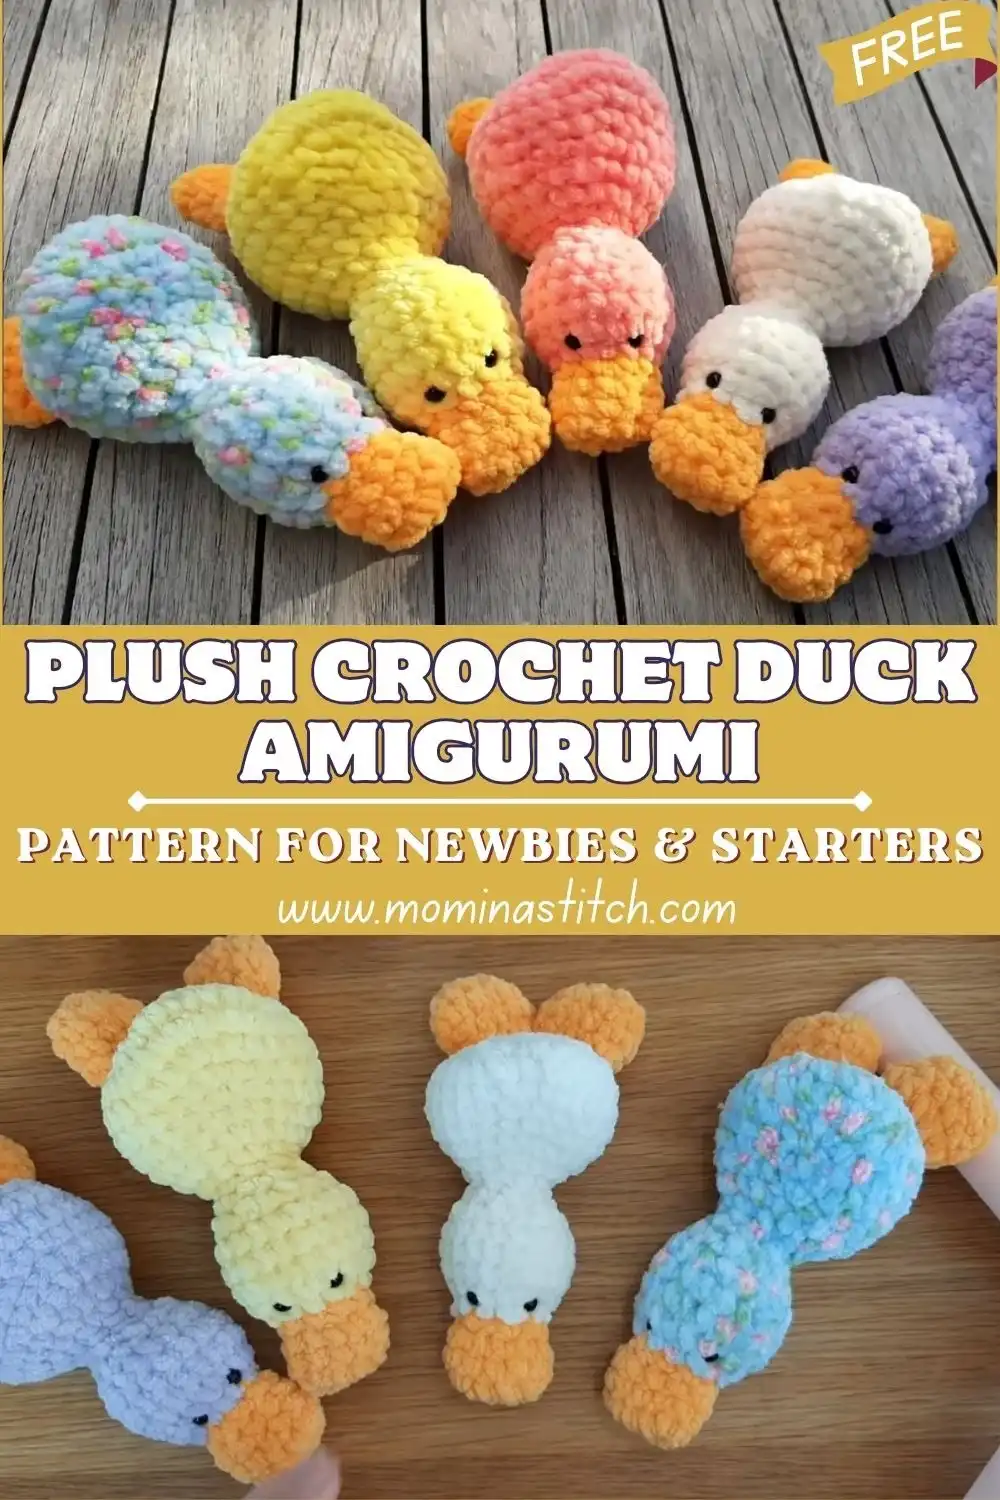
Discover the ultimate project for instant coziness with this delightful Plush Crochet Duck Amigurumi Pattern for Newbies & Starters. This charming duck features a long, lying body, perfectly designed to look like it’s peacefully resting. The use of plush yarn ensures a wonderfully smooth, cuddle-ready texture, making every stitch a gentle and enjoyable experience for beginners.
This pattern focuses on simplicity and sweetness, featuring tiny wings, a small tail, and a bright orange beak that adds a pop of classic duck personality. It’s an ideal beginner-friendly crochet animal that works up quickly, making it a perfect adorable gift or a charming décor piece for any space. If you love creating cute characters, you might also enjoy our Adorable Free Crochet Ditto Pokemon Amigurumi Patterns Collection for more plush fun.
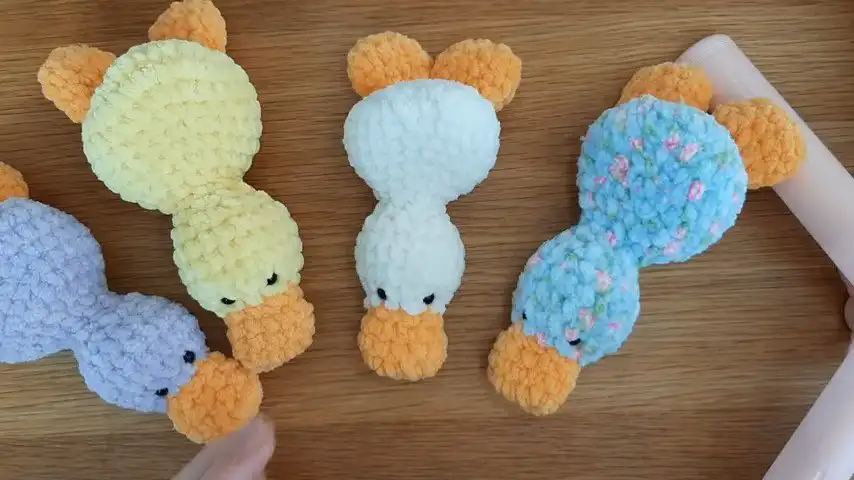
This Crochet Duck Amigurumi is a fantastic project for anyone seeking a quick win without the hassle of complicated shaping. The stitches are kept simple, the individual parts are small, and the minimal sewing means your duck will come together much faster than many traditional round amigurumi projects. Continuous rounds ensure an easy flow, allowing the shape to build naturally into a lovely elongated form rather than a perfect ball.
The unique charm of this duck lies in its relaxed, stretched-out body, resembling a little plush friend happily resting on its tummy. Small wings gracefully adorn its sides, complemented by a tiny tail at the back. Soft plush or velvet yarn elevates the duck’s cuddliness, while the vibrant orange beak provides that quintessential duck character without requiring intricate details. This truly is the kind of project designed to feel relaxing and rewarding from start to finish. For other delightful animal creations, check out these Cool Crochet Dinosaur Patterns – Plush Dino.
Materials Needed (Exact Measurements)
Selecting the right materials is key to achieving that signature plush feel. For the main body, opt for soft plush yarn or velvet yarn, typically requiring 50–80 grams (about 70–100 meters). The choice between plush and velvet can slightly alter the final texture; plush tends to be fuzzier, while velvet is smoother and shinier. Consider brands known for their softness and ease of use for amigurumi.
For the beak and feet, you’ll need a contrasting orange yarn, about 10–15 grams (15–25 meters). This bright color truly brings the duck to life. Your crochet hook should range from 4.0 mm to 6.0 mm. A 4.5 mm hook is ideal for tighter stitches that prevent stuffing from showing, while a 5.5–6 mm hook will create an extra plush and squishier duck. Experiment to find what best suits your yarn and tension.
Safety eyes, 6–8 mm, are perfect for giving your duck an endearing gaze. Alternatively, black yarn can be used for embroidered eyes, offering a softer, child-safe finish. You’ll also need about 20–40 grams of polyfill stuffing, a stitch marker to keep track of your rounds, a tapestry needle for seamless assembly, and a sharp pair of scissors for trimming yarn ends.
Abbreviations (US Terms)
Understanding these standard US crochet terms will make following the pattern straightforward. Familiarizing yourself with them before you begin ensures a smooth crocheting experience.
- MR = magic ring
- sc = single crochet
- inc = increase (2 sc in the same stitch)
- dec = decrease (single crochet decrease)
- sl st = slip stitch
- ch = chain
- rep = repeat
- FO = fasten off
Skill Level
This pattern is confidently rated at a beginner level, making it accessible even if you’re relatively new to amigurumi. It relies on fundamental amigurumi shaping techniques using basic stitches such as single crochet, increases, and decreases. All stitches are worked in continuous rounds, which is a common and straightforward method in amigurumi.
The primary skills required are accurately counting your stitches at the end of each round and maintaining an even tension throughout your work. These practices are crucial for achieving the duck’s intended smooth shape and consistent texture. No complex techniques or intricate stitch patterns are involved, allowing you to focus on the joy of creation.
Finished Size
Upon completion, your plush duck will be a small-to-medium size, typically ranging from about 5 to 8 inches long. This makes it perfectly palm-sized for cuddling or displaying. The exact finished dimensions can vary based on several factors, offering you some flexibility in the final look of your creation.
The thickness of your chosen yarn, the size of your crochet hook, and how firmly you pack the stuffing will all influence the duck’s final size. Using a thicker yarn with a larger hook will result in a larger duck, while a finer yarn and smaller hook will yield a more petite creation. Adjusting these elements allows you to customize your duck to your preference.
Time Planning
This project is designed to be a relatively quick and satisfying make, with a total estimated time ranging from 1.5 to 3 hours. This duration can vary based on your personal crocheting speed and familiarity with plush yarn. Breaking down the project into smaller segments helps manage your time effectively.
- Body: 60–120 minutes
- Beak: 10–15 minutes
- Wings: 15–25 minutes
- Assembly: 15–30 minutes
The body is the most time-intensive part due to its size, while smaller elements like the beak and wings work up very quickly. Assembly involves careful placement and stitching, so allotting sufficient time for this final stage ensures a polished finish.
Important Notes Before Starting
Paying attention to these key notes will help ensure your crochet duck turns out beautifully and without any common beginner pitfalls. These tips are especially helpful when working with plush yarn, which can sometimes be a bit tricky to navigate.
- Use a stitch marker: Always mark the first stitch of each round. This is crucial for keeping your body neatly aligned and preventing the spiral effect that can occur in continuous rounds. Moving your marker after each round ensures accuracy.
- Count stitches at the end of every round: This step is non-negotiable, especially during increase and decrease rounds. Consistent stitch counts guarantee that your duck maintains its intended oval, balanced shape and doesn’t become lopsided.
- Keep tension even: Plush yarn can be forgiving, but uneven tension can still affect the shape. Since plush fibers can hide stitches, take your time and use your fingertips to feel for each stitch rather than relying solely on sight.
- Stuff slowly as the body grows: Avoid overstuffing at once. Adding small amounts of polyfill gradually, as you crochet, helps maintain a smooth, lump-free shape. This technique prevents bulges and ensures a uniform plush feel.
- Aim for an elongated oval, not a ball: The characteristic lying shape of this duck is achieved by spreading increases across rounds and crocheting longer sections of even single crochet. This creates a gentle, stretched-out appearance rather than a perfectly round form.
Step-by-Step Pattern
Let’s begin crafting our adorable plush duck! The core of this project is the main body, which we’ll start with a magic ring and work in continuous rounds. The aim is to create a long, lying body that appears slightly flattened at the bottom and perfectly rounded at the top. The plush yarn naturally contributes to its squishy texture, so gentle shaping and consistent stitch counts are your best tools here.
Body Foundation and Shaping
Begin by making Round 1 into your magic ring (MR) with 6 single crochets (sc), then pull the ring tight. For Round 2, work around to establish a soft, flat base. Over the next few rounds, you’ll gradually increase your stitches to widen the piece. The trick here is to avoid making it too round too quickly. Increase evenly until the body has reached a width that resembles a small oval pillow rather than a perfect circle.
Building the Length
Once your desired width is achieved, continue crocheting several rounds using only single crochet stitches (sc), with no increases or decreases. This is the stage where the distinctive lying duck shape truly begins to form. The longer this section is, the more elongated and relaxed your duck will appear. Continuously check the shape in your hands; the sides should have a gentle curve, and the body should begin to feel like a small plush loaf.
Stuffing for the Perfect Plush Shape
As you continue to crochet the body, begin stuffing gradually. Take a small pinch of polyfill, push it gently into the ends of your piece, and smooth it out with your fingers. The goal is soft, supportive stuffing—an overstuffed duck can lose its flattened, relaxed look. Build the shape slowly, stopping often to assess and adjust. You want a cuddly, slightly flattened form, like a tiny resting duck.
Tapering and Closing the Body
After reaching your desired length and fullness, it’s time to begin decreasing towards the back end of the duck. Use single crochet decreases (dec) spaced evenly around the round to taper the body smoothly. Continue decreasing until the opening is small enough to close neatly. Add a final bit of stuffing just before the opening becomes too small, especially near the tail end, to ensure the body maintains its robust shape.
Finally, close the body by working the last decreases and then pulling the yarn through the remaining stitches. Fasten off (FO), leaving a short tail. Use this tail to sew any remaining small gap closed. Your main body should now be a beautifully shaped, long plush form, ready for its charming details.
Crafting the Distinctive Beak
Next, create the duck’s bright orange beak. This should be a small, rounded piece that sits perfectly on the front of the duck. Start with a magic ring and crochet a few single crochets. Then, add one gentle increase round to create a slight puffiness. Crochet one even round of single crochets to give it a little height. Fasten off, leaving a tail for sewing. You can lightly stuff the beak for a fuller look or leave it unstuffed for a flatter, more subtle appearance, depending on your preferred style.
Creating the Tiny Wings
The wings should be simple and quick to make, resembling little curved petals. Crochet a small piece that is slightly wider at one end and gently tapered at the other. A beginner-friendly method involves starting with a small chain, working single crochets along it, and then adding a second row with a few increases to achieve a soft, natural curve. Fasten off and leave a tail for attaching. Make two identical wings to ensure symmetry.
Adding a Simple Tail
For the tail, simplicity is key. This can be as straightforward as a small bump created with a few stitches worked directly onto the body, or a tiny separate piece shaped like a mini nub and sewn on. Keep it small and proportionate to the duck’s body, ensuring it matches the overall simple style and avoids unnecessary extra sewing stress.
Bringing the Face to Life
Now for the most expressive part: the face! Place safety eyes or embroider small eyes using black yarn. A simple face often looks the cutest on this duck, as its long body already provides a lot of personality. Eyes typically look sweet when positioned slightly above the beak line, with a few stitches of space between them. When working with plush yarn, gently part the fibers to clearly see your stitch placement before securing the eyes.
Finally, sew the beak onto the front of the duck. Stitch carefully around the edges, pulling snug but not so tight that it distorts the plush fabric. Securely weave in all yarn ends. You’re almost there! For another adorable creature, consider making a Heart Shaped Turtle Crochet Pattern.
Assembly
Careful assembly is what brings all your beautiful pieces together into a cohesive, charming duck. Take your time with these final steps to ensure everything is perfectly placed.
Attach the wings evenly on both sides of the body. A good placement is generally around the upper-middle section of the duck, allowing the wings to appear as if they are naturally resting against its sides. It’s highly recommended to pin them in place first using scrap yarn or stitch markers. This allows you to adjust their position before committing to sewing.
Next, attach the beak at the correct front position. The beak usually looks best when centered and slightly lower on the face, giving the duck a relaxed and sleepy expression. Pin it first to visualize the final look.
Before you make any final stitches, step back and check for symmetry. Look at your duck from the front, top, and sides. Adjust the placement of the eyes, beak, and wings until everything feels balanced and pleasing to your eye. Once you’re satisfied with the arrangement, sew each piece firmly in place and securely weave in all remaining yarn ends for a clean finish.
Finishing Touches
These final steps help ensure your plush duck has the perfect shape and a professional finish, making it truly ready for cuddles or display.
Adjust the stuffing evenly by gently pressing and smoothing the body with your hands. Pay particular attention to the front and back ends to ensure the duck maintains a consistent, plush appearance throughout. This also helps to eliminate any potential lumps or uneven spots.
Shape the duck properly by gently flattening the bottom slightly and rounding the top. Plush yarn is very forgiving and makes shaping easy; a little gentle squeezing and molding will help the duck settle into its characteristic lying pose. This subtle shaping enhances its overall relaxed and charming aesthetic.
Finally, hide all yarn ends neatly. Weave the tails securely inside the body of the duck and trim any excess yarn close to the fabric. For plush yarn, it’s often a good idea to weave a little extra, as the fibers can sometimes be more slippery, ensuring the ends stay hidden permanently.
Beginner Tips
These tips are designed to help new crocheters navigate the unique aspects of working with plush yarn and amigurumi, ensuring a smooth and successful project.
- Use a smaller hook than the yarn label suggests: This is a common amigurumi trick. A slightly smaller hook creates tighter stitches, which are essential to prevent the stuffing from showing through any gaps in your crochet fabric.
- Feel the stitches rather than relying solely on sight: Plush yarn’s fluffy texture can obscure stitch definition. Develop a habit of feeling for the loops with your fingertips, especially when working increases and decreases, to ensure you insert your hook into the correct stitch.
- Move the stitch marker immediately after the first stitch each round: Procrastinating on this can lead to losing your place and uneven rounds. Making it a habit ensures accurate stitch counting and consistent shaping.
- Stuff with small pieces of polyfill instead of large clumps: This technique is crucial for preventing a lumpy appearance. Small, even amounts of stuffing can be distributed more smoothly, resulting in a perfectly plush and uniform duck.
- Take quick shape checks often: Don’t wait until the end to assess your duck’s form. Regularly pause, gently squeeze, and smooth your work. This allows you to catch and correct small uneven spots or shaping issues early on, making adjustments much easier.
Common Mistakes to Avoid
Being aware of these common pitfalls can save you time and frustration, helping you achieve a beautifully finished plush duck on your first try.
- Loose stitches: This is a frequent issue, especially with plush yarn. If your stitches are too loose, the stuffing (especially bright white polyfill) can peek through, detracting from the smooth finish. Aim for a firm but not overly tight tension.
- Uneven stuffing: A lumpy duck is less cuddly and aesthetically pleasing. Ensure you’re adding small amounts of stuffing gradually and distributing it evenly throughout the body to maintain a smooth, plush appearance.
- Incorrect shape (too round instead of oval): This happens when there are too many increases in the initial rounds or if the “even rounds” section is too short. Review the pattern’s increase distribution and ensure you crochet enough plain rows to achieve that elongated, lying body shape.
- Misplaced eyes or beak: Even a slight one-stitch difference in placement can significantly alter your duck’s expression. Always pin eyes and beak in place first, step back, and adjust until you’re happy with the symmetry and overall look before permanently attaching them.
Variations
Once you’ve mastered the basic plush duck, feel free to explore these creative variations to personalize your creations or make unique gifts. For more fun patterns, check out the Gummy Bear Granny Square Pattern or 10 Crochet Strawberry Cup Cozies Ideas.
- Different colors: Don’t limit yourself to classic yellow! Experiment with pastel ducks in mint, baby pink, or lavender for a softer look. Cream and beige also create an extra cozy, minimalist aesthetic. You could even try variegated yarn for a unique speckled effect.
- Add a keychain ring: To make a portable charm, crochet a smaller version of the duck using finer yarn and a smaller hook. Before closing the body, stitch a tiny loop of yarn on top of the head. Once finished, attach keychain hardware for an adorable bag charm or backpack buddy.
- Make mini or jumbo version: The beauty of amigurumi is its scalability. Use thinner, sport-weight yarn and a smaller hook (e.g., 2.5mm) for a tiny mini duck. Conversely, grab chunky blanket yarn and a large hook (e.g., 8-10mm) for a giant, super-cuddly plush duck that makes a fantastic decorative pillow.
- Add a scarf or accessories: Personalize your duck with tiny accessories. A miniature crocheted scarf in a contrasting color, a small bow tied around its neck, or even a mini hat can transform your duck into a seasonal gift (e.g., a Santa hat for Christmas) or a cute desk companion with character.
Conclusion
Soft, simple, and brimming with charm, this Crochet Duck Amigurumi is the kind of project that offers comfort and joy from the very first round. Its distinctive lying body shape makes it exceptionally huggable, and the thoughtfully designed tiny details keep it perfectly beginner-friendly while ensuring an undeniably adorable finished product. This pattern truly captures the essence of a tranquil, resting duck.
So, gather your plush yarn, embrace the process of gentle shaping, and take your time as you bring each stitch to life. You’ll soon have a sweet little duck companion, lovingly crafted by your own hands, ready to brighten any day or make the perfect heartfelt gift.
We hope you enjoyed this delightful pattern! Don’t forget to save this pin to your Pinterest board for future reference, share it with a fellow craft enthusiast, and leave a comment below with your thoughts or your finished duck photos!


