Whip Up a Delightful Pumpkin Pie Free Crochet Pattern for Fall
This post contains affiliate links. As an Amazon Associate, we earn from qualifying purchases.
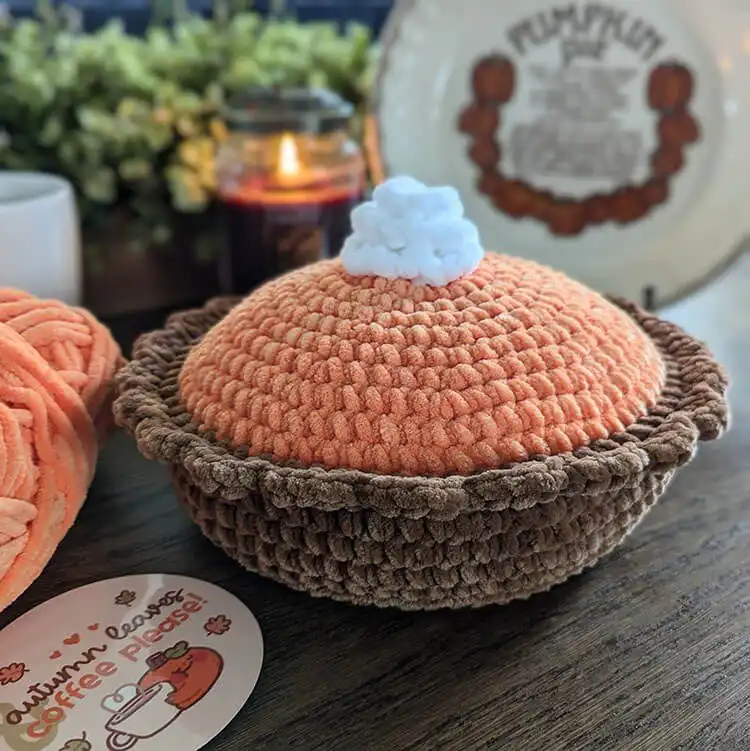
Get ready to create the most adorable and huggable Pumpkin Pie Free Crochet Pattern! This delightful project is not only fun to make but also incredibly versatile, perfect for adding a cozy, autumnal touch to your home decor or expanding your amigurumi collection. Imagine a plush, textured slice of pie sitting on your couch or as a sweet gift for a loved one.
This beginner-friendly pattern guides you through each step, ensuring a satisfying crafting experience. Whether you’re looking for a seasonal decoration or a charming soft toy, this crochet pumpkin pie will surely bring warmth and cheer. Plus, the basic construction allows for easy customization to transform it into other delicious crochet patterns throughout the year.
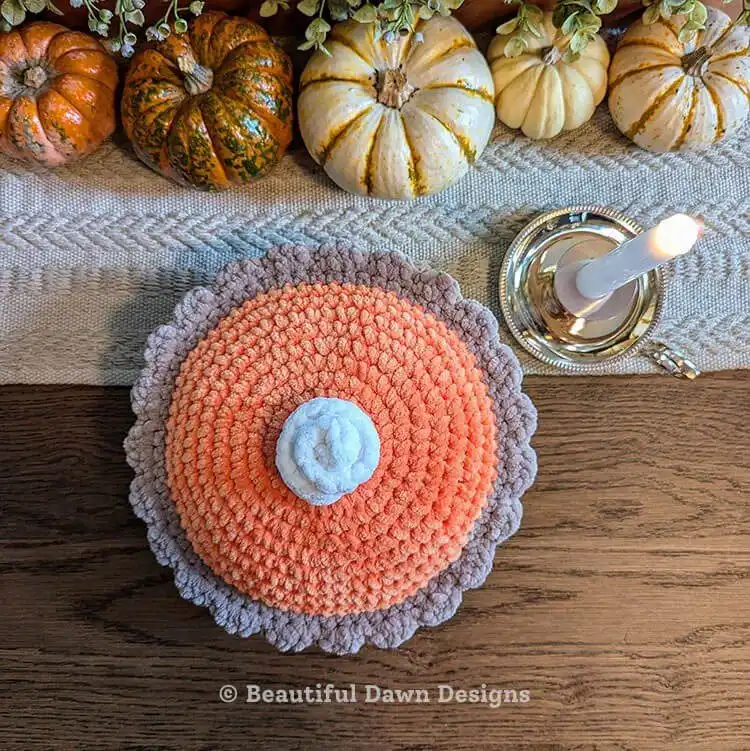
Crafting this pumpkin pie also offers a fantastic opportunity to practice fundamental crochet techniques. The pattern is designed to be straightforward, making it accessible even if you’re relatively new to crochet. You’ll learn how to create flat circles, work in continuous rounds, and assemble different crocheted components into a cohesive, charming final piece.
Before diving into the pattern, let’s gather our essential materials. Having everything ready will make your crafting process smooth and enjoyable. Remember, the choice of yarn and hook size can slightly alter the final dimensions and feel of your crocheted pumpkin pie, so feel free to experiment with your preferred textures.
Materials Needed for Your Pumpkin Pie Project
To embark on your pumpkin pie crochet journey, you’ll need a few key supplies. The specified yarn provides a wonderfully plush and chunky texture, perfect for a cozy pie look and feel.
- Yarn: Premier Parfait Chunky (131yds, #6 Super Bulky) in Tangerine (orange), Toffee (tan), and a small amount of White. You can explore a set of multicolored yarn for similar projects.
- Hook: US size J 6.0 mm crochet hook.
- Stuffing: Poly-fil for giving your pie its plump shape.
- Accessories: A stitch marker to keep track of your rounds, sharp scissors, and a tapestry needle for weaving in ends and assembly.
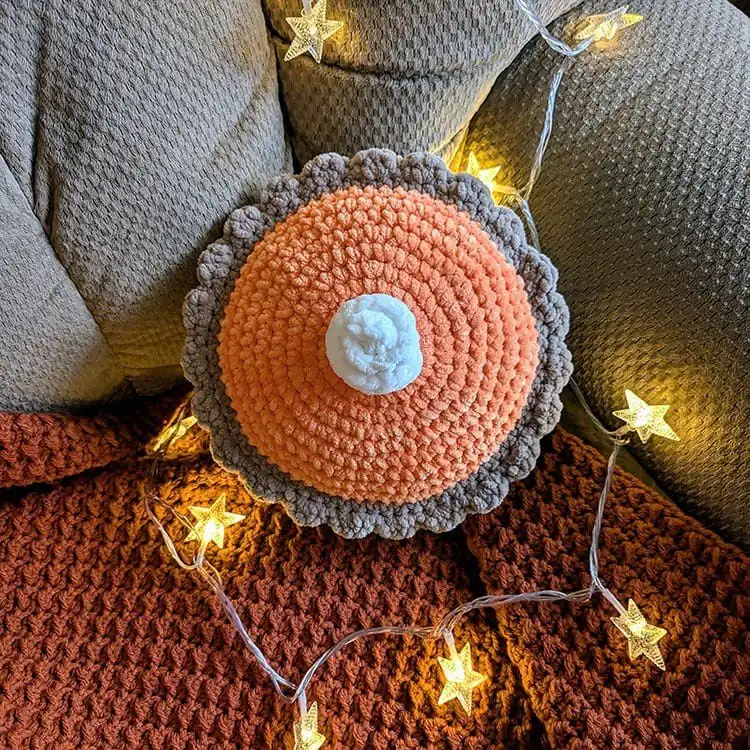
Approximate Finished Size
Once completed, your crocheted pumpkin pie will measure approximately 10.5 inches wide and 5 inches tall, not including the fluffy whipped topping. This makes it a substantial and eye-catching decorative piece or a perfectly huggable plushie.
Essential Pattern Notes for Success
Understanding these notes will help ensure your project goes smoothly. Paying attention to these details can make a significant difference in the final appearance and structure of your pumpkin pie.
- Continuous Rounds: You will be working in continuous rounds. Unless specifically instructed, do not join at the end of each round. This creates a seamless fabric ideal for amigurumi.
- Yarn & Hook Customization: While specific recommendations are given, you are welcome to use your choice of super bulky yarn and a corresponding hook size. Just be aware that this will alter the final size of your pie.
Key Crochet Abbreviations (US Terms)
Familiarize yourself with these standard US crochet terms and their abbreviations, which are used throughout the pattern instructions. If you need a refresher on basic stitches, learning how to single crochet is a great place to start!
- ch – chain
- st(s) – stitch(es)
- sl st – slip stitch
- sc – single crochet
- inc – increase (work 2 stitches in the same stitch)
- hdc – half double crochet
- dc – double crochet
- sc blo – single crochet in the back loop only
Pumpkin Pie Crochet Pattern
Make the Pie Filling (using the color orange)
Begin by creating the central, flat disk that will form the top of your pumpkin pie filling. This section involves increasing stitches evenly to achieve a perfectly round shape, characteristic of a delicious pie.
To begin: Chain 2.
- Round 1: Place 6 single crochet (sc) stitches into the 2nd chain from the hook. This forms your magic ring alternative. (You should now have 6 stitches). Remember to place your stitch marker in the first stitch of each round to keep track of your progress.
- Round 2: Increase (inc) in each stitch around. Work 2 sc into every stitch from the previous round. (You will now have 12 stitches). This starts to expand your circle.
- Round 3: Repeat Increase, single crochet in the next stitch from to around. (Your stitch count should be 18). This continues the gradual expansion.
- Round 4: Repeat Increase, single crochet in the next 2 stitches from to around. (Resulting in 24 stitches).
- Round 5: Repeat Increase, single crochet in the next 3 stitches from to around. (You will have 30 stitches).
- Round 6: Repeat Increase, single crochet in the next 4 stitches from to around. (Total of 36 stitches).
- Round 7: Repeat Increase, single crochet in the next 5 stitches from to around. (Reaching 42 stitches).
- Round 8: Repeat Increase, single crochet in the next 6 stitches from to around. (Achieving 48 stitches).
- Round 9: Repeat Increase, single crochet in the next 7 stitches from to around. (Bringing your total to 54 stitches).
- Round 10: Repeat Increase, single crochet in the next 8 stitches from to around. (You should now have 60 stitches).
- Round 11: Repeat Increase, single crochet in the next 9 stitches from to around. (Resulting in 66 stitches).
- Round 12: Repeat Increase, single crochet in the next 10 stitches from to around. (Your final stitch count for increases is 72 stitches).
- Round 13: Place 1 single crochet in each stitch around. (Maintaining 72 stitches). This final round without increases creates the flat top.
Once Round 13 is complete, slip stitch (sl st) to the first stitch to finish the round neatly. Fasten off your yarn, leaving a short tail, and weave in any loose ends securely using your tapestry needle. You now have the vibrant orange filling for your pie!
Make the Whipped Topping (using the color white)
This whimsical spiral topping adds the perfect touch of realism and charm to your pumpkin pie. It’s a quick and fun element to create, transforming your pie from simple to irresistible.
To begin: Chain 14 stitches.
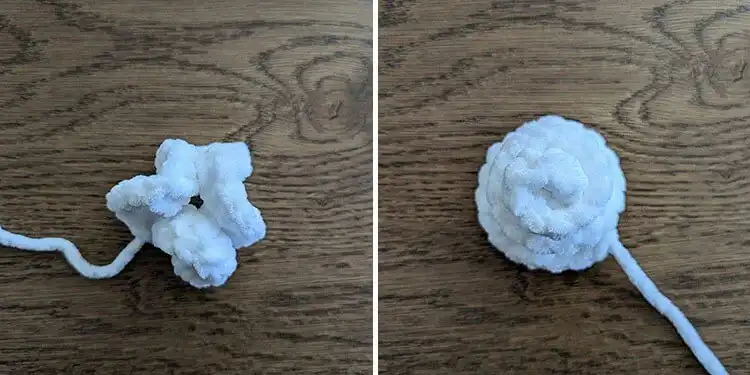
Next, place 3 double crochet (dc) stitches into the 2nd chain from the hook, and then continue working 3 double crochet stitches into each chain across the entire row. This dense concentration of stitches will naturally encourage your work to curl.
Fasten off your yarn, but this time, leave a long tail. You’ll use this tail for sewing the whipped topping onto your pie. Gently wrap the crocheted strip on itself, coiling it into a spiral shape. You might need to adjust it slightly to achieve your desired swirl. Once you’re happy with the shape, use the long tail and your tapestry needle to securely stitch the whipped topping to the center of your pie filling.
Make the Crust (using the color tan)
The crust forms the base and sides of your pie. It starts similarly to the filling but includes a special stitch to create that distinctive crust edge, giving your pie structure and an authentic look.
To begin: Chain 2.
- Round 1: Place 6 single crochet (sc) stitches into the 2nd chain from the hook. (6 stitches). Don’t forget your stitch marker in the first stitch.
- Round 2: Increase (inc) in each stitch around. (12 stitches).
- Round 3: Repeat Increase, single crochet in the next stitch from to around. (18 stitches).
- Round 4: Repeat Increase, single crochet in the next 2 stitches from to around. (24 stitches).
- Round 5: Repeat Increase, single crochet in the next 3 stitches from to around. (30 stitches).
- Round 6: Repeat Increase, single crochet in the next 4 stitches from to around. (36 stitches).
- Round 7: Repeat Increase, single crochet in the next 5 stitches from to around. (42 stitches).
- Round 8: Repeat Increase, single crochet in the next 6 stitches from to around. (48 stitches).
- Round 9: Repeat Increase, single crochet in the next 7 stitches from to around. (54 stitches).
- Round 10: Repeat Increase, single crochet in the next 8 stitches from to around. (60 stitches).
- Round 11: Repeat Increase, single crochet in the next 9 stitches from to around. (66 stitches).
- Round 12: Repeat Increase, single crochet in the next 10 stitches from to around. (72 stitches).
- Round 13: Place 1 single crochet in the back loop only (sc blo) in each stitch around. (Maintaining 72 stitches). This crucial step creates a visible ridge, setting the foundation for your pie crust’s edge.
- Rounds 14-17: Place 1 single crochet in each stitch around. (Still 72 stitches for each round). These rounds build the height of your pie crust.
Slip stitch to the first stitch to close the round. Fasten off your yarn and weave in the ends. Your pie crust base is now complete, ready for assembly.
Attach the Crust and Filling, Stuff and Make Crust Edge
This final stage brings all the elements together, transforming your crocheted pieces into a complete, plump pumpkin pie. You’ll join the two main parts, add stuffing, and create the iconic crimped crust edge.
Carefully place the orange pie filling on top of the tan crust. We will now join these two pieces together using the tan yarn. This creates a neat seam and begins to form the pie’s structure.
- Round 1 (Joining): Attach your tan yarn to any stitch on the edge, chain 1, and then work a single crochet (sc) in the same stitch. Continue to work 1 single crochet in each stitch around, making sure to go through a stitch on both the filling and the crust simultaneously. This effectively sews the two pieces together.
As you work your way around, before you completely close the pie, take a moment to stuff it firmly with Poly-fil. Stuff to your preferred level of firmness, ensuring it holds a nice round shape. After stuffing, continue to crochet around until the opening is fully closed. (You should still have 72 stitches once closed).
Slip stitch to the first stitch to join, but do not fasten off. You’ll continue directly to Round 2 to create the decorative crust edge.
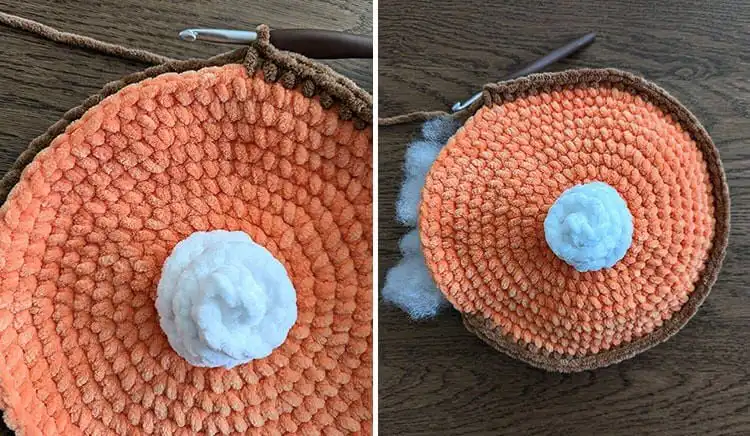
- Round 2 (Crust Edge): Chain 1 and single crochet (sc) in the same stitch. Then, repeat the following sequence from to around: Work 3 half double crochet (hdc) stitches in the next stitch, skip the next stitch, then slip stitch (sl st) in the following stitch. This creates a lovely, ruffled edge reminiscent of a real pie crust.
When you reach the end of the round and have 1 stitch remaining, skip that last stitch. Slip stitch into your initial chain 1 to neatly close the round. Fasten off your yarn, leaving a tail, and weave in all remaining ends with your tapestry needle for a clean finish. For more creative ideas, consider exploring other amigurumi bird free crochet patterns to expand your collection of adorable handmade items.
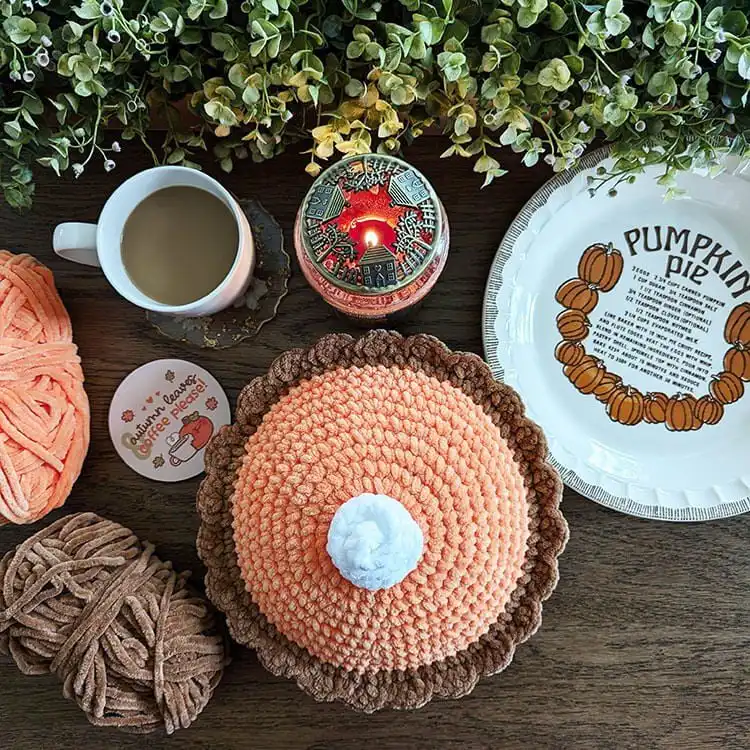
Your beautiful crocheted pumpkin pie is now complete! We hope you enjoyed creating this charming piece. Don’t forget to save this pin to your Pinterest board for future reference, share this delightful pattern with your crafting friends, and leave a comment below with your finished pie photos!