Quick and Simple Crochet Sweater Pattern Free: Your DIY Guide
Embark on a creative journey with this quick and simple crochet sweater pattern free, designed for advanced beginners. This guide walks you through crafting a beautiful top-down raglan sweater, a project that builds confidence and delivers a truly wearable garment. You’ll love the seamless construction and custom fit, making it perfect for your handmade wardrobe. If you’re a beginner looking for more projects, a complete crochet kit is a great starting point.
Creating your own crochet sweater is incredibly rewarding. This pattern demystifies garment making, allowing you to enjoy the process from the first stitch to the final blocking. Prepare to master essential techniques and create a cozy, stylish piece you’ll cherish for seasons to come. You can find all your crochet supplies here, ideal for personal use or as a thoughtful gift. Consider making a matching adorable baby set for a loved one.
Full Pattern
This comprehensive pattern outlines everything you need to create a stunning, custom-fit sweater. Designed for advanced beginners, it introduces techniques like raglan increases and post stitches, building on basic crochet knowledge. For more stitch inspiration, consider a crochet stitch dictionary. The result is a versatile garment perfect for layering in various seasons, offering both comfort and classic style.
The pattern is adaptable, allowing for personal touches in color and length. Focus on maintaining consistent tension for the best fabric drape. With clear instructions for multiple sizes, you can tailor this sweater to fit perfectly, ensuring a satisfying and personalized crafting experience.
Measurements Targets (guide)
Achieving the right fit is crucial for a comfortable sweater. These measurement targets act as a guide to ensure your yoke depth, sleeve circumference, and body width align with your desired size. Regularly measure your work against these targets, especially when trying on the garment during the process, to make any necessary adjustments.
Paying close attention to these guidelines helps prevent common fitting issues. A well-fitting sweater enhances wearability and appearance, so take the time to check your progress. Remember that personal gauge can affect outcomes, making these targets essential for a custom fit.
Neckline & Setup
The foundation of your sweater begins with the neckline, setting the tone for the entire garment. Whether you choose the foundation double crochet or a chain, ensure your initial ring is even and untwisted. This critical step guarantees a smooth start and prevents distortions in the final garment, laying the groundwork for a successful project.
Placing your four equidistant markers is key for the raglan shaping. These markers will guide your increases, ensuring the yoke grows symmetrically and beautifully. Double-check the fit around your neck before proceeding, as small adjustments here can make a big difference in comfort and final appearance.
Yoke (raglan grows)
The yoke is where your sweater truly begins to take shape, expanding from the neckline to form the shoulders and upper chest. Consistent raglan increases, executed by working (dc, ch 1, dc) into each corner space, are vital for creating a smooth, professional curve. This method ensures an even distribution of stitches and a graceful transition from neck to underarm.
Regularly trying on your work during this phase is highly recommended. This allows you to assess the depth and fit of the yoke against your body, ensuring it sits comfortably and flat. Adjusting the number of increase rounds based on your specific measurements guarantees a custom and flattering fit for your unique silhouette.
Separate Sleeves
Once the yoke reaches the target depth, it’s time to separate the sleeves from the body. This involves carefully placing the sleeve stitches onto waste yarn or stitch holders, allowing them to rest while you work on the main body. Creating an underarm chain to bridge the gap is crucial for comfort and mobility.
This separation marks a significant milestone in your sweater’s construction. Take a moment to check the fit again in the mirror; the shoulder line should drape well, and the underarm should feel unrestricted. Slight adjustments to the underarm chain length can fine-tune the fit for optimal comfort.
Body
With the sleeves separated, you’ll now focus on working the body of the sweater in continuous rounds of double crochet. This section is often described as “smooth sailing” because it involves repetitive, even stitching without complex increases or decreases. Maintaining consistent tension here is key for a uniform fabric drape.
This is also an excellent stage for creative color play, whether you opt for elegant stripes, a bold color-block, or a classic solid. Explore a variety of acrylic yarn skeins for your next project. Periodically trying on the body helps confirm the length and drape, ensuring it meets your desired aesthetic. Plan for the ribbing by stopping a few inches short of the final desired length.
Sleeves (make 2)
Returning to the sleeve stitches held on waste yarn, you’ll now bring them to life. Rejoin your yarn at the center of the underarm and carefully pick up stitches around the armhole, including those from the underarm chain. Working in the round ensures a seamless finish, just like the body.
Consider whether you prefer a tapered sleeve for a classic silhouette or a straight sleeve for a more relaxed fit. Gentle decreases every few rounds can create a subtle taper towards the wrist. Work until your desired sleeve length, allowing for cuff ribbing, ensuring both sleeves match for a polished look.
Neckline
The neckline provides the final touch of polish to your sweater, framing the face beautifully. Using a smaller hook, pick up stitches evenly around the neck opening and work a few rounds of single crochet, followed by front-post and back-post double crochet ribbing. This creates a neat, structured collar that prevents stretching.
You can customize the height of your collar by adding more ribbing rounds for a taller neck or keeping it minimal for a low crew neck. This detail significantly enhances the garment’s overall finished appearance, making it look professional and store-bought.
Finishing
The finishing steps are essential for a professional-looking handmade garment. Neatly weave in all your ends using a yarn needle, taking care to hide them securely within the stitches. This prevents unraveling and gives your sweater a clean, tidy appearance from all angles.
Lightly blocking your finished sweater is a transformative step. Whether you opt for steam blocking or wet blocking, this process helps to smooth out stitches, even out the fabric, and relax the yarn, allowing the sweater to drape beautifully and settle into its intended shape. Enjoy wearing your beautifully crafted piece!
Supplies Flat-Lay
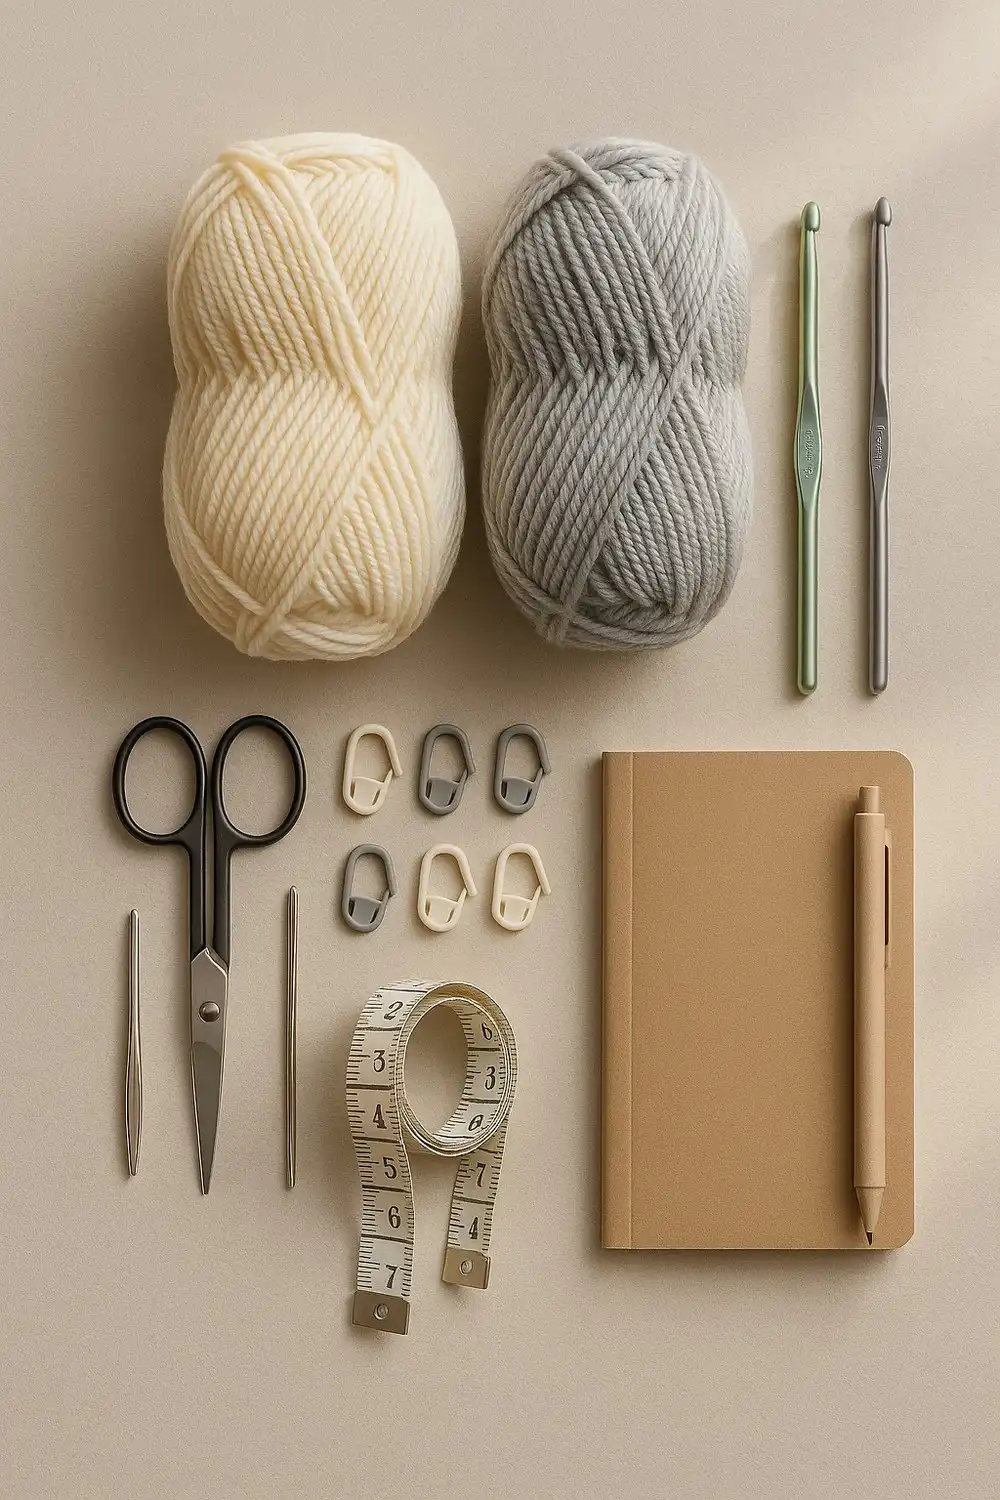
Before you even begin to chain, organizing your supplies in a flat-lay helps ensure a smooth and enjoyable crochet session. Selecting a worsted-weight yarn that feels soft against the skin is paramount for comfort. Your main hook, a 5.5 mm crochet hook, and a smaller 4.5 mm from a versatile crochet hook set for ribbing are essential for different fabric textures.
Don’t forget four locking stitch markers for raglan lines, a tape measure for precise fitting, and a notebook to track your progress. Sharp scissors, a yarn needle for weaving, and good lighting complete your toolkit. Choosing your yarn colors now can streamline your creative flow, whether you prefer solids or playful stripes.
Supplies You Needed
Gathering the correct materials before you start ensures a seamless crafting experience. You’ll need worsted weight yarn (approximately 800–1400 yards, depending on your chosen size). Your primary tool will be a 5.5 mm (I) crochet hook, with a smaller 4.5 mm (7) hook reserved for the ribbing sections. Consider investing in a set of ergonomic crochet hooks for comfort.
Essential notions include four locking stitch markers to delineate raglan lines, a pair of sharp scissors, a yarn needle for weaving in ends, and a dependable measuring tape for checking gauge and fit. A notebook is also invaluable for keeping track of your rounds and specific size notes.
Neckline & Setup
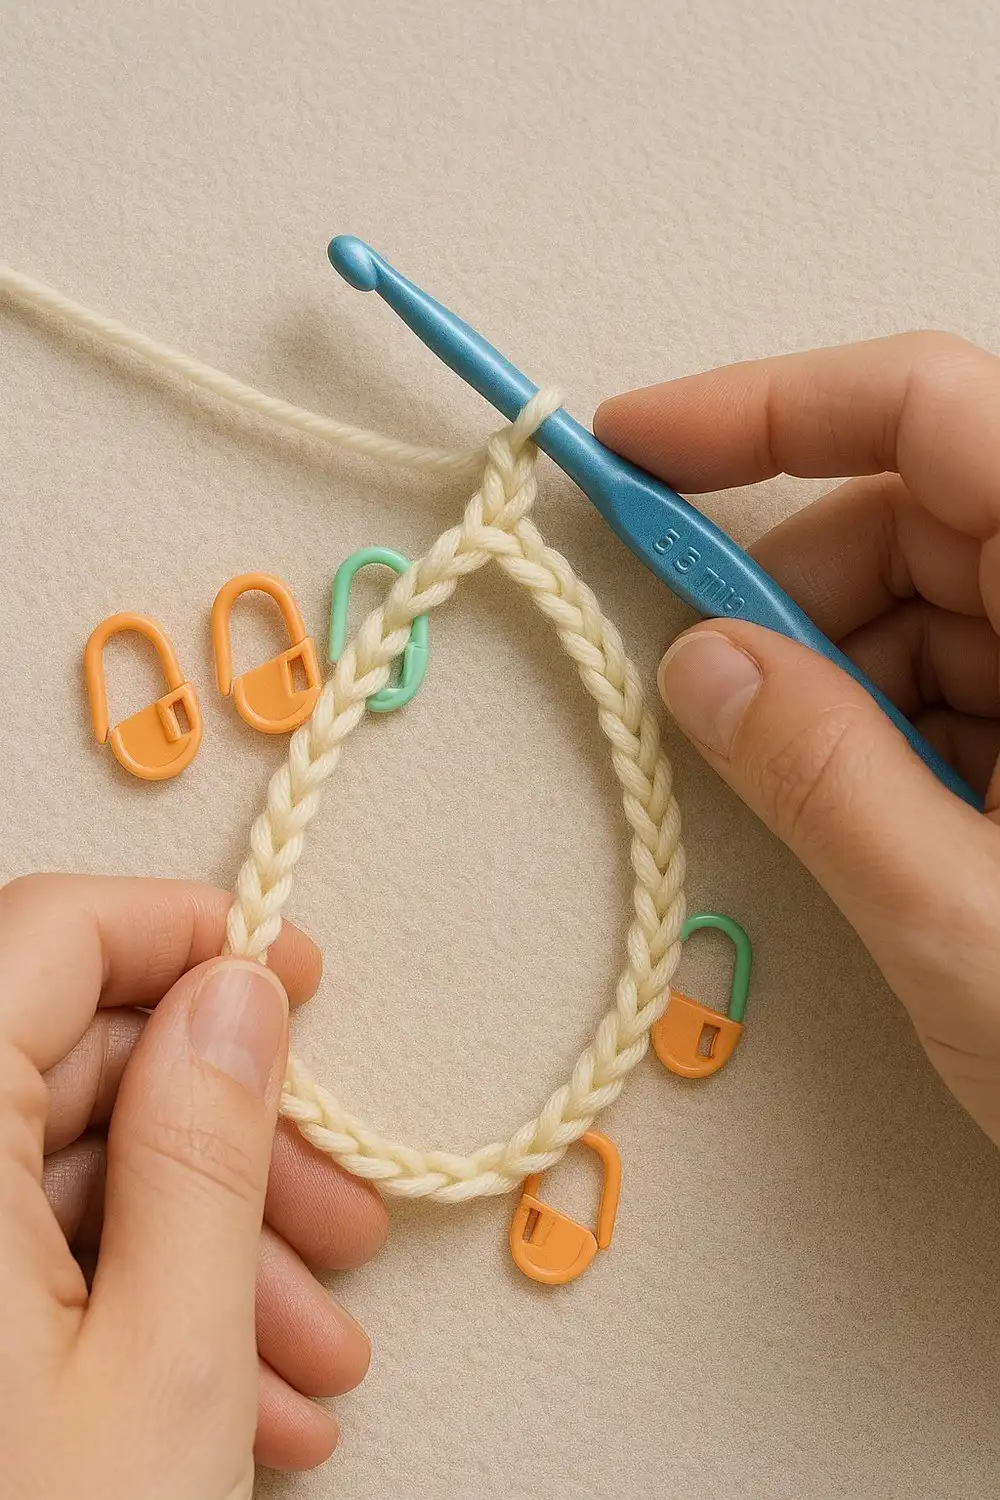
The very first step—creating your neckline—is foundational for the entire sweater. Opt for a relaxed foundation chain or foundation double crochet method to ensure flexibility, then join carefully to form a ring without any twists. This careful beginning prevents later distortion and ensures a comfortable fit around the neck.
After your initial double crochet round, strategically place four markers to define your raglan lines. These markers are your critical guides for all subsequent increases, ensuring your yoke develops symmetrically. Take a moment to assess the neckline’s fit; a comfortable, non-gaping opening here saves significant adjustments down the line.
Raglan Increase Rounds
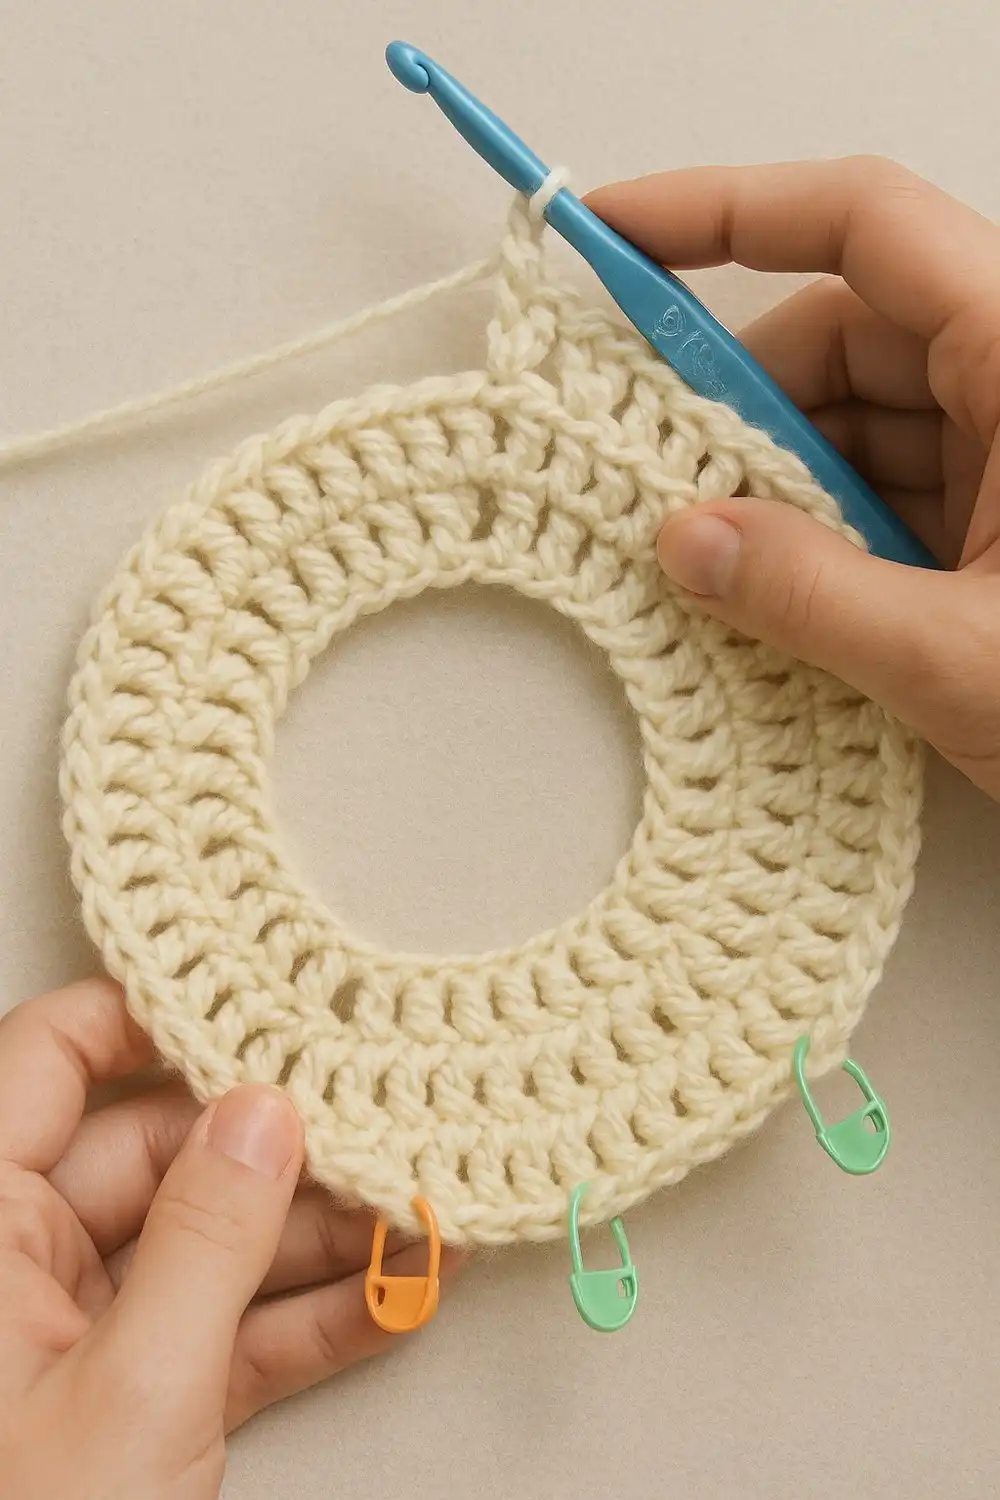
This is the magical stage where the sweater’s shoulders and upper body begin to expand from the neckline. By consistently working (dc, ch 1, dc) into the designated corner spaces at each marker, you create the signature raglan shape. The tiny chain-1 space acts as a flexible hinge, allowing the yoke to grow smoothly and evenly.
Regularly trying on your developing yoke is a crucial step. It allows you to check that the neckline lies flat and the shoulder line angles gracefully towards the underarm. If you desire more room in the sleeves, consider adding an occasional extra increase along the sleeve sections. Consistent stitch count and careful marking in your notebook will ensure a balanced garment.
Split for Sleeves
Reaching the correct yoke depth means it’s time for the pivotal step of separating the sleeves. Carefully slip the stitches intended for the sleeves onto waste yarn or dedicated stitch holders, keeping them secure for later. This allows you to focus on the main body of the sweater without interruption.
Crucially, add a short chain (typically six stitches) under each arm to bridge the gap between the front and back body sections. This underarm chain provides essential mobility and comfort. Perform a quick mirror check: the shoulder seam should sit well, and the fabric should have appropriate ease across the chest, avoiding any pulling.
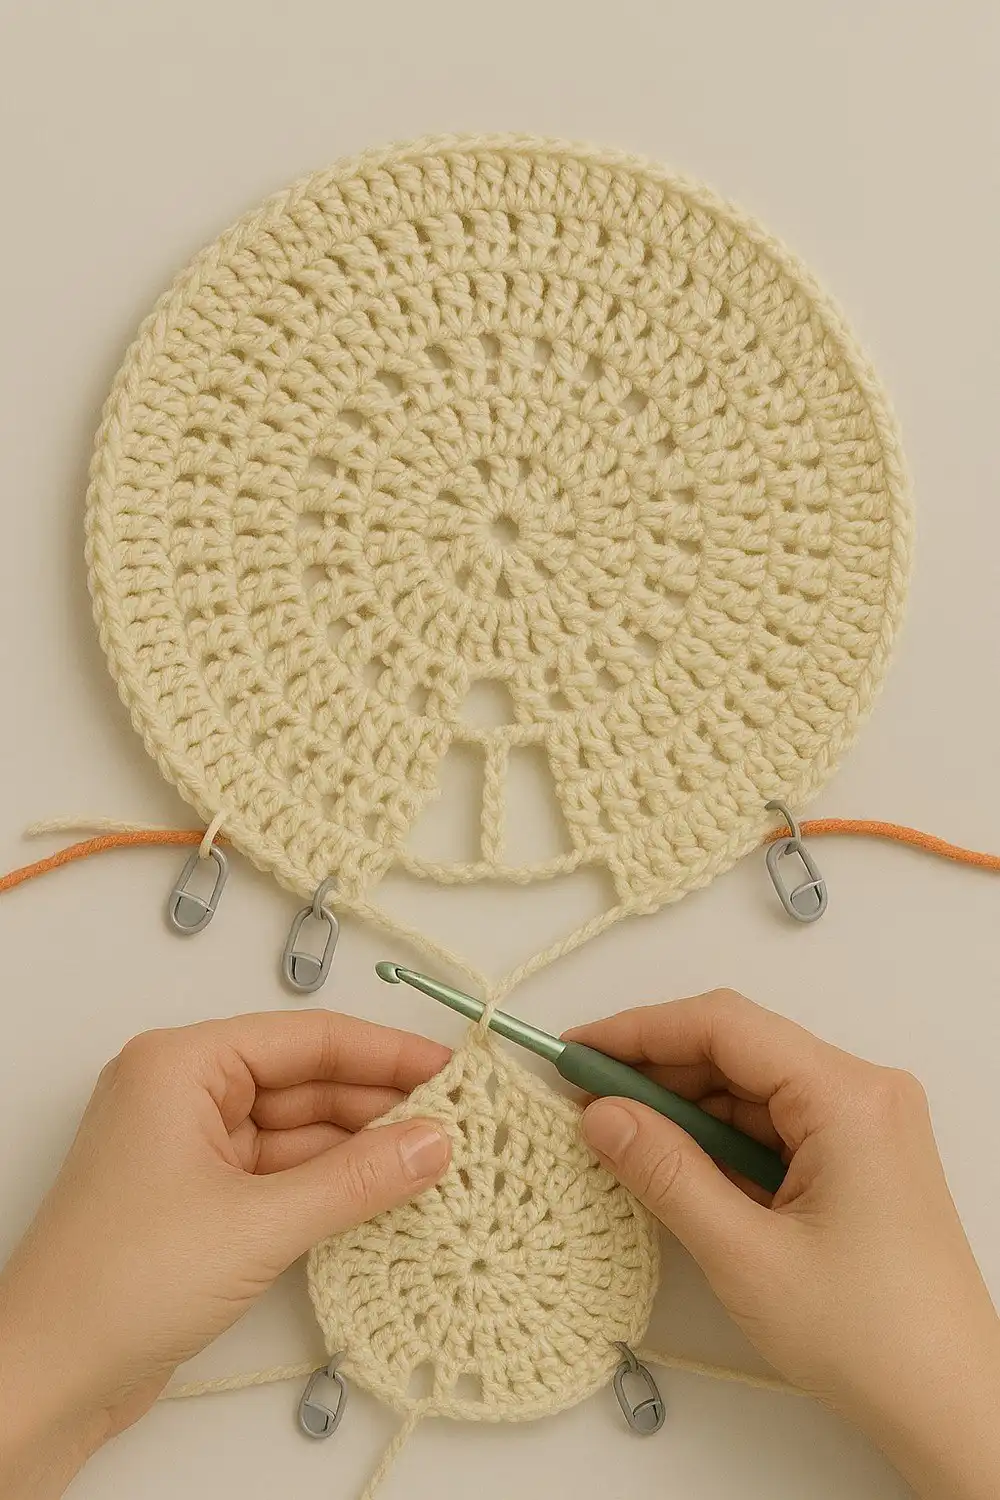
Supplies: Same as Prompt 1 + scrap yarn or stitch holders.
Work The Body
After separating the sleeves, the body of the sweater becomes a straightforward yet satisfying section. Continue working in continuous rounds of double crochet, maintaining an even hook angle to ensure uniform stitch height and a neat fabric column. This phase is about building length, creating the main torso of your garment.
Decide on your preferred fit: a straight, classic look requires simply working even, while a gently shaped waist can be achieved with subtle decrease rounds along the sides every 6-8 rounds. Remember to account for the hem ribbing by stopping 2-3 inches short of your final desired length. Periodic try-ons confirm the drape and fit over your typical outfits.
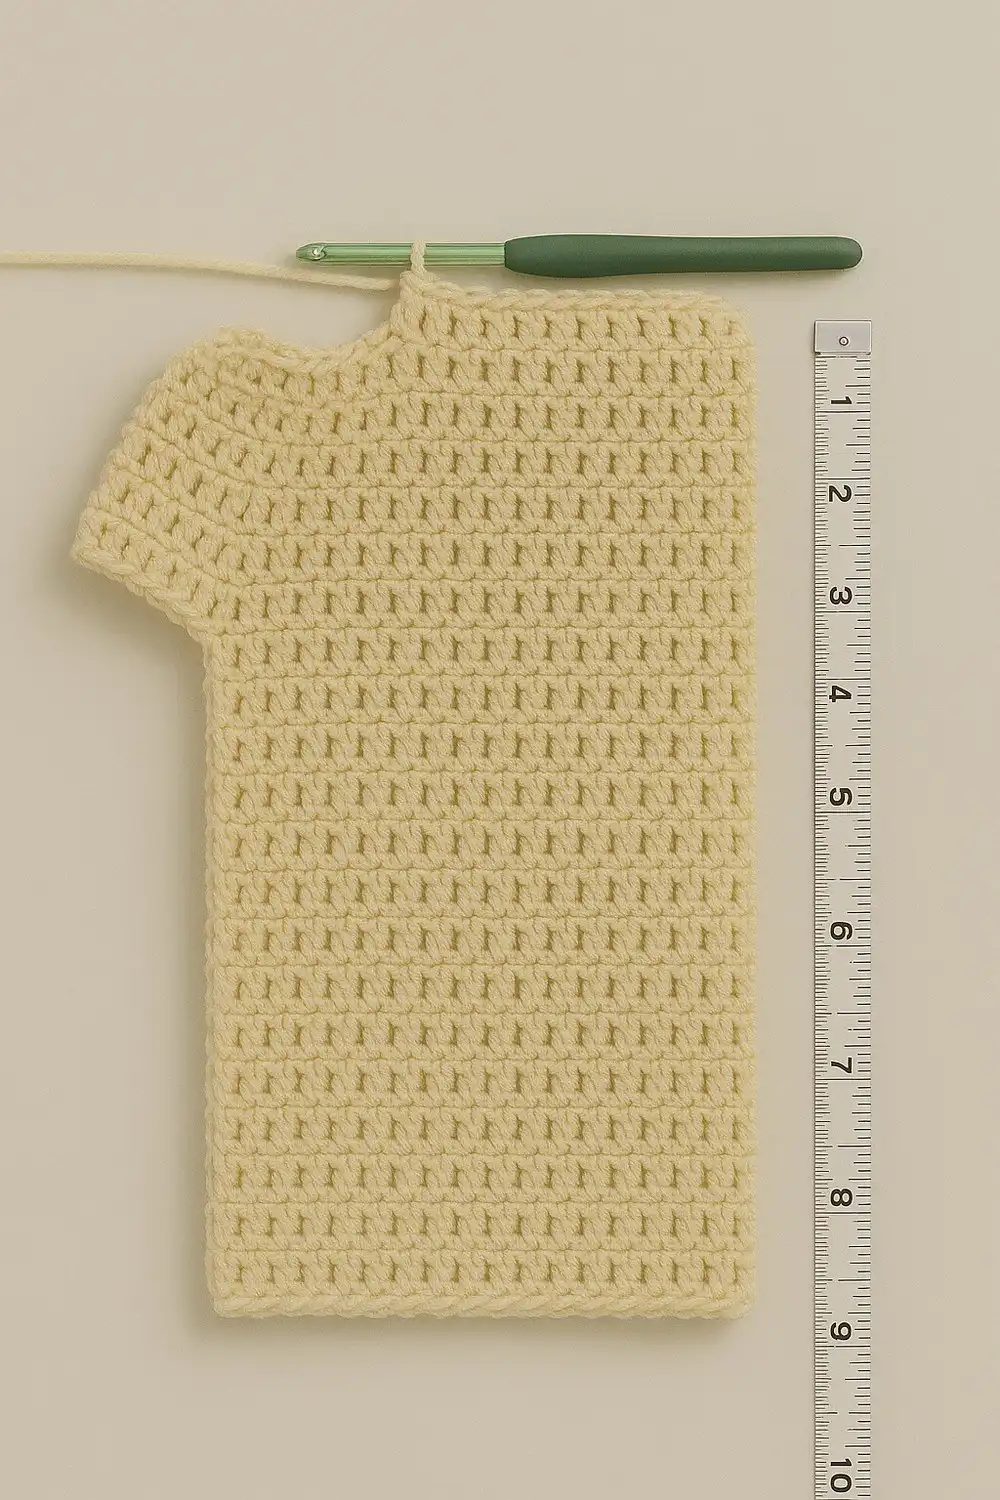
Hem Ribbing
The hem ribbing defines the bottom edge of your sweater, providing structure and a polished finish. Begin by switching to your smaller hook, which helps create a tidier, more elastic edge. A preliminary round of single crochet ensures a clean base before you embark on the ribbed pattern.
The classic rib is achieved by alternating front-post double crochet (fpdc) and back-post double crochet (bpdc). This technique creates distinct vertical columns that mimic knit ribbing, offering excellent stretch and recovery. Aim for relaxed tension to ensure the hem comfortably cinches without being constrictive. Six to ten rounds typically create a substantial, professional-looking rib.
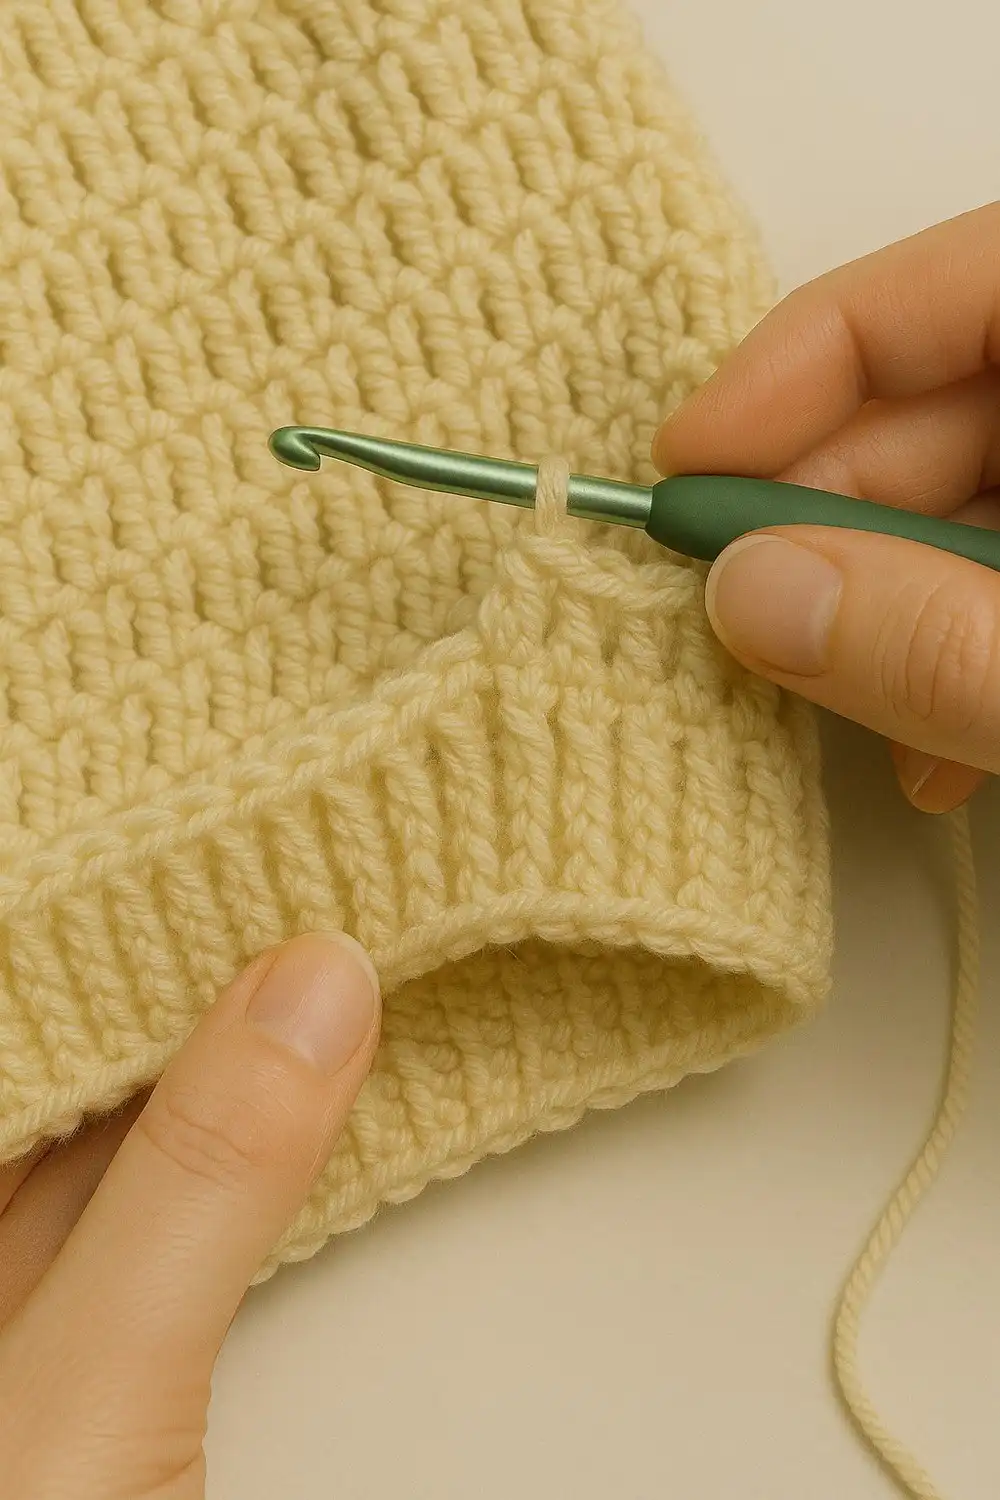
Sleeves, Cuffs & Finish
With the body and hem complete, it’s time to bring the sleeves to life. Rejoin yarn at the underarm and meticulously pick up stitches around the armhole, ensuring an even distribution for a smooth sleeve cap. Work in continuous rounds, deciding whether to maintain a straight fit or introduce subtle decreases every 6-8 rounds for a classic taper toward the wrist.
Once you reach the desired sleeve length, switch back to your smaller hook for the cuffs. Apply the same fpdc/bpdc ribbing technique used for the hem, creating a cohesive look. After both sleeves are complete, weave in all remaining ends with a sharp yarn needle, then lightly steam or wet block the entire sweater to set the stitches and shape. Your beautiful handmade layer is now ready to wear!
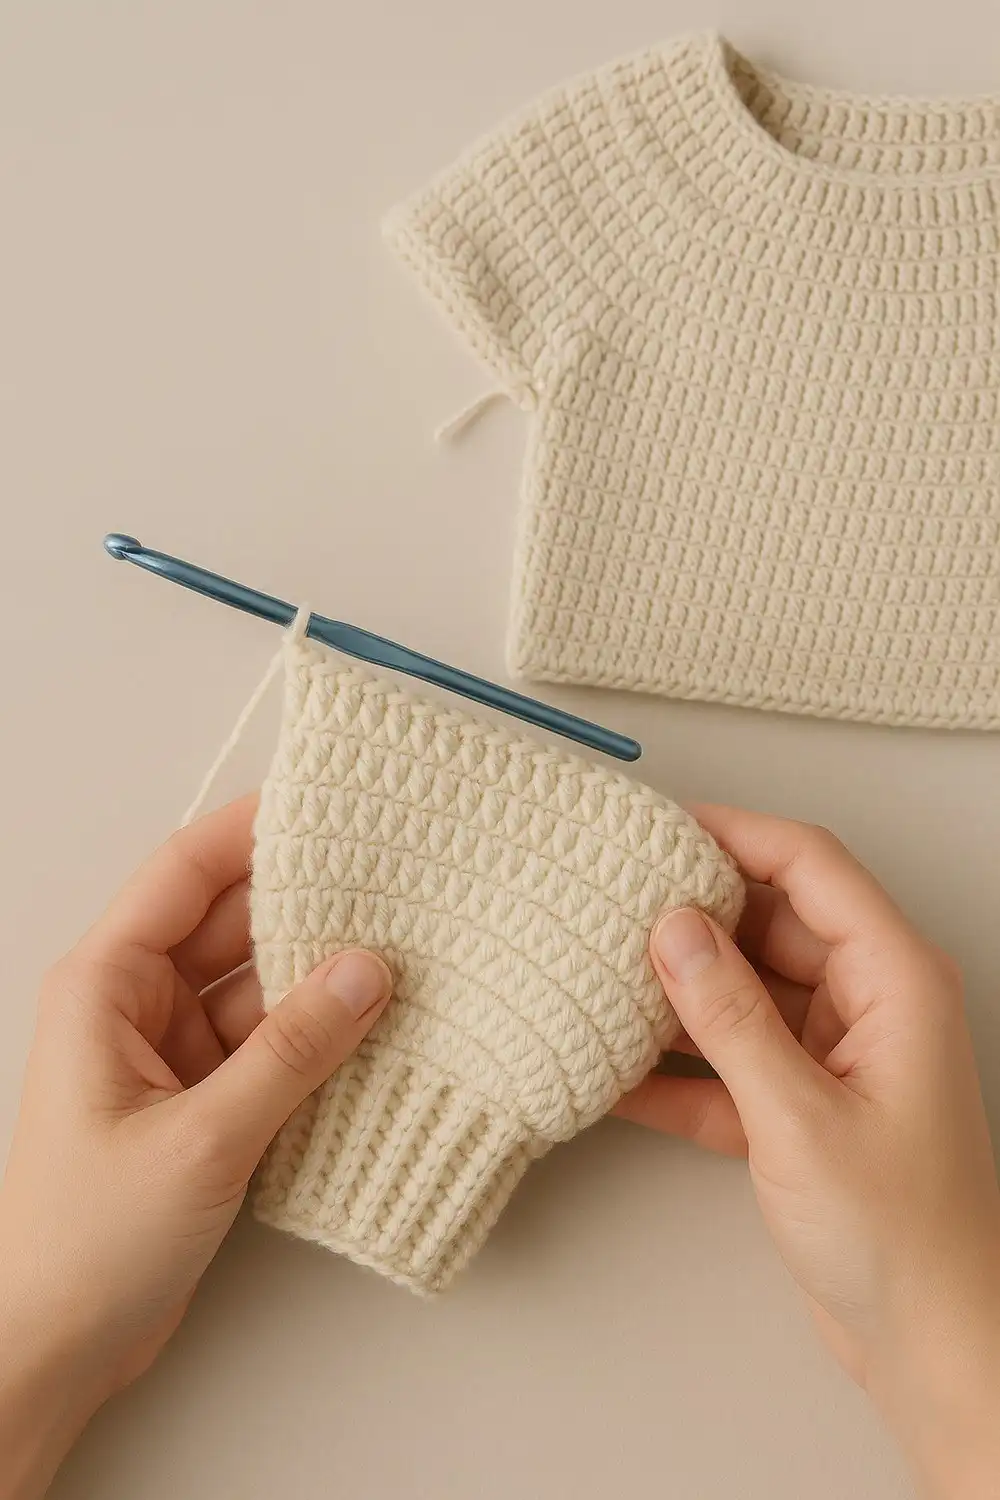
Crochet Sweater Quick and Easy
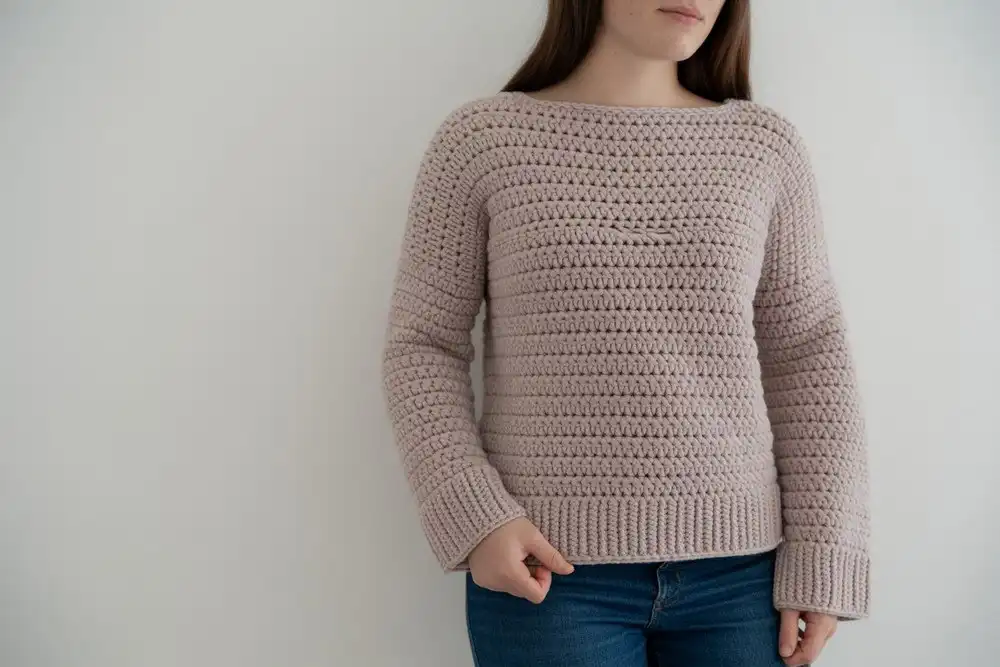
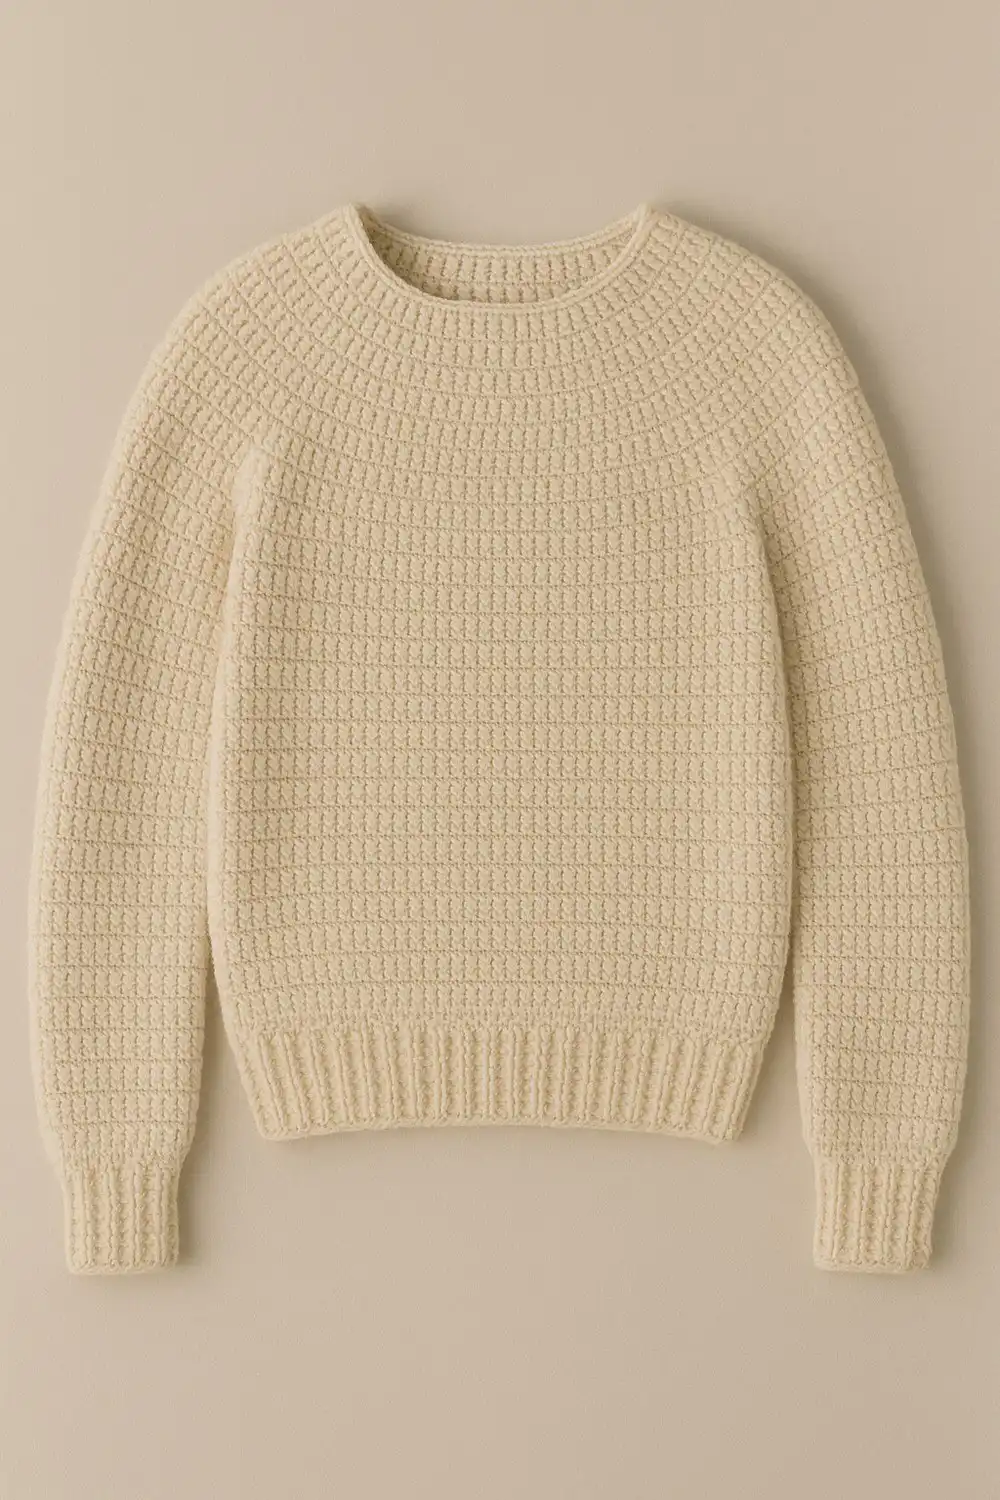
This beautifully crafted crochet sweater exemplifies the perfect blend of simplicity and elegance, making it a joy to wear. Fashioned from a soft, neutral-toned yarn, it boasts a classic round neckline that flatters any wearer, complemented by sleeves that gently taper to the wrist for a refined silhouette. The meticulous ribbing at both the cuffs and hem ensures a snug yet flexible fit, adding a touch of tailored sophistication.
The chosen stitch pattern creates a subtly textured fabric that is both timeless and contemporary, offering a comfortable drape. Presented simply, laid flat, its balanced design speaks to its versatility, making it an ideal piece for layering during transitional seasons, a thoughtful handmade gift, or a cherished staple in your personal collection. This is truly a project that rewards your efforts with lasting style.
Final Thoughts
Completing a top-down raglan sweater is a significant accomplishment that rewards your patience with clean lines and a perfectly customized fit. The key to success lies in meticulous note-taking, frequent try-ons, and allowing the fabric’s drape to guide your small adjustments, whether it’s an extra round or a subtle decrease. For more advanced learning, a comprehensive guide on crochet tips and tricks can be invaluable.
If this is your inaugural sweater project, take immense pride in celebrating each stage: from the foundational neckline and expansive yoke to the essential sleeve separation, robust body, neat ribbing, and detailed sleeves. The unparalleled comfort and personal connection you feel when wearing something handmade are truly special—soft, unique, and built to last. Don’t forget to capture a photo of your masterpiece, share your creation, and perhaps even start envisioning your next color palette!
Crochet Phone Case Free Pattern
Craft a stylish and protective home for your smartphone with this free crochet phone case pattern. Designed to be quick and satisfying, this project utilizes basic stitches to create a snug, custom-fit pouch. It’s an excellent way to use up leftover yarn and perfect for beginners looking to make a practical item.
This pattern often incorporates a simple flap and button closure to keep your device secure, making it both functional and fashionable. Experiment with different yarn colors and textures to personalize your case, transforming it into a unique accessory or a thoughtful, handmade gift. It’s a small project that yields big satisfaction.
We hope you found this Quick and Simple Crochet Sweater Pattern Free guide inspiring and helpful! Don’t forget to save this project to your Pinterest board, share it with a fellow crafter, and let us know your favorite part of making your own sweater in the comments below.


