Master the Square: A Step-by-Step Guide on How to Crochet a Solid Granny Square
Welcome to the wonderful world of crochet! In this comprehensive guide, you will master how to crochet a solid granny square, a fundamental building block for countless beautiful projects. Granny squares are incredibly popular for their versatility and ease of learning, making them perfect for beginners and seasoned crocheters alike. While the classic granny square features a mosaic-like open pattern, the solid granny square offers a denser, more cohesive fabric.
This solid version is ideal for creating sturdy items like blankets, bags, placemats, or even unique apparel. Unlike its traditional counterpart, the solid granny square provides a more uniform texture, making it a fantastic choice for projects that require less “holey” fabric. We’ll be using a beginner-friendly method, starting each round from the corner to ensure easy stitch counting and a smooth learning curve. So, gather your supplies and let’s embark on this rewarding crochet journey together!
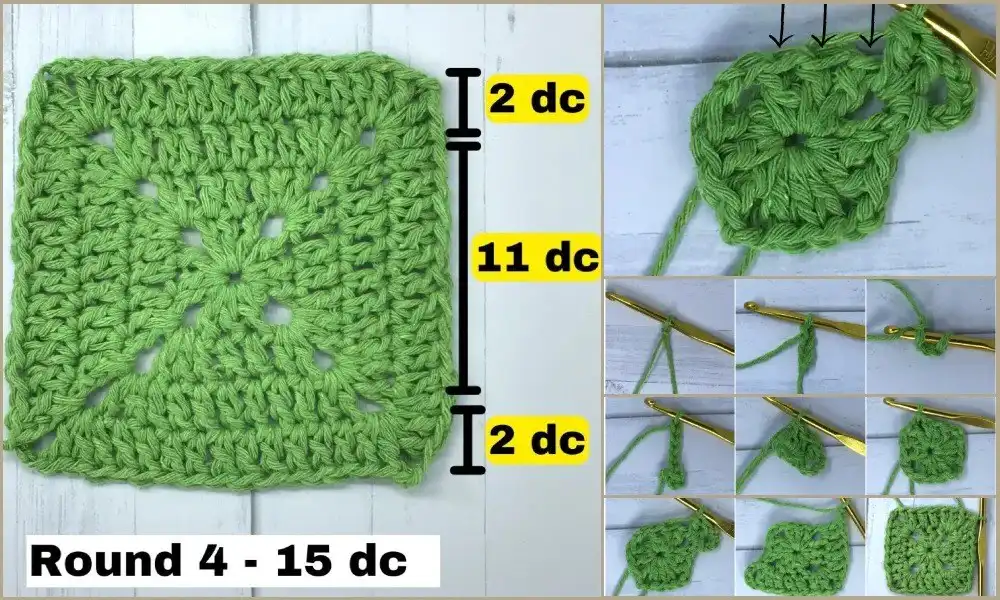
To get started on your solid granny square adventure, you’ll need just a few basic crochet essentials. The beauty of this project is its minimal material requirement, making it perfect for using up yarn scraps or trying out new color combinations. Feel free to experiment with different yarn weights and corresponding hook sizes to achieve varied textures and sizes.
Materials you will need:
- Yarn of your choice: A small ball or even yarn scraps will suffice. For beginners, a worsted weight yarn is recommended as it’s easy to handle and see stitches clearly. You might also consider this cotton yarn for a different texture.
- Crochet hook: Select a hook size that complements your chosen yarn. Always check the yarn label for recommended hook sizes. A 5mm crochet hook is often a good choice for worsted weight.
- Scissors: For cutting yarn ends, a reliable pair of scissors is essential.
- Yarn needle (tapestry needle): Essential for weaving in loose ends neatly, giving your finished square a professional look. A bent tip needle is often preferred for this task.
A step-by-step guide on How to Crochet a Solid Granny Square:
Before we dive into the creation of your solid granny square, let’s familiarize ourselves with the common crochet abbreviations we’ll be using throughout this pattern. Understanding these shorthand terms will make following the instructions much clearer and more efficient. For a deeper dive into stitches and techniques, consider a comprehensive Crochet Stitch Dictionary.
Abbreviations:
- Ch = Chain stitches
- Sl St = Slip Stitch
- Dc (s) = Double Crochet (s)
- St = Stitch
- Sts = Stitches
Foundation:
Every crochet project begins with a secure starting point, and for our solid granny square, we’ll establish a central ring. This method ensures a neat and stable center for your square, laying the groundwork for all subsequent rounds. Pay attention to maintaining an even tension for a clean finish.
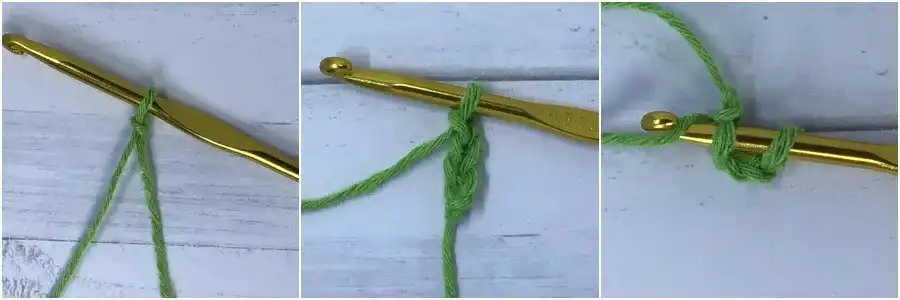
- Start with a slip knot on your crochet hook. If you’re new to this, there are many helpful tutorials available online to guide you through creating this essential first knot.
- Make a chain of 4 stitches (ch 4). This small chain will form the core of your granny square.
- Insert your hook into the 4th chain from the hook (which is the very first chain you made). Complete a sl st to join the chain into a small ring. To execute a slip stitch, insert your hook, yarn over, and pull the yarn through both the chain stitch and the loop already on your hook.
While you could also start with a magic ring for a tighter center, beginning with a chain of 4 and slip stitching to form a ring is often easier for beginners and provides a perfectly sufficient small center for this solid granny square pattern.
Round one:
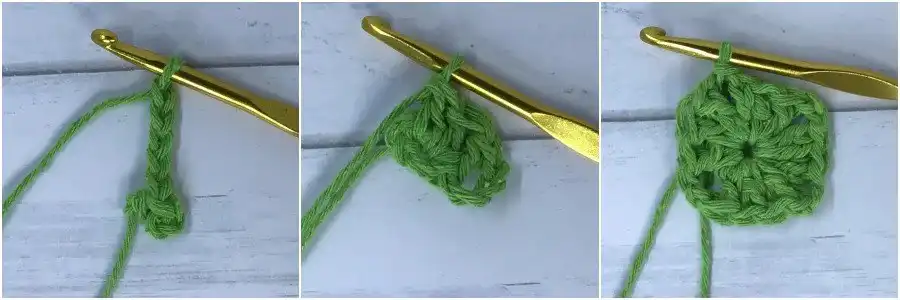
The first round establishes the initial corner structure of your square. It’s crucial to correctly place your double crochets and chain stitches to define the square’s shape right from the start. Remember to keep your stitches consistent in tension for a uniform look.
- Begin by chaining 5 stitches (Ch 5). The first 3 chains will count as your first double crochet (dc), and the remaining 2 chains will form the first corner space.
- Now, you’ll create the first side and corner. Work (Make 3 dc into the center ring of ch4. Ch 2) repeat 2 times. Ensure all these double crochets are worked directly into the center of the ring you created in the Foundation step. This repetition forms two sides and two corner spaces of your square.
- Next, make 2 dc into the center ring. To finish the round and connect to your starting chain, insert your hook into the 3rd chain of the initial ch 5. Perform a sl st to join.
- Finally, make a Sl st into the adjacent 2-chain space. This positions your hook correctly for starting the next round directly from a corner, which is a key technique for this solid granny square method.
Round two:
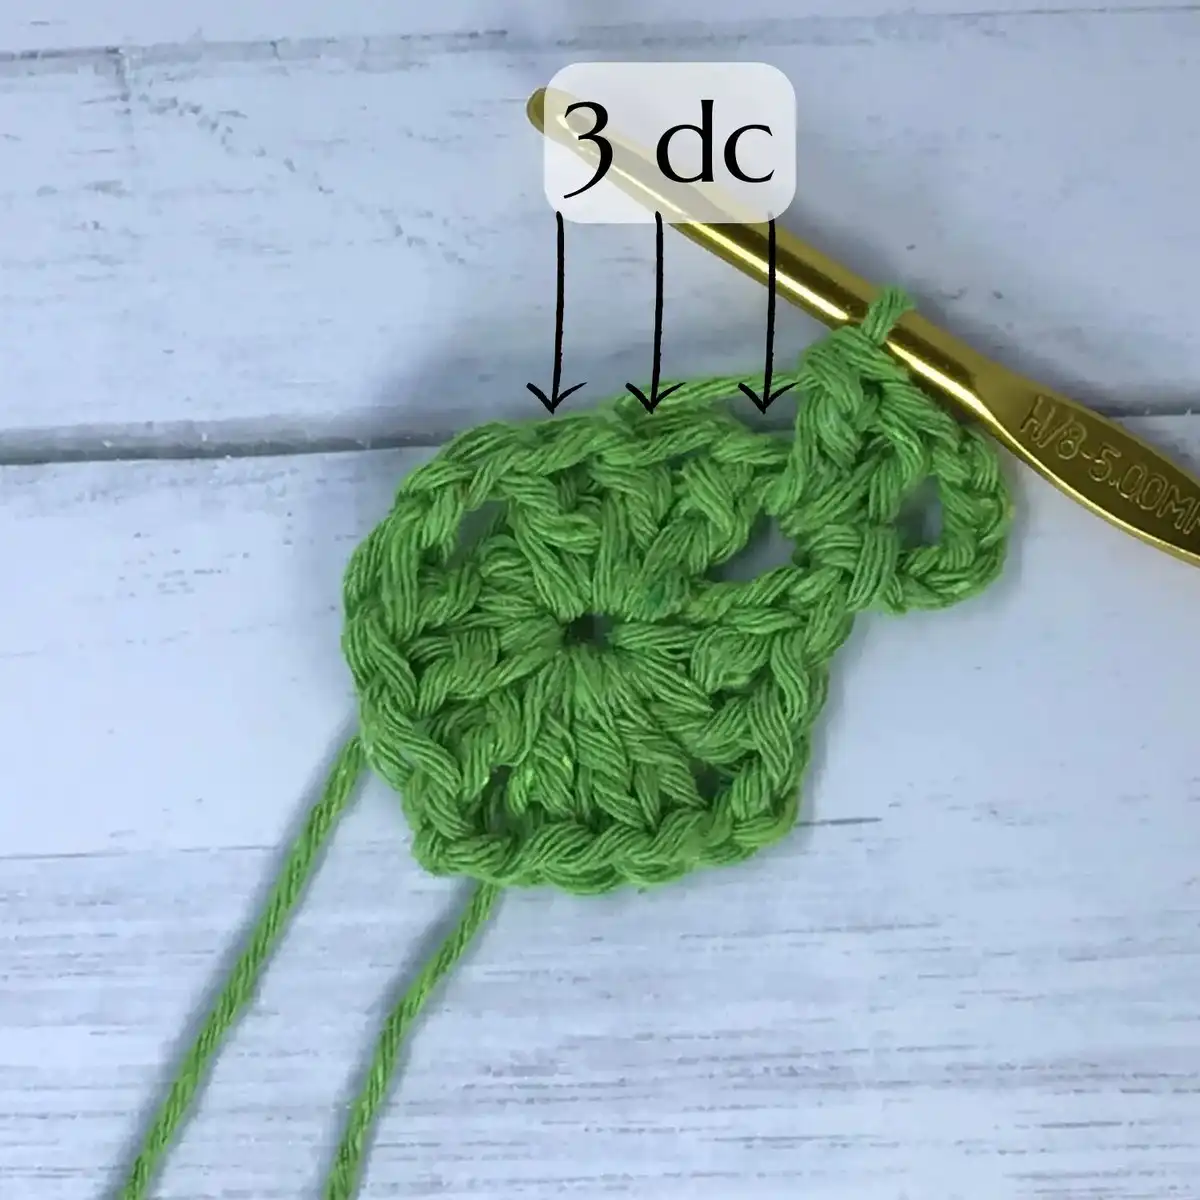
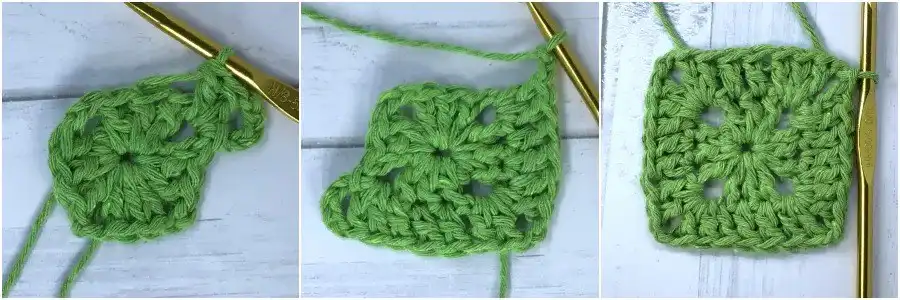
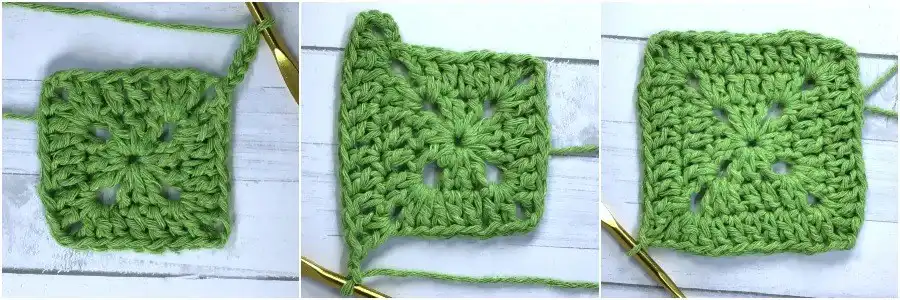
In round two, you’ll begin to build out the sides of your square, increasing the stitch count and reinforcing the corners. This round introduces working into existing stitches, not just the center ring, which is a fundamental crochet skill. Pay close attention to where each stitch is placed.
- Start this round by chaining 5 stitches (Ch 5). Again, the first 3 chains count as your first dc, and the next 2 chains create your corner space.
- Now, you’ll work along the first side and into the next corner. Follow this sequence: (2 dc into the ch-2 space of round 1. Then, make 3 dc into each of the following dc stitches from round 1. Next, work 2 dc into the subsequent 2-ch space of round 1. Ch 2) repeat this entire sequence twice. This builds up two sides and creates two new corner spaces.
- For the final side, work 2 dc into the next ch-2 space, followed by 3 dc into the following dc(s) of round 1. Finish this side with 1 dc into the next 2-ch space. Then, join the round by making a Sl st into the 3rd chain of your starting ch 5.
- To prepare for the next round, make a Sl st into the next ch-2 space. This maneuver is crucial for ensuring that each new round begins neatly from a corner. If you find the first double crochet stitch a bit hidden after making corner stitches, gently manipulate the fabric to locate the correct chain for insertion.
Round three:
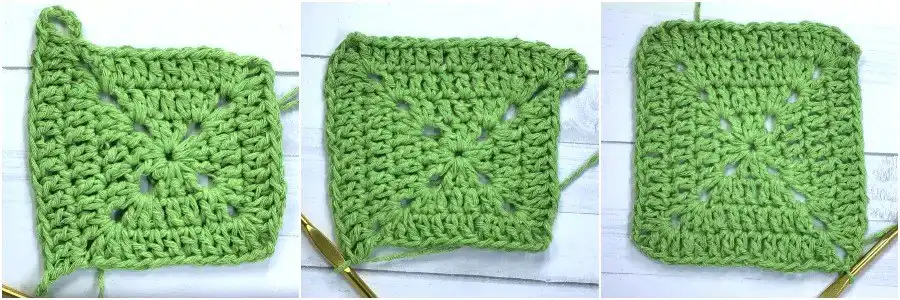
Each subsequent round will expand your solid granny square, adding more double crochets along the sides and maintaining the distinct 2-chain corner spaces. Round three continues this pattern, ensuring your square grows evenly. The stitch count will increase, so keeping track is essential.
- Initiate round three with a chain of 5 stitches (Ch 5), counting as your first dc and corner space.
- Proceed with building the sides and corners: (Work 2 dc into the current ch-2 space from round 1. Then, make 7 dc into each of the following dc stitches from the previous round. Next, work 2 dc into the subsequent ch-2 space, followed by Ch 2) repeat this sequence twice. This structure forms two additional sides of your growing square.
- To complete the final side, crochet 2 dc into the next ch-2 space, then make 7 dc into the dc stitches from round 1. Finish this side with 1 dc into the last 2-ch space. Secure the round by making a Sl st into the 3rd chain of your initial ch 5.
- Once again, prepare for the next round by making a Sl st into the next ch-2 space, positioning your hook perfectly for the start of round four.
Round four:
You’re now on round four, and your solid granny square is really taking shape! This round follows the same logical progression as the previous ones, adding more stitches to the sides. Consistency in your stitch count and tension will result in a beautifully proportioned square, perfect for any project from a cozy spring blanket to a stylish tote bag.
- Start round four with a chain of 5 stitches (Ch 5), serving as your first double crochet and the corner space.
- Continue expanding your square: (Work 2 dc into the current ch-2 space from round 1. Then, make 11 dc into each of the following dc stitches from the previous round. Next, work 2 dc into the subsequent ch-2 space, followed by Ch 2) repeat this sequence twice. This method ensures symmetrical growth on all sides.
- To complete the last side, crochet 2 dc into the next ch-2 space, then make 11 dc into the dc stitches from round 1. Finish this side with 1 dc into the last 2-ch space. Join the round securely with a Sl st into the 3rd chain of your starting ch 5.
- Finally, make a Sl st into the next ch-2 space to prepare for any additional rounds you might wish to add or to finish off your work.
Finish off:
Once you’ve achieved your desired size, it’s time to secure your work and make it look neat and professional. Finishing off correctly prevents your stitches from unraveling and prepares your solid granny square for joining with others or becoming a standalone piece.
To finish off your solid granny square, simply yarn over your hook and pull the yarn through the loop on your hook (this creates a slip knot to secure the last stitch). Cut the yarn tail, leaving about a 4-6 inch tail. Gently pull the hook out of the loop, pulling the yarn tail completely through to tighten the knot. Use your yarn needle to weave in all loose ends securely through the stitches of your square. This step is crucial for durability and a polished appearance.
Summary:
Congratulations! You have successfully crocheted your very first solid granny square. This pattern is designed to be straightforward and easy to follow, making it accessible even for beginners. The core principle to remember for expanding your square is the consistent increase in double crochet stitches per side.
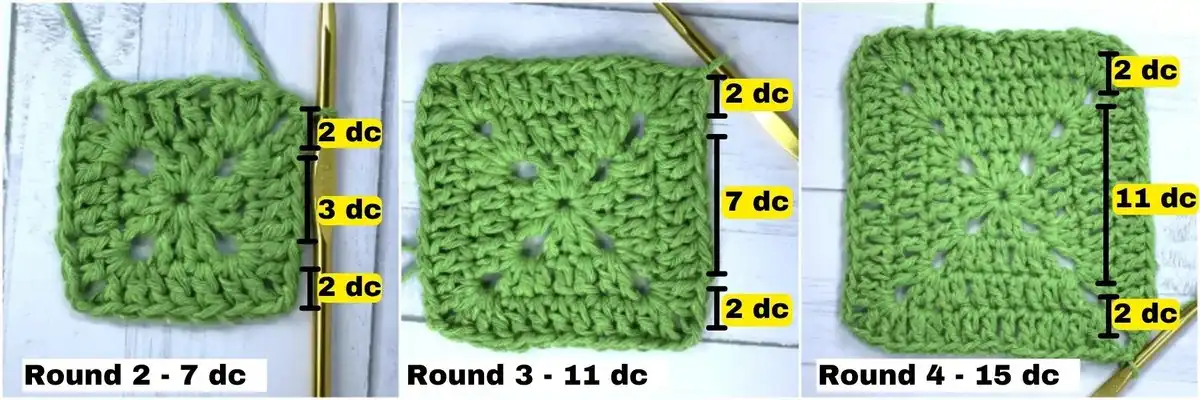
As you may have noticed, each round progressively increases by 4 double crochet stitches on each side. For example, Round 1 had 3 dc per side, Round 2 had 7 dc, Round 3 had 11 dc, and Round 4 had 15 dc. If you wish to make your solid granny square larger, simply continue adding rounds, increasing the double crochet count on each side by 4 stitches per round, always starting and ending in the corners as instructed. These squares are perfect for projects like crochet tops or even a simple coaster!
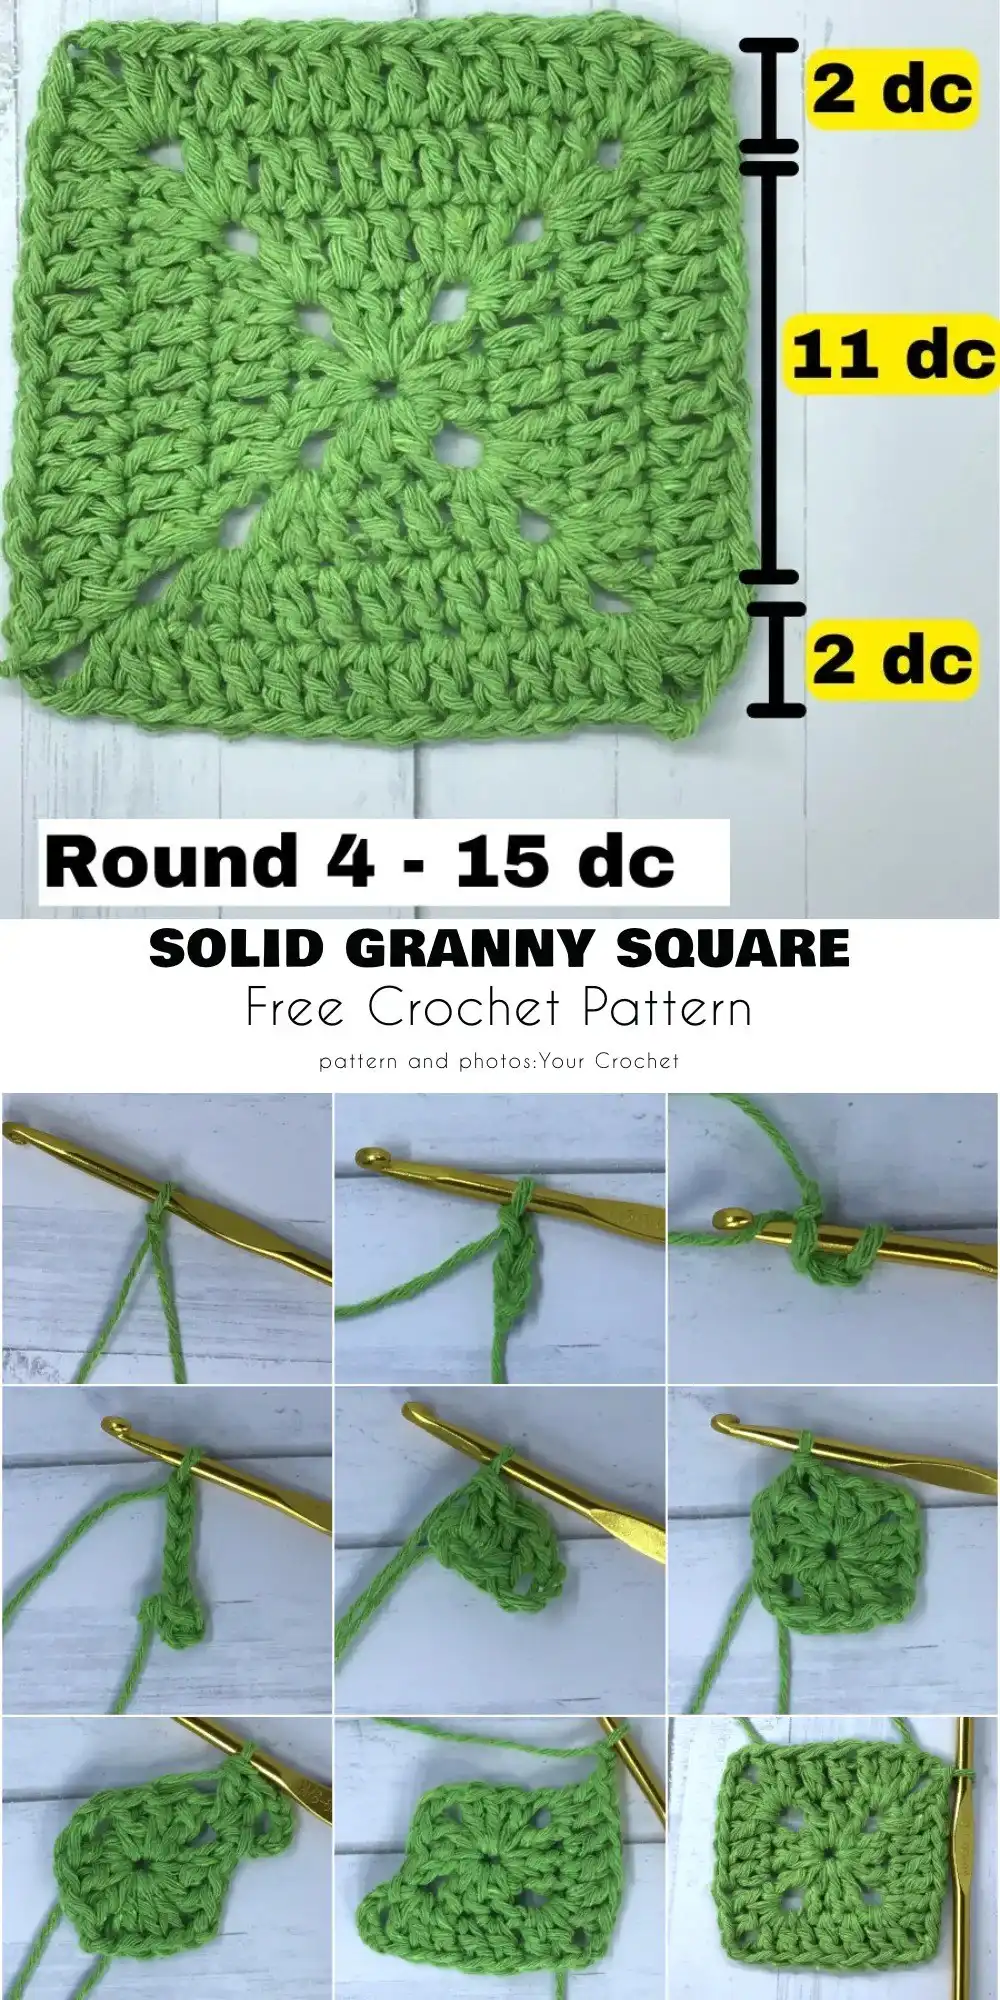
Pin this pattern for later:
We hope you enjoyed this step-by-step guide on how to crochet a solid granny square! Don’t forget to save this pin to your Pinterest board for future reference, share this tutorial with fellow craft enthusiasts, and tell us about your creations in the comments below!


