This post contains affiliate links. As an Amazon Associate, we earn from qualifying purchases, which helps support our blog at no extra cost to you.
Crochet Baby Jellyfish Amigurumi with Curly Tentacles and Ruffle Details
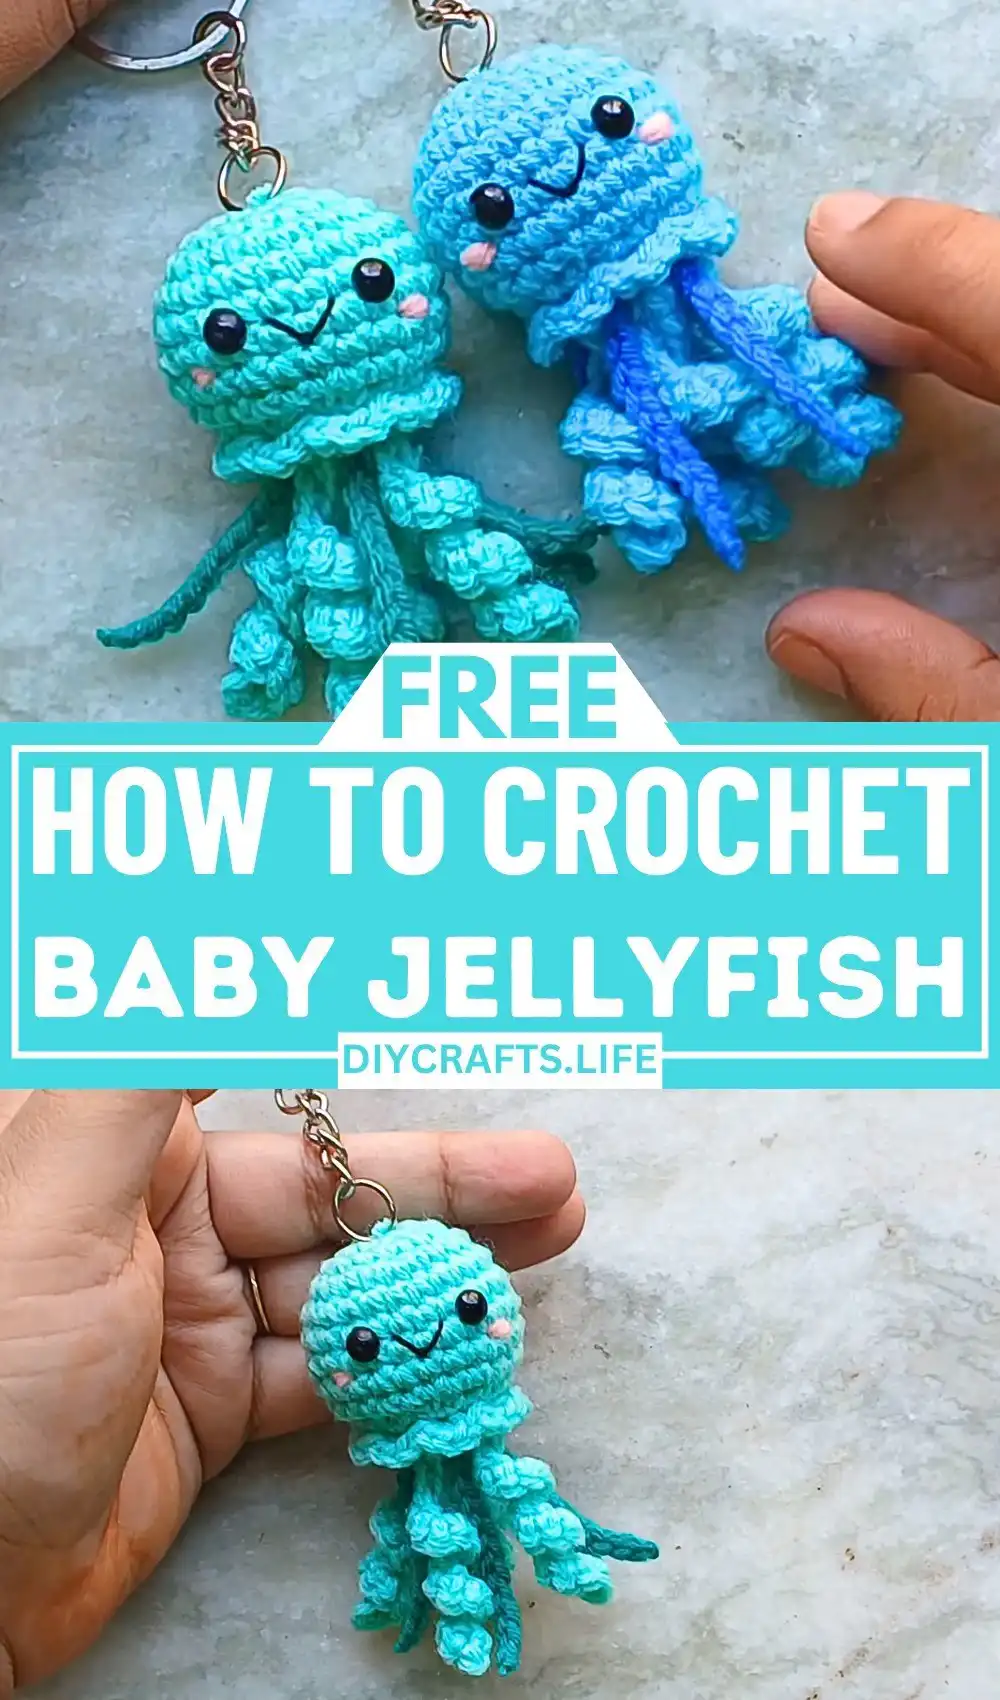
Dive into the enchanting world of amigurumi with this guide on how to crochet a delightful Crochet Baby Jellyfish Amigurumi with Curly Tentacles and Ruffle Details. This beginner-friendly, no-sew pattern is perfect for adding a touch of whimsy to your craft collection. You’ll create a charming, compact piece featuring adorable curly tentacles, an elegant ruffle head border, and expressive embroidered facial features.
Ideal for personalizing keychains, decorating shelves, or crafting thoughtful handmade gifts, this project is not only fun but also a fantastic way to enhance your crochet skills. Get ready to bring this unique undersea creature to life with clear, step-by-step instructions that ensure a beautiful, finished product every time.
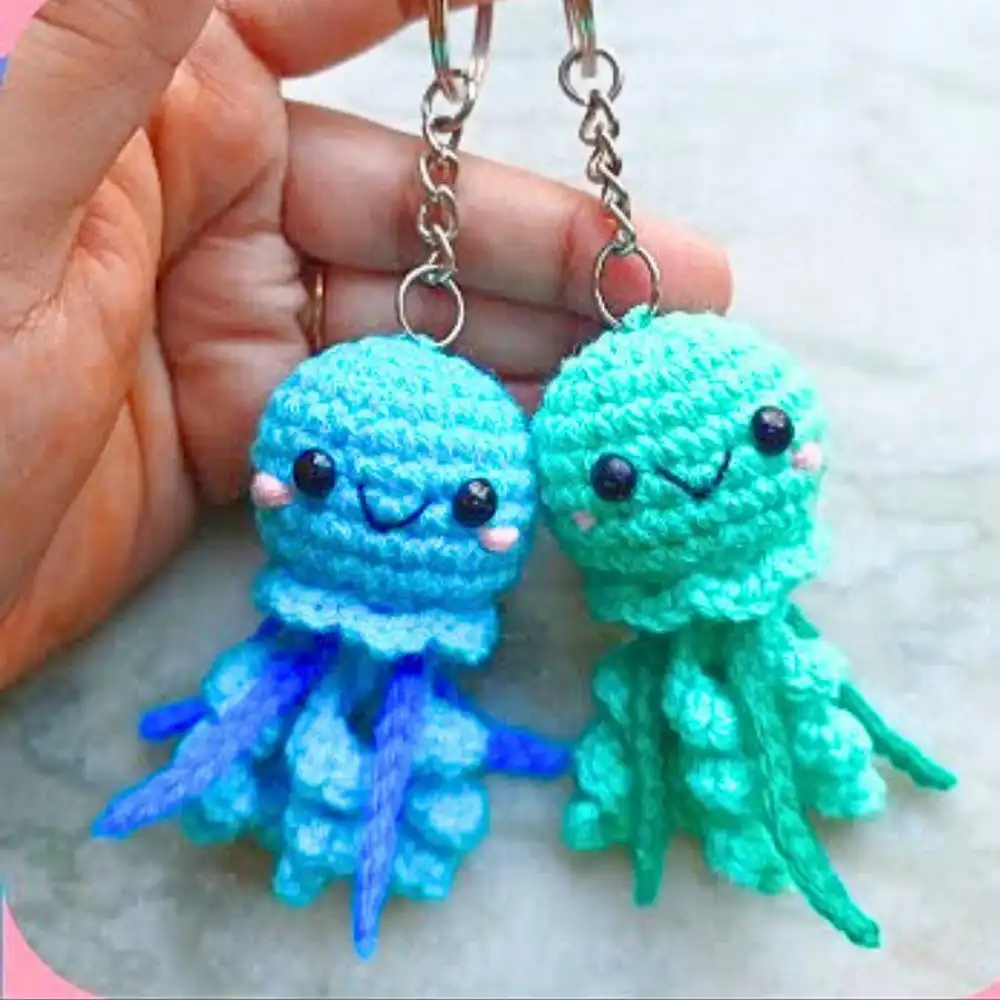
This particular Crochet Baby Jellyfish Amigurumi design truly stands out due to its tightly stitched, durable construction and incredibly whimsical curly tentacles that bring it to life. Its perfectly compact size makes it an excellent candidate for a personalized keychain, a charming shelf decoration, or even a playful, safe toy for little ones. The subtle blush accents and intricate ruffle detail around the head transform this handmade item into an eye-catching piece that is both versatile and universally appealing, making it a joy to craft and to share.
Crochet Baby Jellyfish Amigurumi
Embark on a delightful crafting journey with this beginner-friendly tutorial for a charming crochet baby jellyfish amigurumi. You’ll master essential crochet techniques such as the magic circle for a seamless start, invisible decreases for a polished finish, and creative chain stitches to form those captivating curly tentacles. Each step is accompanied by clear, concise instructions to guide you effortlessly through the process. From precisely placing safety eyes to embroidering a sweet smile and crafting those signature curly patterns, you’ll discover immense joy and satisfaction in creating this unique and charming oceanic friend. Explore other fun creations like Amigurumi Bee Free Crochet Patterns to further your amigurumi journey.
Materials and Preparation:
To successfully create this adorable baby jellyfish amigurumi, gathering the correct materials is your first crucial step. The quality and type of yarn, along with the right tools, will significantly impact the final look and feel of your project. Here’s a detailed breakdown of everything you’ll need to ensure your jellyfish comes out perfectly:
Materials:
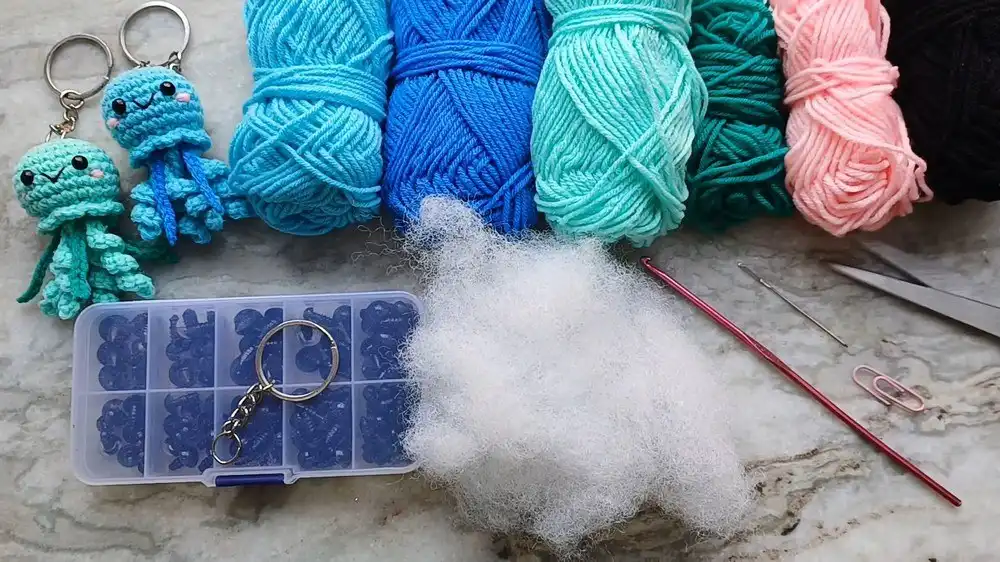
For the main body, select a light and dark version of the same color 4-ply yarn; this combination adds depth and visual interest to your jellyfish’s bell. A soft pink yarn is essential for those charming blush embellishments, bringing a touch of sweetness to its face. Black yarn will be used for delicately embroidering the facial features, giving your jellyfish personality. Optionally, a dark green yarn can be introduced for straight tentacles, offering a delightful contrast and variety in texture.
Tools:
A 3 mm crochet hook is recommended; using a slightly smaller hook size than what your yarn typically suggests is a pro tip for creating tight stitches. This tightness is crucial for amigurumi to ensure the stuffing doesn’t show through and maintains a firm shape. You will also need a yarn needle for weaving in ends and assembling parts, a stitch marker (a paper clip or contrasting scrap yarn works perfectly) to keep track of your continuous rounds, and a sharp pair of scissors for cutting yarn.
Extras:
To give your jellyfish expressive eyes, you’ll need 4 mm safety eyes; these provide a secure, child-safe feature. High-quality stuffing is required for the jellyfish body to give it a plump, huggable form. If you plan to transform your jellyfish into a portable accessory, keychain components such as a jump ring and a swivel clasp are optional but highly recommended.
Abbreviations and Notes:
Understanding the standard crochet abbreviations and following specific notes will make this pattern smooth and enjoyable. These conventions are designed to simplify the instructions and ensure consistency in your stitches, leading to a beautifully crafted amigurumi.
Abbreviations:
Familiarize yourself with these common crochet terms: SC (Single Crochet) is the foundational stitch for amigurumi, creating dense fabric. Inc (Increase) means working two single crochets into the same stitch, used for expanding the shape. Dec (Decrease) involves combining two stitches into one, essential for shaping and reducing circumference. Invisible Dec (Invisible Decrease) is a specialized decrease worked through the front loops only, resulting in a neater, less visible reduction. Sl St (Slip Stitch) is used for joining or finishing. Ch (Chain) forms the base loops for your work and is crucial for creating tentacles.
Notes and Tips:
This pattern is primarily worked in continuous rounds; this means you will not join rounds with a slip stitch, which helps to avoid a visible seam. Always use a stitch marker to accurately track the last stitch of each round, preventing miscounts. Achieving tight stitches is paramount in amigurumi; this prevents the stuffing from showing through and ensures a durable, firm structure for your jellyfish. Employing invisible decreases throughout the pattern will help maintain a neat and polished appearance, making your finished project look professionally made. Finally, if you’re new to embroidery, practicing the smile and blush details on scrap fabric beforehand can build confidence and ensure a perfect finish on your jellyfish.
Gauge, Approximate Size, and Pattern Notes:
While precise gauge isn’t critical for this specific amigurumi project, maintaining consistently tight stitches is the most important factor for success. This ensures your jellyfish holds its shape well and the stuffing remains neatly contained. Upon completion, the jellyfish body will measure approximately 2–3 inches, making it an ideal size for a charming keychain accessory, a small gift, or a delightful decorative piece on a desk or shelf.
No gauge swatch is generally required for this pattern, allowing you to jump straight into the fun part of crocheting. Special techniques you will master include forming a magic circle to create a seamless, tight foundation for the body, utilizing invisible decreases for smooth shaping, and the unique method of crocheting the curly tentacles that give this jellyfish its signature playful look. These techniques are explained in detail, making them accessible even for advanced beginners.
Step-by-Step Pattern:
Follow these detailed steps to construct your adorable baby jellyfish, starting from the very foundation to its delightful finishing touches. Each section builds upon the last, guiding you through the creation of its distinctive shape and features.
Foundation/Base:
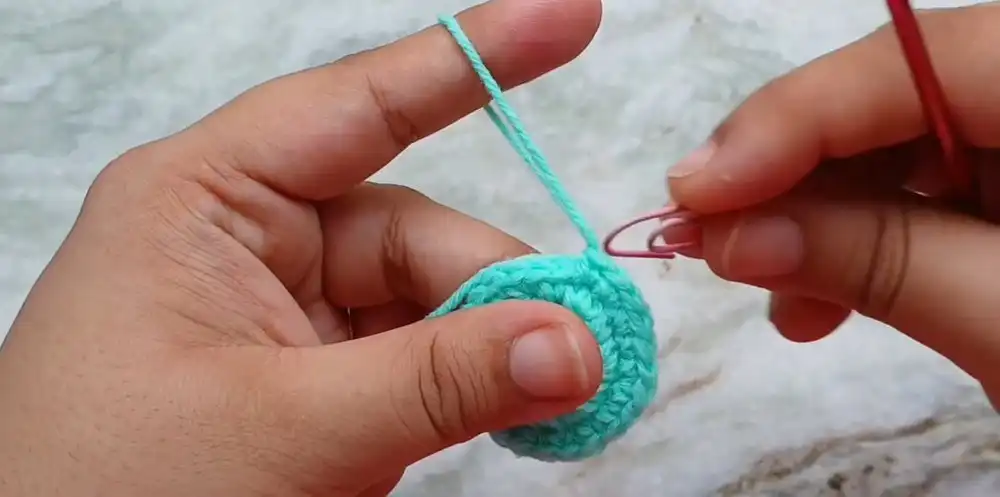
- Magic Circle: To begin, wrap your yarn around your finger to form a loop. Insert your crochet hook under this loop, draw up a loop of yarn, chain 1, and then proceed to work your stitches into this magic circle. This creates a tight, adjustable center. For a visual guide, consider watching a Master Crochet Magic Ring in 5 Minutes tutorial.
- Round 1: Work 6 single crochet stitches into the magic circle. Gently pull the yarn tail to cinch the circle tightly closed, eliminating any hole. (6 stitches) Remember to mark the last stitch of this round with your stitch marker.
- Round 2: Increase in every stitch around by working two single crochets into each stitch. (12 stitches) This begins to widen the base of your jellyfish.
- Round 3: Work 1 single crochet in the next stitch, then increase in the following stitch. Repeat this sequence all the way around the round. (18 stitches)
- Round 4: Start this round with 1 single crochet, then an increase. To create a smoother, less angular shape, stagger your increases: work 2 single crochets, then an increase. Repeat this sequence 5 times across the round. (24 stitches)
- Round 5 – Round 9: Work 1 single crochet into each stitch around for these five rounds. This maintains a constant stitch count of 24 stitches, creating the height and initial body shape of your jellyfish. (24 stitches)
Adding Features:
Once the base is established, it’s time to bring your jellyfish to life by adding its eyes and initial stuffing. Careful placement here ensures a charming and well-proportioned finished look.
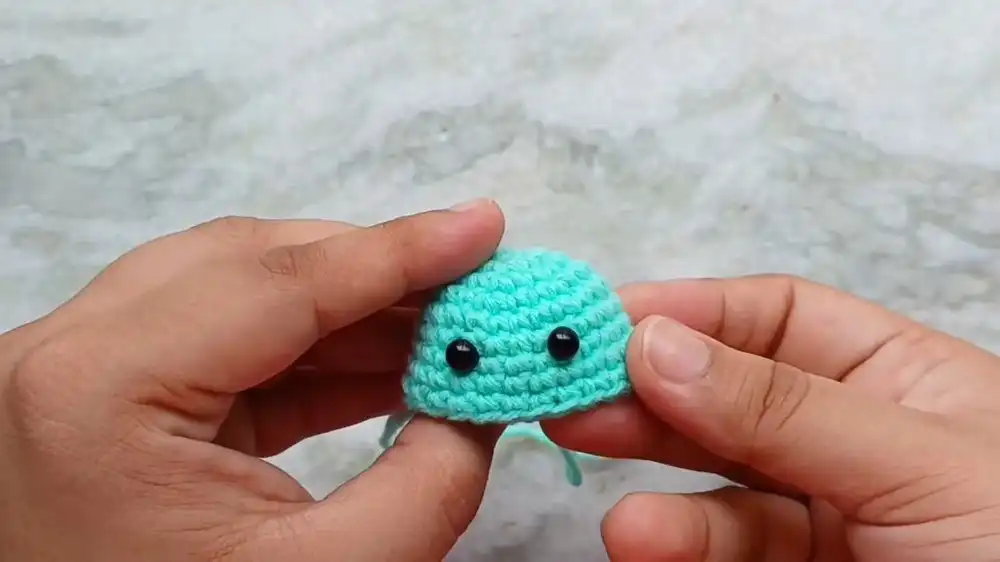
- Insert Safety Eyes: After completing Round 9, count down six rounds from the very top of your work. Carefully place the safety eyes between Rounds 6 and 7, ensuring there are three visible stitches between the two eyes. Once positioned correctly, attach the safety eye backings firmly to secure them in place.
- Stuffing: Begin to lightly stuff the body of the jellyfish with your chosen stuffing material. It’s important to avoid over-stuffing, as this can distort the shape and make the stitches stretch, potentially allowing the stuffing to show through. Aim for a soft yet firm consistency that holds the jellyfish’s intended form.
Shaping with Decreases:
Now, we will begin to shape the bottom of the jellyfish’s bell, giving it its characteristic rounded form. These rounds utilize decreases to narrow the opening precisely.
- Round 10: Start the decreasing process by working 1 single crochet, followed by an invisible decrease. Repeat this sequence 8 times around the entire round. (16 stitches) This begins to cinch the bottom opening.
- Round 11: Work an invisible decrease into every stitch around, specifically working through the back loops only. This technique creates a very neat and almost invisible closure for the bottom of the body. (8 stitches)
Tentacles:
The tentacles are what give the jellyfish its whimsical character. You can create curly ones, straight ones, or a combination for varied texture and charm.
- Curly Tentacles:
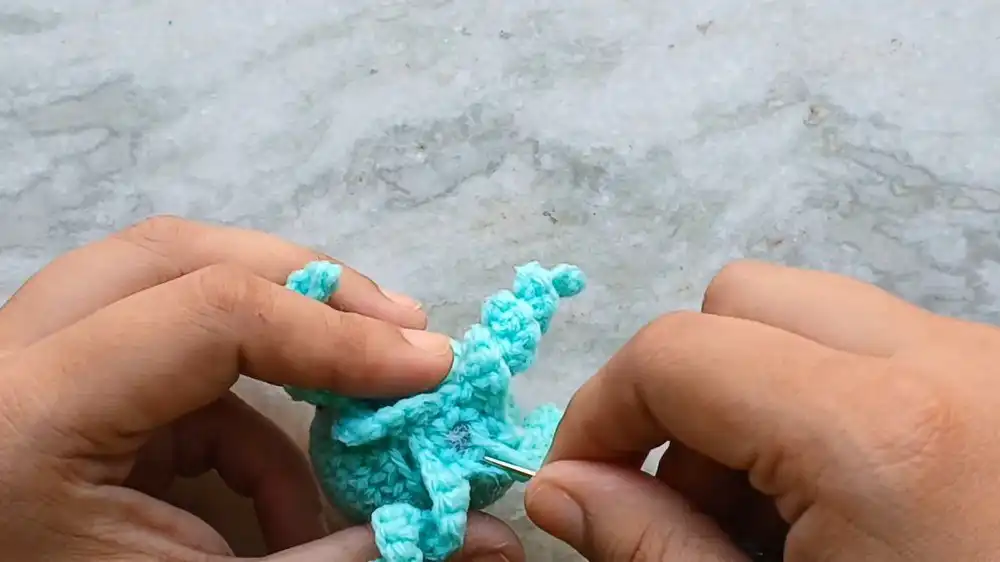
- Slip stitch into the front loop of the next stitch to secure the start of your tentacle.
- Chain 12 stitches, forming the base length for the curl.
- Skip the first chain from your hook, then work 2 single crochets into each remaining chain stitch. This double-crochet-per-chain technique is what naturally creates the tight curl.
- Slip stitch into the front loop of the following two stitches on the jellyfish body to secure the tentacle and prepare for the next.
- Repeat the steps above three more times to create a total of four beautiful curly tentacles, evenly spaced around the base.
- Straight Tentacles (optional):
- If adding straight tentacles, switch to your dark green yarn. Slip stitch into a slip stitch located between two existing curly tentacles.
- Chain 12 stitches to create a straight length, then fasten off, leaving a tight knot at the end of the chain to prevent unraveling.
- Repeat this process until you have four straight tentacles, ensuring they are evenly spaced to alternate between the curly ones for a balanced look.
Embellishments:
These final details add personality and refined charm to your jellyfish, making it truly unique. The ruffle and embroidered face bring it to life.
- Ruffle Border: To create the delightful ruffle, locate the front loops of Round 10 (the round before your final decreases). In the first available front loop, slip stitch to attach your main head yarn. Then, work 3 single crochets into the very next front loop, followed by a slip stitch in the subsequent front loop. Repeat this “SC 3, Sl St” sequence all the way around the entire round to form a delicate, undulating ruffle that frames the jellyfish’s head beautifully.
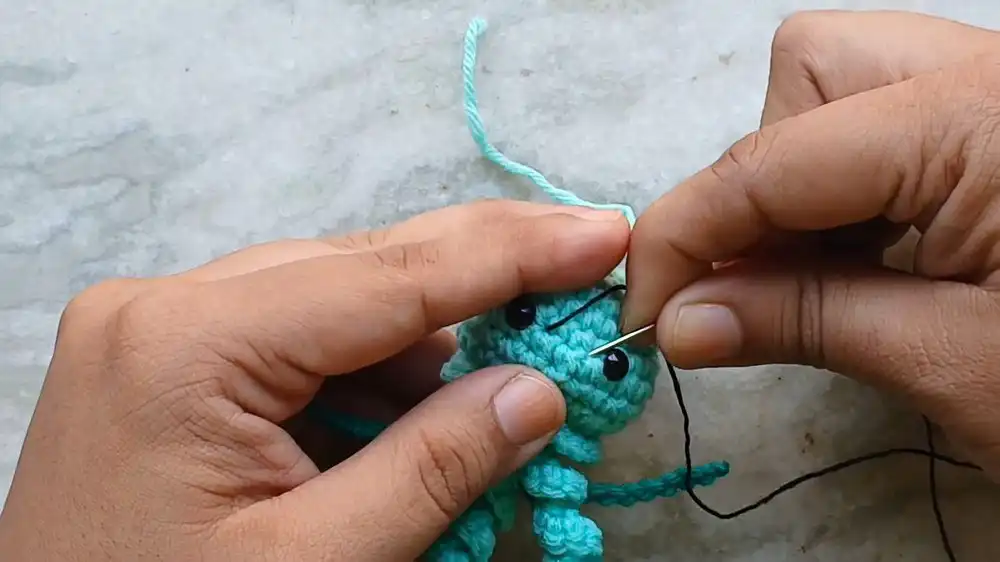
- Facial Embroidery: Using your black yarn, carefully embroider a simple smile directly between the safety eyes. Make it span approximately two stitches wide. To give the smile a lovely curve, gently tack down the center of the stitch with a tiny stitch. Next, take your pink yarn and add a small, subtle blush just below each eye using a few small, horizontal stitches. This adds a touch of sweetness and character to your jellyfish’s expression.
Keychain Assembly:
If you’re turning your jellyfish into a keychain, this final step ensures it’s securely attached and ready for everyday use.
- Using the remaining yarn tail from when you closed the top of the jellyfish’s head, carefully sew on the keychain ring. Loop the yarn through the jump ring of the keychain multiple times, ensuring it’s very securely fastened to the top of the jellyfish’s head.
- Once the keychain is firmly attached, tie a strong knot with the yarn tail. Then, using your yarn needle, carefully hide any excess yarn inside the body of the jellyfish, ensuring a clean and professional finish.
Finishing Touches:
A few final adjustments ensure your baby jellyfish is perfectly presented and ready to be admired or gifted. These steps make all the difference in the finished look.
- Make sure all yarn tails from joining and finishing are meticulously secured and hidden deep inside the jellyfish body. This prevents unraveling and gives a professional, clean appearance.
- Gently adjust the tentacle curls as needed. You can gently twist them or arrange them with your fingers to give them the most defined and playful look, ensuring they cascade attractively.
- Step back and enjoy your adorable, handmade baby jellyfish! Its unique details and charming personality are sure to bring a smile.
Pattern Question
A common query when crafting this adorable creature is: “How can I ensure the tentacles curl properly during the crafting process?” The key to achieving those perfectly defined, whimsical curls lies in a specific crocheting technique. When you are creating the tentacles, make sure to work two single crochets into each chain stitch. This generous amount of stitches worked into a relatively short chain naturally causes the yarn to coil and form a tight curl. After you’ve finished crocheting them, you can gently twist the tentacles with your fingers to further enhance and set their beautiful, playful shape, giving your jellyfish its signature look.
Conclusion
The baby jellyfish amigurumi project is truly a delightful and rewarding crochet endeavor, packed with unique and charming details. From its perfectly formed bell to the whimsical curly tentacles and the delicate ruffle border, every element contributes to its special appeal. Whether you choose to transform it into a functional keychain, a decorative piece for your home, or a heartfelt handmade gift for someone special, its intricate design makes it a creation truly worth crafting. With the clear guidance provided in this tutorial, even beginners can achieve fantastic results and create a beautiful, memorable piece of art.
Video Tutorial
For those who prefer visual learning, a video tutorial can be an invaluable resource. Watching the stitches and techniques demonstrated live can clarify any ambiguities and provide extra confidence as you work through each step of the pattern. Refer to the original source for any accompanying video content that can enhance your crafting experience and help you master this adorable baby jellyfish.
More Free Crochet Patterns
If you’ve enjoyed crafting this charming jellyfish and are looking for your next crochet adventure, explore these other delightful free patterns. Expand your skills and create more beautiful items for the festive season or year-round enjoyment.
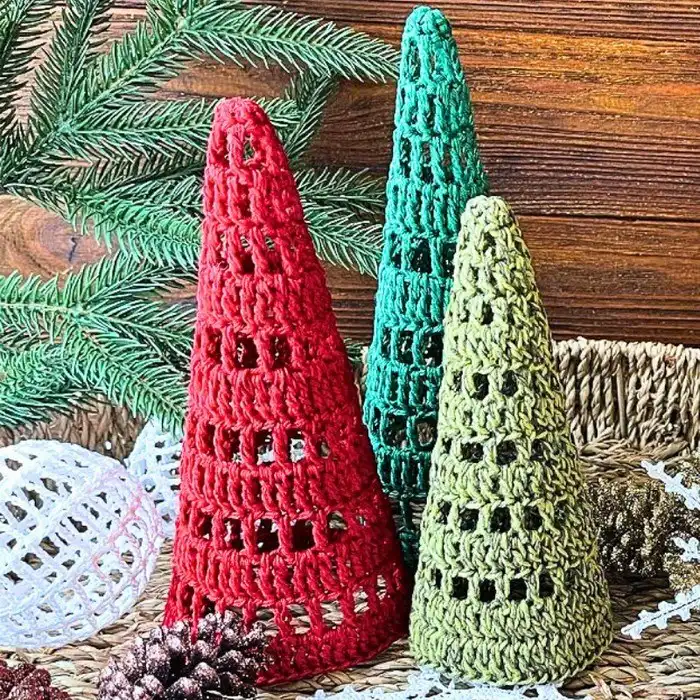
Easy Crochet Christmas Tree Pattern with Starch Stiffening
Create a beautiful, freestanding crochet Christmas tree using this easy-to-follow pattern. The unique starch stiffening technique ensures your tree maintains its elegant conical shape, making it a perfect festive decoration for mantels, shelves, or as a centerpiece. Customize with different yarn colors and small embellishments for a personalized touch that will be cherished year after year during the holidays.
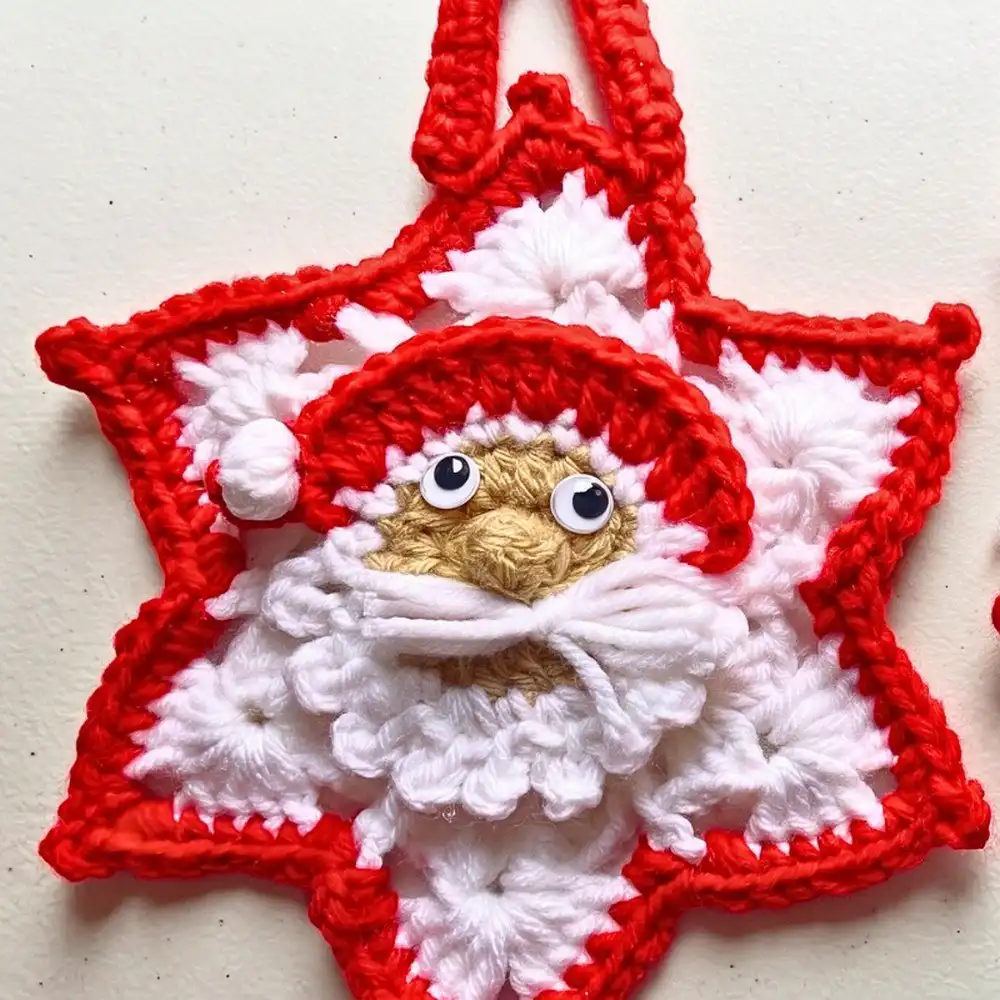
Crochet Santa Star Ornament For Festive Décor
Add a touch of holiday magic to your Christmas tree with this adorable crochet Santa star ornament. This pattern combines classic star shaping with charming Santa details like his hat and beard, making it a unique and festive addition to your decor. It’s a quick project, perfect for using up scrap yarn and creating multiple handmade gifts or charity donations.
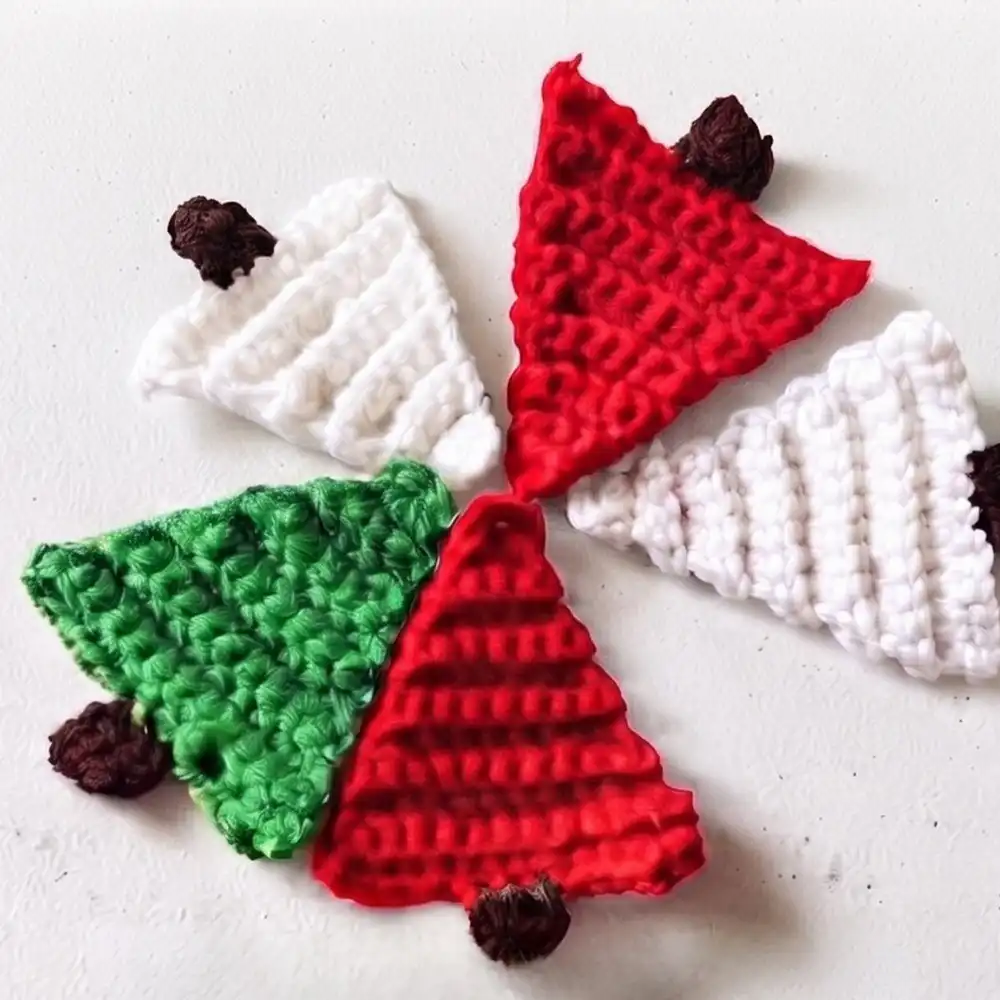
Crochet Hanging Christmas Tree Decoration Pattern Free
This free pattern offers a simple yet elegant way to craft hanging Christmas tree decorations. Ideal for beginners, these ornaments work up quickly and can be customized with various colors and sizes to match any holiday theme. Perfect for adorning your tree, garlands, or even as small festive gifts for friends and family, adding a cozy handmade feel to your celebrations.
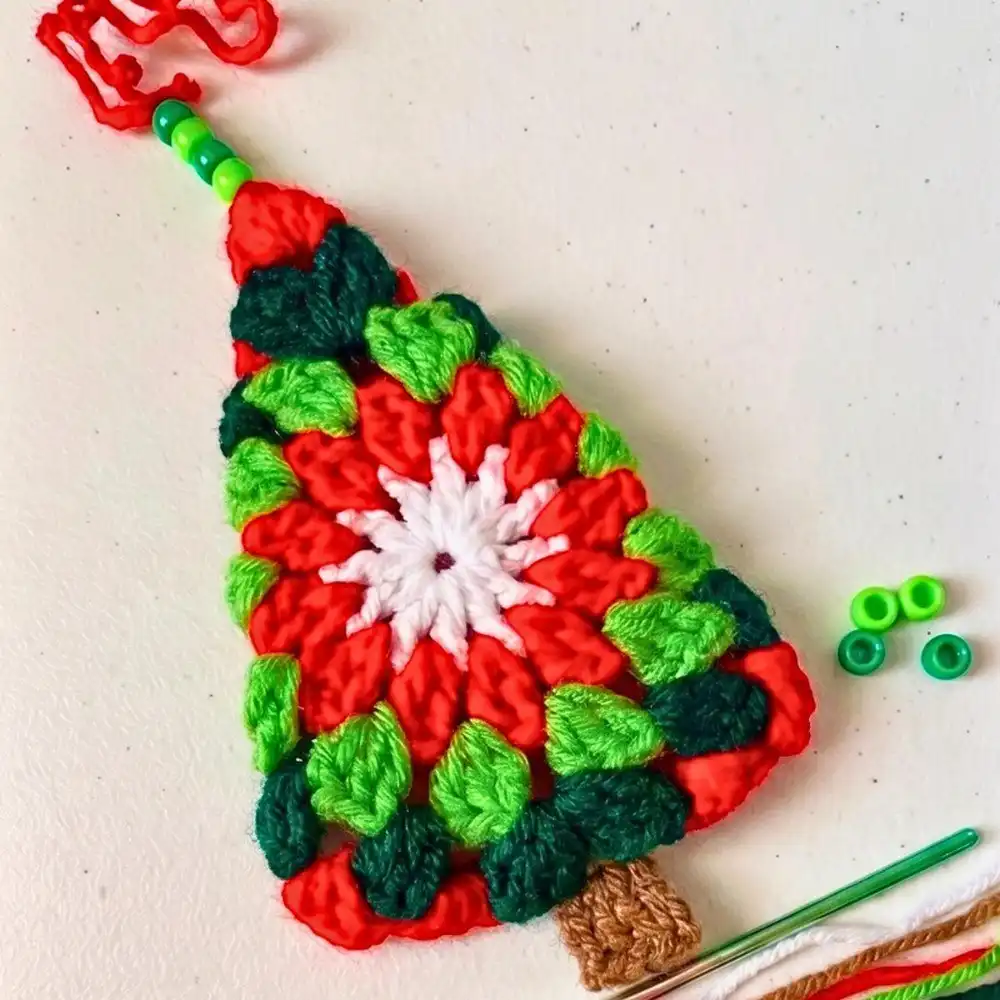
Crochet Christmas Tree Pattern For The Best Decoration
Craft the ultimate Christmas tree decoration with this versatile crochet pattern. Whether you want a miniature tree for a desk or a larger centerpiece, this pattern provides clear instructions to create a sturdy and charming tree. Experiment with different yarn textures and embellishments like beads or small buttons to make each tree a unique festive masterpiece for your home.
We hope you enjoyed creating your Crochet Baby Jellyfish Amigurumi! Don’t forget to save this project to your Pinterest board for future reference, share it with fellow craft enthusiasts, and let us know how your jellyfish turned out in the comments below! For more adorable baby-friendly crochet projects, you might want to explore a Crochet for Babies pattern book or a general Crochet & Amigurumi Pattern Book for continued inspiration.


