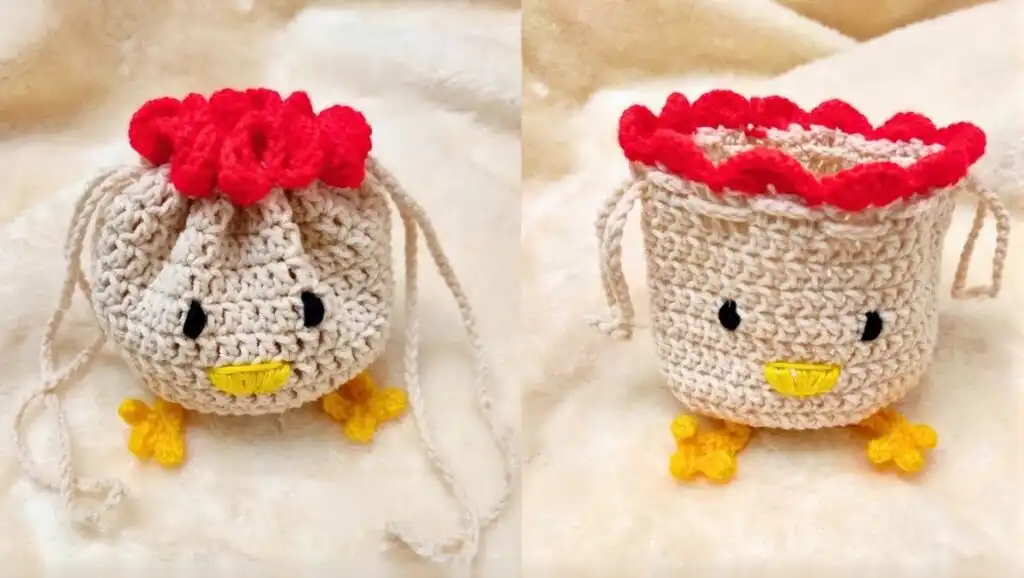
Cutest Crochet Chicken Drawstring Pouch: Free Pattern Idea
Discover how to create the Cutest Crochet Chicken Drawstring Pouch Free Pattern Idea, a charming and practical accessory perfect for storing small treasures or gifting. This beginner-friendly project guides you through crafting an adorable chicken-themed pouch, making it an ideal choice for anyone looking to expand their crochet skills with a quick and rewarding make. If you’re just starting out, an Aeelike Complete Crochet Kit for Beginners & Adults can provide all you need.
This delightful drawstring pouch combines simple crochet stitches with fun, whimsical details like a scallop edge and little feet, transforming a functional item into a conversation starter. Whether you’re a seasoned crocheter or just starting, this pattern offers clear steps to create a unique piece. You might also enjoy making other small, thoughtful gifts like these Personalized Christmas Baubles for festive occasions.
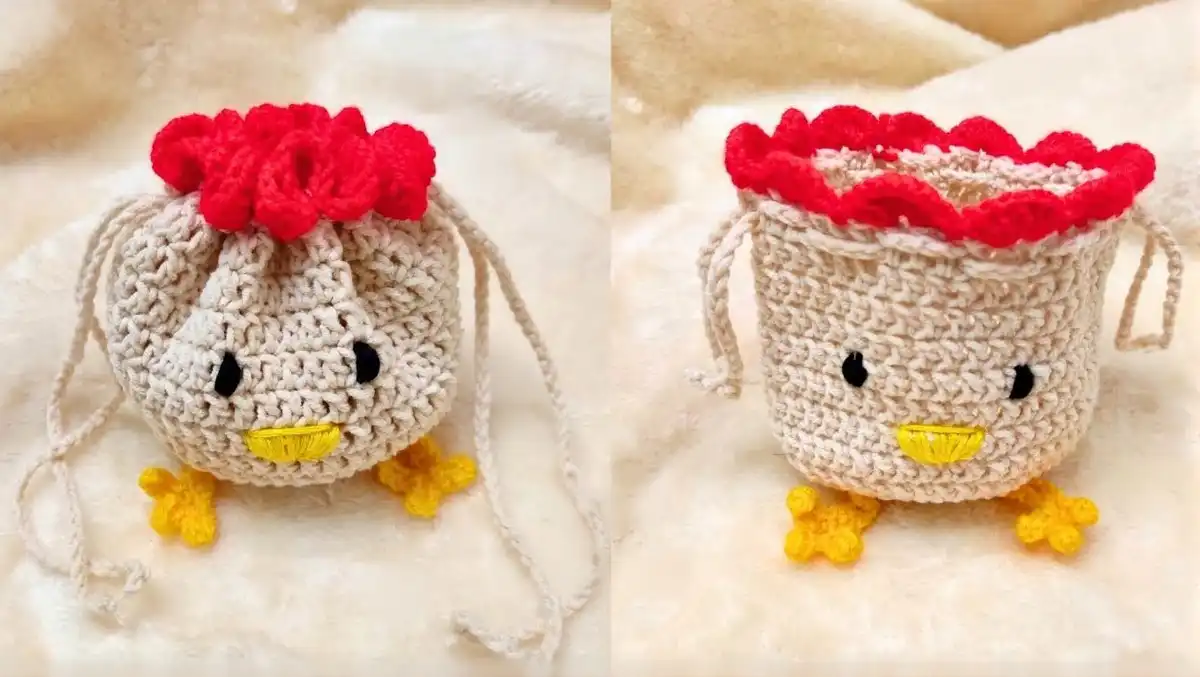
Materials Needed
Gathering the right materials is the first step to ensuring your crochet chicken drawstring pouch turns out beautifully. The choice of yarn greatly influences the final look and feel, so consider your main color and the contrasting hues for the chicken’s features carefully. Having all your tools ready beforehand will make the crocheting process smooth and enjoyable.
For the main body of your pouch, a medium/worsted-weight yarn like cotton or acrylic yarn is recommended. Katech 100% Cotton Yarn for Crocheting offers a crisp stitch definition, while acrylic yarn skeins from Inscraft provide softness and durability. You’ll need smaller amounts of red yarn for the charming scallop “ruffle” that forms the chicken’s comb-like top, and yellow yarn for the distinctive feet. A small quantity of black or another dark color is also useful for embroidering the eyes and mouth, bringing your chicken to life.
Your crochet hook size should complement your chosen yarn; typically, a 4mm to 5mm hook works well for worsted weight. This ensures your fabric is firm enough to hold its shape without being too stiff. A 4 mm Clover Purple Amour Crochet Hook is a great option, or you can explore a full ergonomic crochet hook set. Don’t forget essential accessories like sharp scissors for cutting yarn, a bent tip yarn needle for weaving in ends and assembling details, and optional colorful crochet stitch markers to help keep track of your rounds, especially as you build the pouch body. For the drawstring itself, you can crochet simple chains, as shown in the pattern, or opt for a decorative ribbon or pre-made crochet cord for an alternative touch.
Crochet Abbreviations (Beginner Guide)
Understanding crochet abbreviations is fundamental to following any pattern, especially for beginners. This section demystifies the shorthand used in the chicken pouch pattern, ensuring you can confidently read and execute each step. Familiarizing yourself with these terms before you begin will prevent confusion and help you maintain a smooth rhythm in your crocheting. For comprehensive guidance, a Crochet Stitch Dictionary can be an invaluable resource.
Here are the essential abbreviations you’ll encounter: ch for chain, which is the foundational stitch. sl st signifies a slip stitch, used for joining rounds and neatening edges. The workhorse of many projects, sc, stands for single crochet, known for creating a dense fabric. While hdc (half double crochet) is listed for general knowledge, it’s not primarily used in the main pouch rounds of this specific pattern. dc, or double crochet, is a taller stitch that works up quickly and forms the bulk of the pouch body. Lastly, inc denotes an increase, meaning you work two stitches into the same stitch to expand your fabric, crucial for shaping the base of the pouch.
Step-by-Step Crochet Pattern
Embark on the journey of crocheting your adorable chicken drawstring pouch with this detailed step-by-step guide. Each segment is designed to build upon the last, transforming your yarn into a delightful and functional creation. We’ll start from the very foundation, ensuring even beginners can follow along with confidence and joy.
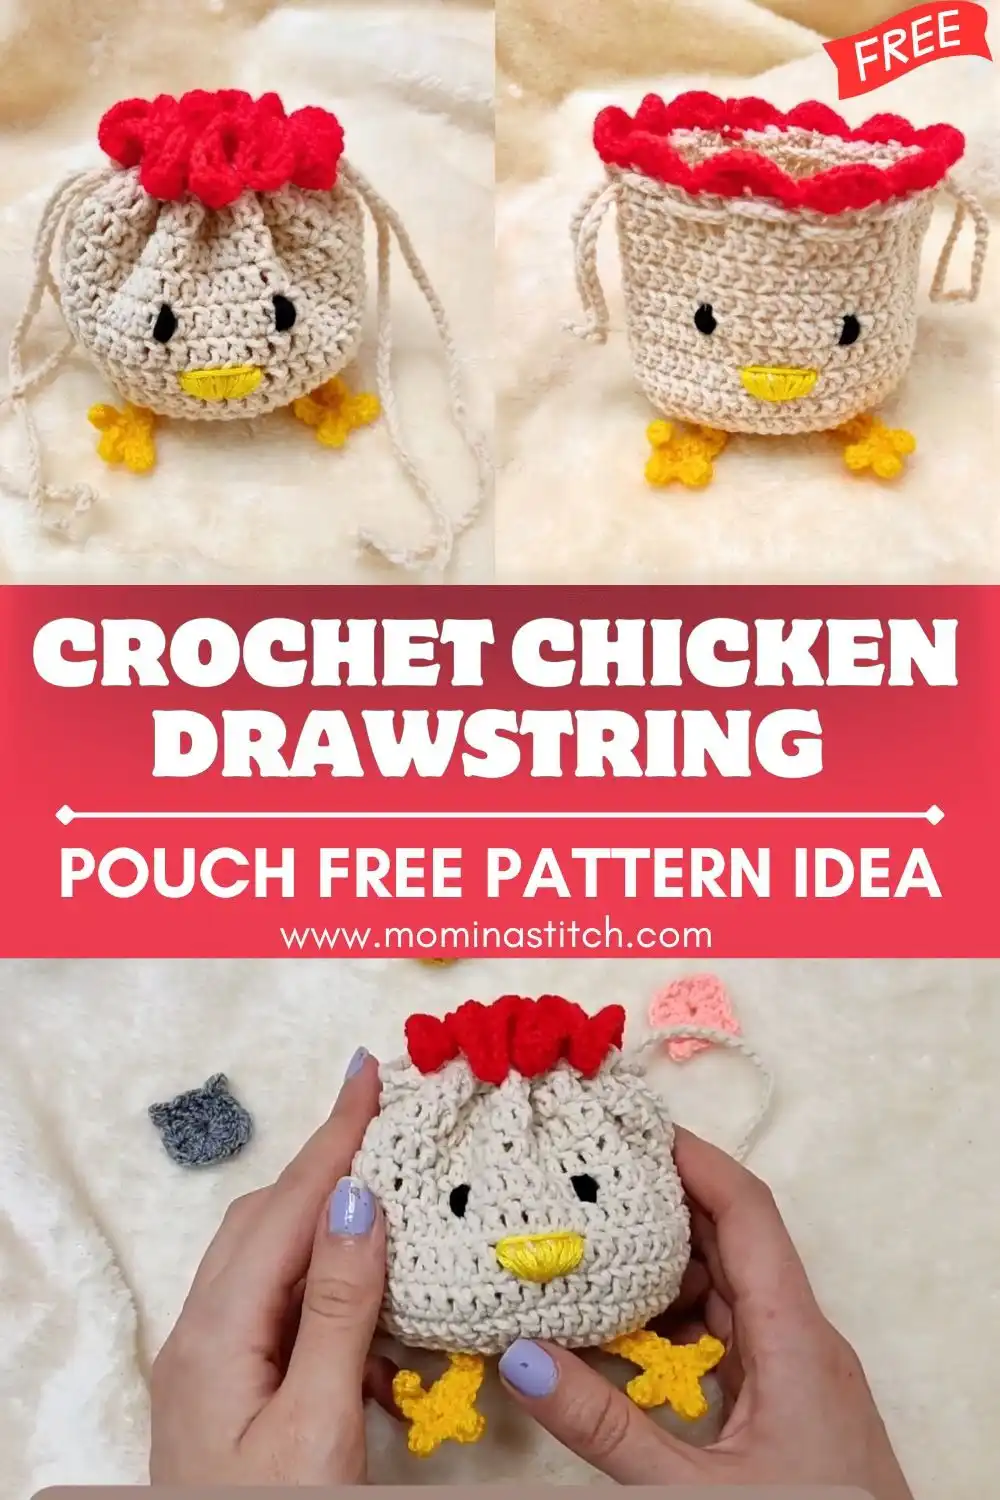
Step 1 – Make the Magic Ring (or Starting Chain)
The foundation of your crochet chicken pouch begins with a secure center, which can be achieved through either a magic ring or a starting chain. The magic ring creates a tightly closed center, ideal for amigurumi and circular projects where you want no hole. To begin, form a magic ring and chain 3; this chain counts as your first double crochet. Then, work 11 double crochets into the magic ring. This will give you a total of 12 double crochets, including your starting chain-3. Gently pull the yarn tail to close the ring tightly, then join with a slip stitch to the top of your starting chain-3 to complete the first round.
If the magic ring feels a bit tricky, a beginner-friendly alternative is to chain 4 stitches. Then, join the first and last chain with a slip stitch to form a small ring. You can then work your 12 double crochets into this chain ring. Both methods provide a solid starting point for your pouch, allowing you to choose the technique you’re most comfortable with. Ensure your stitch count is accurate to lay a proper foundation for the subsequent rounds.
Step 2 – Crochet the Base of the Pouch (Increase Rounds)
With your magic ring or starting chain established, it’s time to expand your work to form the flat circular base of the pouch. These increase rounds are crucial for creating a stable bottom that will allow your pouch to stand nicely. Consistency in your increases will ensure a perfectly round shape, avoiding any wobbly edges.
Round 2
For Round 2, you will systematically increase your stitch count to create a larger circle. Begin by chaining 3, which again counts as your first double crochet. In the very same stitch where you joined, work another double crochet; this forms your first increase. Continue by working 2 double crochets into each stitch around the entire round. This consistent doubling will expand your circle evenly. At the end of the round, you will have 24 double crochets. Join the round with a slip stitch into the top of your initial chain-3. This method of increasing evenly is typical for flat circles and sets the stage for the next rounds of growth.
Continue increasing in subsequent rounds to achieve your desired base diameter. For Round 3, chain 3, then work 1 double crochet in the next stitch, followed by an increase (2 double crochets) in the stitch after that. Repeat this pattern of “1 dc, inc” around the entire round. For Round 4, chain 3, then work 1 double crochet in the next stitch, 1 double crochet in the following stitch, and then an increase in the stitch after that. Repeat “1 dc, 1 dc, inc” around. These rounds create a gradual increase, forming a sturdy base for your pouch. This base size is ideal for holding small items such as jewelry or makeup minis, making it perfect for its intended use as a small storage solution.
Step 3 – Continue Rounds to Build the Pouch Body
Once your base is the desired size, it’s time to stop increasing and start building the vertical sides of your pouch. This transformation from a flat circle to a cylindrical shape is what gives your pouch its capacity. These straightforward rounds are perfect for practicing consistent tension, leading to a neat and even fabric.
To begin forming the pouch body, chain 3. Then, work one double crochet into each stitch around the entire round. Crucially, there are no increases in these rounds, allowing the fabric to grow upwards. Continue working these plain double crochet rounds for a total of 9 additional rounds. In many tutorials, the creator counts 13 rounds in total from the very beginning (4 base rounds plus 9 body rounds). This creates a good depth for a small drawstring pouch. When you complete your final body round, join with a slip stitch, securing the top edge of your main pouch body.
Step 4 – Create the Decorative Stitch Pattern (Scallop Round)
This is where your chicken pouch truly starts to take on its charming character! The decorative scallop round, worked in a contrasting color like red, adds a delightful “ruffle” or “comb” detail near the top, making it instantly recognizable as part of your feathered friend. This round adds a beautiful textural element and defines the style of your chicken.
At the end of your last body round, change your yarn color to red by pulling the new color through the loop on your hook when making the final slip stitch join. Chain 1 (this will count as your first single crochet for this round). The pattern for the scallop involves repeating a sequence: single crochet in the first stitch, skip the next stitch, then work 7 double crochets into the following stitch to create a prominent scallop, and finally, skip one more stitch. Repeat this sequence 12 times around the pouch. After creating your last scallop, join with a slip stitch to the first red stitch of the round. Cut the red yarn, leaving a tail to secure it neatly. This decorative edge not only looks adorable but also provides a visual break before the drawstring channel.
Step 5 – Make the Drawstring Holes
Creating the drawstring holes for your chicken pouch is simpler than you might imagine, as it often doesn’t require a dedicated “hole round.” Instead, the drawstring is artfully woven through the natural gaps between stitches in the upper part of the pouch, just above the decorative scallop edge when the pouch is folded. This method results in a clean finish and is very beginner-friendly.
The key is to maintain even spacing as you weave the cord. A good guideline is to pass the cord over a few stitches and then bring it out through the gap, then back in after a few more stitches, and so on. For instance, following an “over 3 stitches, out 3 stitches” rhythm creates a consistent and functional channel. You’ll typically weave through the stitches of the last main color round before the scallop. The natural tension of the fabric will hold the drawstring securely, allowing your pouch to close neatly when pulled.
Step 6 – Crochet the Top Edge (Optional Note)
While the primary tutorial focuses on completing the pouch after the scallop round and moving directly to assembly, you have the option to add an extra finishing touch. If you prefer a firmer, more defined top edge for your pouch, you can incorporate an additional round before adding the drawstrings. This can enhance the structure and durability of the pouch’s opening.
To create a firmer top edge, after completing your scallop round (or the last main body round if you prefer the scallop to be a lower feature), work one round of single crochet stitches in the main yarn color. This single crochet round will create a dense, neat border that can provide a bit more stability to the drawstring channel. However, to stay true to the original tutorial’s streamlined approach, you can certainly proceed directly to crocheting the feet and preparing the drawstrings immediately after finishing the scallop work. Both approaches yield a beautiful result, so choose what best suits your desired aesthetic and pouch functionality.
Step 7 – Make the Drawstring Cord (Two Strings)
A distinctive feature of this pouch’s closing mechanism is the use of two separate drawstrings, which ensures a smooth and balanced closure. Each drawstring is simply made from a length of crochet chains, providing a soft and flexible cord that complements the handmade feel of the pouch. This step is quick and easy, even for novice crocheters.
Using your main yarn color, begin by making a slip knot. Then, carefully crochet 100 chains. This length provides ample slack for opening and closing the pouch, as well as for tying a decorative knot or bow. Once you reach 100 chains, fasten off your yarn securely. You will then repeat this entire process to create a second identical string of 100 chains. Having two separate cords is essential for the clever opposing weave that makes the pouch cinch up so perfectly. If you desire thicker cords, you can slip stitch back along the chain, make a more robust i-cord, or even substitute with a thin ribbon for a different look and feel.
Step 8 – Insert the Drawstring and Finish the Pouch
The ingenious design of this crochet chicken pouch relies on its dual-string system for a perfectly cinched closure. Inserting the drawstrings correctly ensures both functionality and a neat appearance. This final assembly step brings all the elements together, making your pouch ready for use.
Insert String #1
To make weaving easier, gently flatten your pouch. This helps to visualize the path your string will take through the stitches. Begin by weaving the first string through the designated “holes” or spaces between stitches, typically in the round just above the scallop edge. A common rhythm is to bring the string out after 3 stitches, then back in after 3 stitches, continuing this pattern all the way around the pouch. Once you’ve woven it through all the way, ensure both ends of this first string emerge from the same opening point. Tie these two ends together, but don’t pull too tightly yet; you’ll adjust the tension once both strings are in place.
Insert String #2
With the first string in place, take your second string and start at the same opening point. This string will be woven in the exact same manner as the first, but in the opposite “over/under” path. This means if the first string went over a section of stitches, the second string will go under that same section. This creates two distinct “tracks” for the drawstrings, allowing them to pull smoothly from opposing directions. Once the second string is fully woven, bring both its ends out of the same opening and tie them together, matching the first string. Now, you can smoothly close your adorable pouch by gently pulling both sets of tied drawstrings outward, creating a perfectly gathered top.
Crochet the Chicken Feet (Super Cute Detail)
The charming little feet are what truly transform your pouch into an unmistakable chicken! These delightful details are crocheted separately in a bright yellow yarn and then securely attached to the base of the pouch, adding a playful and whimsical touch. This step is quite quick and adds a lot of personality.
Foot Pattern
To create each foot, begin by chaining 7 stitches with your yellow yarn. Then, starting in the second chain from your hook, work 6 single crochets along the chain. This forms the base of the foot. Now, you’ll create the three distinct “toes.” For each toe, chain 4 stitches, then work 3 single crochets starting in the second chain from the hook. Once you’ve completed the 3 single crochets, slip stitch back into the base area of the foot to attach the toe. Repeat this toe-making process two more times, resulting in three distinct toes. Fasten off your yarn, leaving a long tail for tying and securing the foot to the pouch. You will need to make two identical feet for your chicken. These small details, much like those in a Quick and Easy Crochet Coaster, add so much character.
Attach the Feet
Attaching the feet securely is important for both aesthetics and durability. First, identify the “back” of your chicken pouch, usually indicated by the seam line where your rounds joined. The feet will be attached to the front bottom area of the pouch. Using the long yarn tails you left when fastening off, carefully position each foot onto the base of the pouch where you’d like them to be. Thread one yarn tail through your yarn needle and pass it through a stitch on the pouch base, then repeat with the other yarn tail. Tie the two tails together on the inside of the pouch with several secure knots. Trim any excess yarn and weave in the remaining ends to ensure a neat finish and to prevent the knots from coming undone. Take care to position them symmetrically for the best look.
Finishing Touches
The final details are what elevate a handmade item from good to great. Paying attention to these finishing touches ensures your crochet chicken pouch looks polished, is durable, and truly reflects the care and effort you put into making it. A neat finish always makes a project feel more professional and ready for gifting or use.
First and foremost, weave in all your loose yarn ends using a yarn needle. This includes the main body yarn, the red scallop yarn, and the yellow foot yarns. Neatly weaving them in prevents unraveling and gives your pouch a clean, professional appearance. Double-check that all knots, especially where the feet are attached, are tight and secure. Gently shape your pouch by lightly stretching the base circle and smoothing the sides; this helps it achieve its intended form. For an extra touch of charm, consider adding embroidered details: use black yarn or embroidery thread to sew on small, expressive eyes and a tiny mouth, bringing a sweet face to your chicken. Alternatively, you could use a Yexixsr Safety Eyes & Noses Set for a different look. If you plan to use the pouch for heavier items, consider adding a fabric lining for added structure and security.
Customization Ideas
One of the joys of crochet is the ability to personalize your creations. This chicken drawstring pouch pattern is a fantastic canvas for your creativity, allowing you to easily adapt it to your preferences or to create a unique gift. Even small changes can make a big impact on the final look.
Experiment with different yarn colors to create a whole flock of diverse chickens: imagine a pastel chicken, a vibrant rainbow pouch, or a classic white chicken with a bold red comb. You can further embellish your pouch by adding beads to the ends of the drawstrings or tying a small, coordinating bow onto the drawstring knot for extra flair. To alter the size, simply adjust the number of increase rounds in the base for a wider pouch, and/or add more body rounds for a taller one. Conversely, stop after fewer body rounds for a smaller, more petite pouch. For a truly refined finish or if you intend to store very small items like earrings, adding a fabric lining can enhance the pouch’s shape and prevent tiny items from slipping through stitches. This flexibility makes it a versatile pattern, similar to how appliques can transform projects, as seen in Variety of Flower Appliques Free Crochet Patterns. If you want more adorable projects, consider exploring Kawaii Crochet: 40 Super Cute Crochet Patterns.
Creative Uses for a Crochet Drawstring Pouch
Beyond its undeniable cuteness, this crochet chicken drawstring pouch is surprisingly versatile and practical. Its compact size and secure closure make it perfect for organizing a variety of small items, whether at home or on the go. Its handmade charm also makes it an excellent choice for special occasions and thoughtful gifts.
Consider using it as an elegant jewelry pouch to keep rings, earrings, and bracelets safe and untangled, especially when traveling. It makes an utterly adorable gift bag for small handmade treasures or store-bought trinkets, adding an extra layer of personalization to your present. For everyday use, it can serve as a charming coin pouch (add a lining for extra security) or a mini makeup storage solution for lip balm, mini powder, or hair ties. It’s also excellent as a travel organizer for electronic essentials like charging cables, earbuds, or SD cards, keeping them neatly contained in your bag. Its utility mirrors the practicality of a 20-Minute Crochet Cup Cozy, making small tasks more enjoyable.
Tips for Beginners (And Common Mistakes to Avoid)
Crocheting is a rewarding hobby, and starting with beginner-friendly projects like this chicken pouch is ideal. To ensure your first attempts are successful and enjoyable, keep these tips in mind and be aware of common pitfalls. These insights will help you build confidence and produce beautiful results. If you need a comprehensive collection of crocheting essentials to get started, many options are available.
Always count your stitches and rounds; consistency in your stitch count is paramount, especially in the base, to achieve a perfectly round and flat shape. Maintain steady tension throughout your work; uneven tension can lead to a wobbly fabric and an less polished final look. When working with a magic ring, ensure you close it tightly to prevent a loose center hole, which could allow small items to slip out. Do not skip the second drawstring; using two strings woven in opposite directions is key to ensuring the pouch closes smoothly and evenly from both sides. Finally, secure the chicken feet well with tight knots and by weaving in all ends thoroughly; this prevents them from detaching with use and keeps your adorable chicken intact. Attention to these details will make your project a resounding success.
Conclusion
This cute crochet drawstring pouch is a fantastic beginner project because it uses simple stitches (mostly double crochet), easy repeating rounds, and quick finishing. The chicken details—the ruffle edge, tiny feet, and optional embroidered face—make it extra special for gifts, storage, or just showing off your crochet skills.
We hope you loved this free pattern idea! Don’t forget to save this pin to your Pinterest board for later, share it with a crafty friend, and leave a comment below with your favorite part of this adorable chicken pouch!


